background image


HARDWARE INSTALLATION

Page 11

M205 PRO User’s Manual

Connecting to Speakers or Headphones

NOTE

: The 

CaptureTV

 M205 PRO audio output  jack is a low-gain output suitable for

headphones and 

powered

 speakers, as well as an input into stereo systems or other

types of amplifiers. It is not suitable for driving unpowered external speakers alone.
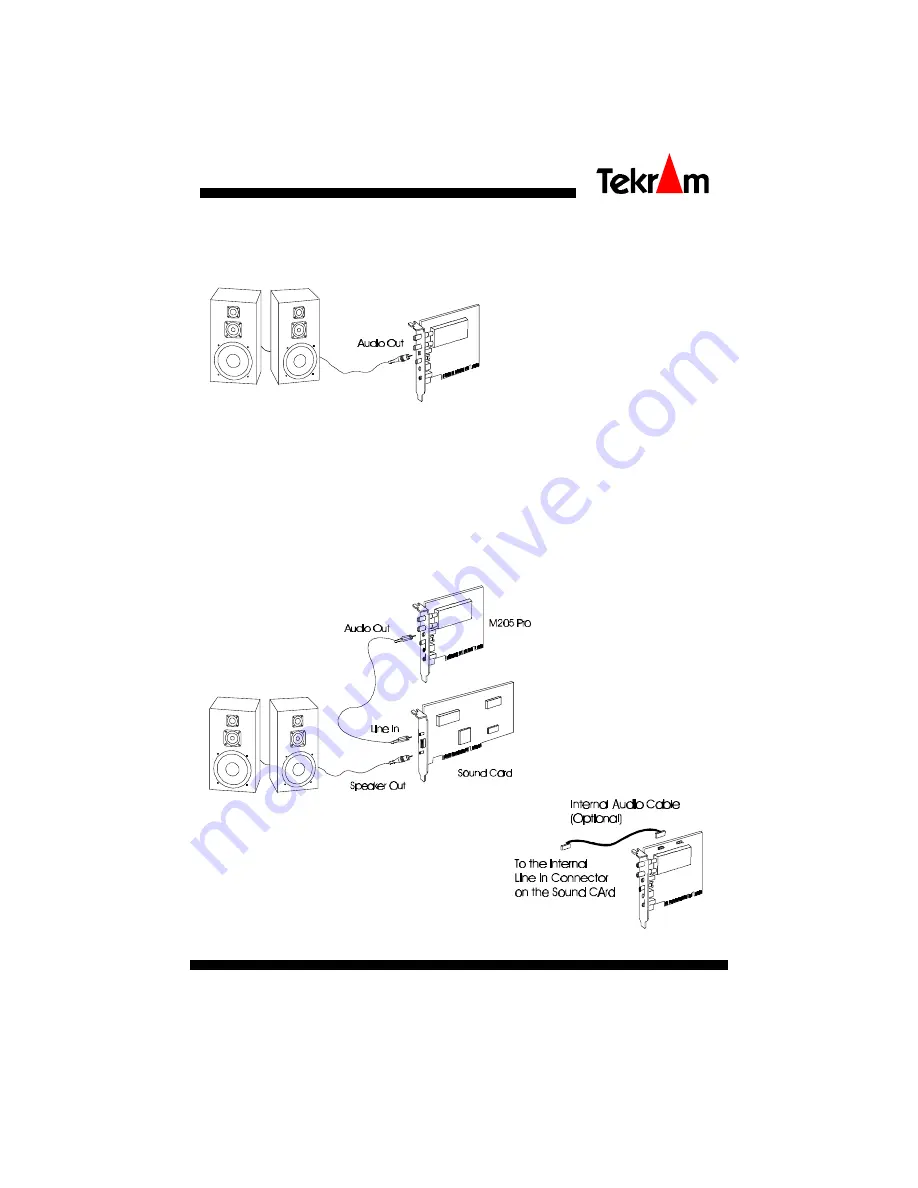
If your system already has a sound card, hook the 

CaptureTV

 M205 PRO card’s audio

output to your sound card’s audio input, usually marked “LINE-IN” with a 1/8” stereo
cord, as shown below.

Connecting to a Sound Card

Or you may connect M205 Pro to the sound card
internally:

Summary of Contents for CaptureTV M205 PRO

Page 1: ...Rev 1 0 11 98 USER S GUIDE ...

Page 2: ...hielded interface cables The FCC requires the user to be notified that any change or modifications to the equipment by the user not expressly approved by the grantee or manufacturer could void the user s authority to operate such equipment Each M205 PRO is equipped with an FCC compliance label which shows only the FCC Identification number FCC ID KHAM205 PRO This device complies with Part 15 of th...

Page 3: ...Installing the Capture Card 8 Connectors and Jumpers on the M205 PRO Card 8 Connecting the IR Sensor 9 Connecting to External Video Sources RCA jack 10 Connecting to External Video Sources S video 10 Connecting to Speakers or Headphones 11 Connecting to a Sound Card 11 SOFTWARE INSTALLATION 12 n INSTALLING THE WINDOWS 95 DEVICE DRIVERS 12 n INSTALLING THE WINDOWS 98 DEVICE DRIVERS 13 n THE AUTORUN...

Page 4: ...ideo Compressor 24 Allocating Memory Space 24 Specifying the File Name for Motion Video Capture 25 Capturing Motion Video 26 Capturing a Still Image 26 Copying to the Clipboard 26 n THE TV TUNER 27 Show Hide Control Panel 27 Selecting Antenna Cable Input 27 Auto Scanning for TV Channels 27 Editing the Channel List 27 Selecting a Channel 28 Fine Tuning a Channel 28 Adjusting the Volume 28 Viewing i...

Page 5: ...h to full screen mode up to 1024 768 16bit color for leisure viewing Catch your favorite programs without leaving your computer Keep up with the news or stock prices throughout the day The M205 PRO s remote control allows you to switch between PC and TV mode adjust the channel volume and more Live Video Display Plug in your camcorder VCR or laser disk player The M205 PRO allows you to monitor mult...

Page 6: ...tioning NTSC only Support including transcript creation and Hot Words that alert you when M205 PRO application program is broadcasting information that you want to watch n n Minimum System Requirements 32 bit PCI Local Bus system with PnP CPU 486DX 33Mhz or higher Pentium CPU recommended 16MB System RAM or more and 1GB hard disk recommended for motion video capture Windows 95 98 VGA display in 32K...

Page 7: ...n your CaptureTV M205 PRO box 1 CaptureTV M205 PRO board 6 Optional NICAM Daughter Board 2 Tekram Multimedia Drivers Utilities CD ROM 7 Optional S video Adaptive Cable 3 IR Sensor 4 Remote Control 5 Audio Cable for Sound card Make sure all of the above components are accounted for before you begin the installation n n n n n n 2 ...

Page 8: ...cord and the monitor cable from the back of the computer 3 Remove the computer cover Refer to your system user s manual for instructions 4 Align the gold fingered edge on your card with an empty PCI expansion slot and gently insert it into place You may need to remove the cover from the rear of the PCI expansion slot that you selected 5 Replace the screws to secure the card retaining bracket in pl...

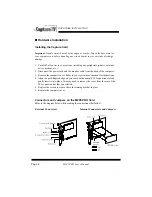
Page 9: ...HARDWARE INSTALLATION Page 9 M205 PRO User s Manual Connecting to FM antenna Optional Connecting to Cable TV or Antenna Connecting the IR Sensor ...

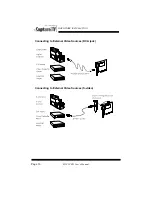
Page 10: ...HARDWARE INSTALLATION Page 10 M205 PRO User s Manual Connecting to External Video Sources RCA jack Connecting to External Video Sources S video ...

Page 11: ...s as well as an input into stereo systems or other types of amplifiers It is not suitable for driving unpowered external speakers alone If your system already has a sound card hook the CaptureTV M205 PRO card s audio output to your sound card s audio input usually marked LINE IN with a 1 8 stereo cord as shown below Connecting to a Sound Card Or you may connect M205 Pro to the sound card internall...

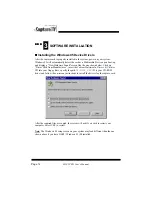
Page 12: ...hown below Click on Driver Disk from Manufacturer insert the Tekram Multimedia Drivers Utilities CD into your floppy drive specify the path D M205_PRO D is your CD ROM drive and follow the on screen instructions to install the drivers for the capture card After the required files are copied the system will ask if you wish to restart your computer Select YES to restart Note The Windows 95 setup scr...

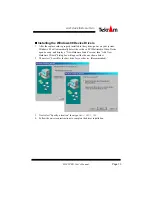
Page 13: ...ill automatically detect the card as a PCI Multimedia Video Device upon boot up and display a New Hardware Found screen then Add New Hardware Wizard dialog box will appear like the one shown below 2 Then select Search for the best drive for your device Recommended 3 Next select Specify a location then type in D M205_PRO 4 Follow the on screen instructions to complete the driver installation ...

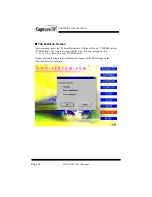
Page 14: ... rebooting insert the Tekram Multimedia Utilities Drivers CD ROM into the CD ROM drive The Autorun screen will show up If it does not appear run D AUTORUN where D is your CD ROM drive Double clicking the appropriate product model name M205 PRO brings up the Function Selector submenu ...

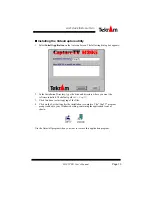
Page 15: ...lation Directory type the drive and directory where you want the software installed The default path is C CapTV 3 Click Continue to start copying of the files 4 Click on the Exit button after the installation is complete The CapTV program group is added to your Windows desktop containing the application icons as shown Use the Uninstall program when you want to remove this application program ...

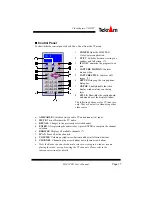
Page 16: ...or lower color mode Double click the CAPTV icon from the CapTV program group to start the program The application window and the control panel will appear n n Application Window Title and Information Bar Contains the program name the standard Windows Minimize Maximize and Exit buttons Also displays information about actions taking place in the window Menu Bar Lists the six menus of the program Dis...

Page 17: ... of the display window The following buttons are for TV tuner use only They are not active when using other video source a AIR CABLE Switches between cable TV and antenna Air input b MUTE Turn off resume the TV audio c RECALL Changes to the previously selected channel d ENTER After pressing the numeric keys press ENTER to complete the channel selection e BROWSE Displays all available channels f SC...

Page 18: ...stem Select video system type for the current input source For proper operation you must make sure that the Video System is correctly set for any given Video Source For instance your CCD camera may be a PAL device whereas a camcorder or VCR may be a NTSC device Changing the video system type brings up the Video Format dialog box For Video Format settings please refer to later section Color Drag th...

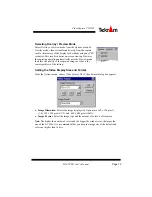
Page 19: ...lity of the captured image or video is the same regardless of the setting Setting the Video Display Size and Format From the Options menu choose Video Format The Video Format dialog box appears Image Dimension Selects the image display size Options are 160 x 120 pixels 1 4 320 x 240 pixels 1 2 and 640 x 480 pixels Full Image Format Select the image type and the amount of colors it will contain Not...

Page 20: ... video in the size you specify in the Video Format dialog box described above Creating New Palette If the image type of the displayed video is 256 colors 8 bit color or less setting a new color palette may improve the picture dramatically From the Options menu choose Make Palette to create a new palette The following dialog box appears Colors Specify the number of colors to be contained in the pal...

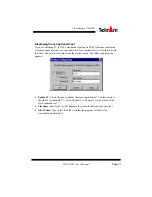
Page 21: ...ith the video Choose Video Display from the Options menu The following dialog box appears Enable CC Check this box to display the close captioned text The text overlays the video as in standard TV Select Channel 1 or Channel 2 for the source of the close captioned text File Name Specify the text file name for the transcribed closed captioned text Alert Token Type in this field the word that the pr...

Page 22: ...ng the program Frame Rate Number of still video frames that can be captured and converted to digital format in one second A lower frame rate will produce less fluid motion but will result in a smaller AVI file Video Buffers If the memory capacity allowed more buffers will result in higher video transfer rate It is recommended that you leave it at the default value Enable Capture Time Limit Check t...

Page 23: ...his option enabled the program will try to use the DOS memory for faster performance However the memory capacity is limited to under 1 Megabyte Selecting the Audio Format With the Capture Audio option enabled See the previous section the Audio Format command from the Options menu allows you to specify the format of sound you will record with your video The following dialog box will appear Enhancem...

Page 24: ...e The higher number will result in less distortion but bigger AVI file Key Frame The bigger the interval between the key frames the more the distortion will be Configure Configures the settings for the selected compressor Allocating Memory Space Digital video takes up a large amount of hard disk space Before you start to capture a movie check out the available hard disk space and set aside a memor...

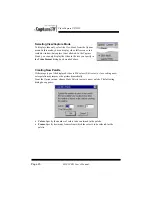
Page 25: ...re Before capturing a motion video you should first decide the name of the captured file and the location on the hard drive that the image will be stored in or the file will be saved to the default name and path c capture avi Choose Set Capture File from the File menu The following dialog box appears ...

Page 26: ...resume the playing Capturing a Still Image Click Capture Frame from the Capture menu to freeze the motion video Then click Save As DIB File from the File menu to capture the current frame The captured image is saved to the hard disk with the default path and filename c tekcap dib To resume playing the video press the Esc key on your keyboard Copying to the Clipboard To copy the displayed image ont...

Page 27: ...hannels and stores them to a list Editing the Channel List To add delete a channel from the channel list click on Channel List The Channel List dialog box will appear The Scanned List contains all active channels picked up by the Auto Scan function To delete a channel select it from the Preferred List then click Delete The channel number will disappear from the Preferred List To add it back to the...

Page 28: ...e Click on Volume Up Volume Down to adjust the volume To temporarily stop playing the sound click Mute Click Mute again to resume playing the sound Viewing in a Window Full Screen To watch TV in a full screen click on TV Mode press the Esc key to return to Windows Note M205 PRO supports full screen viewing up to 1024 768 16bit color VGA setting however some problem may occur with certain VGA cards...

Page 29: ...Browsing To view all channels simultaneously click Channel Browsing The option is then toggled to Exit Browsing To stop browsing click Exit Browsing or press the Esc key on you keyboard You may select the channel while browsing by clicking on the desired channel ...

Page 30: ...ur monitor Following is a summary of the Remote Control s major function buttons POWER Activates Quits the VideoCapture software SOURCE Switches between TV S video and composite video sources PC VIDEO Switches between full screen and window STILL Freezes the video Activates Stops Channel Browsing AIR CABLE Switches between cable TV and antenna Air MUTE Stops Resumes playing the sound VOL Volume up...

Page 31: ...rise from a combination of items Check the following list and find a symptom that s similar then try the suggested solution Video is unstable Check that you re using the correct broadcast standard format NTSC PAL or SECAM Check the quality of your incoming TV signal on another receiver bad reception may be the cause Video is in black and white only Check the connectors setting to make sure you ve ...

Page 32: ...Insert the Tekram Multimedia Drivers Utilities CD ROM into your CD ROM drive 3 Under Start Run of the task bar TYPE in X DIRECTX6 DXSETUP X is the letter of your CD ROM drive The following dialog box will appear 4 Check Direct 3D Hardware Acceleration Enabled option and then click the ReInstall DirectX button 5 Restart Windows 95 to complete installation ...

Reviews: