background image

 å

Insert four SHORT WOOD DOWELS (4) into the RIGHT END (A)
and UPRIGHT (D). 

 å

Fasten the BOTTOM (E) to the RIGHT END (A) and UPRIGHT (D).
Use four BLACK 1-9/16" PAN HEAD SCREWS (13).

 å

NOTE: Be sure the WOOD DOWELS in the RIGHT END and
UPRIGHT insert into the BOTTOM.

Step 4

Page 9

4

D

A

E

BLACK 1-9/16" PAN HEAD SCREW 

(4 used in this step)

13

4

Summary of Contents for 5425304

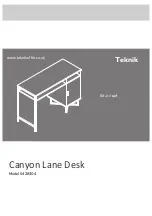
Page 1: ...Canyon Lane Desk Model 5425304 Sit and surf Teknik www teknikoffie co uk ...

Page 2: ...dware Identification Assembly Steps Français Español Safety Warranty No 2 Phillips Screwdriver Tip Shown Actual Size Table of Contents Assembly Tools Required Skip the power trip This time 3 4 5 18 19 21 22 24 25 26 27 Page 2 ...

Page 3: ...stinguish similar parts from each other Use this part identification to help identify similar parts Now you know our ABCs A RIGHT END 1 B BACK 1 C SMALL FIXED SHELF 1 D UPRIGHT 1 E BOTTOM 1 F LARGE FIXED SHELF 1 G TOP 1 H MODESTY PANEL 1 J LEG 4 K LEFT END 1 L DOOR 1 M ADJUSTABLE SHELF 1 N BASE 1 Page 3 A B C D E F G H L M N J K J ...

Page 4: ...SCREW 2 15 BLACK 1 9 16 PAN HEAD SCREW 5 13 BLACK 1 3 16 HEX HEAD SCREW 2 14 BLACK 1 2 HEX HEAD SCREW 8 17 L WRENCH 1 11 HIDDEN CAM 13 1 CAM SCREW 13 2 PULL 1 10 LONG WOOD DOWEL 2 3 BLACK 1 7 8 HEX HEAD SCREW 2 12 BLACK 5 8 FLAT HEAD SCREW 2 16 BLACK 1 2 FLAT HEAD SCREW 2 19 SILVER 1 2 FLAT HEAD SCREW 12 18 SHORT WOOD DOWEL 18 4 MAGNETIC CATCH 1 6 APPLIQUE CARD 2 7 ...

Page 5: ... Turn the CAM SCREW or gently tap the CAM DOWEL until the shoulder is against the surface of the part 1 Hidden Cam Hidden Cam Arrow Push a HIDDEN CAM into the part The arrow in the HIDDEN CAM must point toward the hole in the edge of the board Hole 2 3 1 2 Insert the CAM SCREW or CAM DOWEL into the HIDDEN CAM Tighten the HIDDEN CAM Page 5 ...

Page 6: ...1 into the RIGHT END A and BACK B å Turn three CAM SCREWS 2 into the RIGHT END A å Insert two SHORT WOOD DOWELS 4 into the RIGHT END A å Fasten the RIGHT END A to the BACK B Tighten one HIDDEN CAM å NOTE Be sure the WOOD DOWELS in the RIGHT END insert into the BACK Page 6 2 Arrow 1 Arrow 1 4 4 A B A B Remember Righty tighty Lefty loosey ...

Page 7: ...SCREWS 16 å Insert two SHORT WOOD DOWELS 4 into the RIGHT END A å Fasten the SMALL FIXED SHELF C to the RIGHT END A Tighten two HIDDEN CAMS å NOTE Be sure the WOOD DOWELS in the RIGHT END insert into the SMALL FIXED SHELF Step 2 Page 7 Arrow 1 Arrow 1 A 4 C C 6 BLACK 5 8 FLAT HEAD SCREW 2 used in this step 16 The MAGNETIC CATCH must be here ...

Page 8: ...å Push two HIDDEN CAMS 1 into the UPRIGHT D å Insert two SHORT WOOD DOWELS 4 into the UPRIGHT D å Fasten the UPRIGHT D to the BACK B and SMALL FIXED SHELF C Tighten three HIDDEN CAMS å NOTE Be sure the WOOD DOWEL in the UPRIGHT inserts into the BACK Step 3 Page 8 B C D D D S u r f a c e w i t h f e w e r h o l e s FLIP O V E R 2 Arrow 1 4 ...

Page 9: ...PRIGHT D å Fasten the BOTTOM E to the RIGHT END A and UPRIGHT D Use four BLACK 1 9 16 PAN HEAD SCREWS 13 å NOTE Be sure the WOOD DOWELS in the RIGHT END and UPRIGHT insert into the BOTTOM Step 4 Page 9 4 D A E BLACK 1 9 16 PAN HEAD SCREW 4 used in this step 13 4 ...

Page 10: ...he edge of the LARGE FIXED SHELF F å Fasten the LARGE FIXED SHELF F to the UPRIGHT D Tighten two HIDDEN CAMS å NOTE Be sure the WOOD DOWELS in the LARGE FIXED SHELF insert through the UPRIGHT D and into the edge of the SMALL FIXED SHELF C Step 5 Page 10 Arrow 1 3 D F F Surface with HIDDEN CAMS C ...

Page 11: ...o SHORT WOOD DOWELS 4 into the TOP G å Fasten the MODESTY PANEL H to the TOP G Tighten one HIDDEN CAM å NOTE Be sure the WOOD DOWELS in the TOP insert into the MODESTY PANEL Step 6 Page 11 2 Arrow 1 H G H G 4 S u r f a c e w i t h H I D D E N C A M Don t worry It isn t Rome This can be built in a day ...

Page 12: ...ighten four HIDDEN CAMS å NOTE Be sure the WOOD DOWELS in the TOP and MODESTY PANEL insert into the RIGHT END A UPRIGHT D and LARGE FIXED SHELF F å Fasten the LARGE FIXED SHELF F to the MODESTY PANEL H Use one BLACK 1 9 16 PAN HEAD SCREW 13 Step 7 Page 12 H 4 F G D A 4 BLACK 1 9 16 PAN HEAD SCREW 1 used in this step 13 4 ...

Page 13: ...e 13 å Fasten the BASE N to the LEGS J Tighten four BLACK 1 2 HEX HEAD SCREWS 17 using the L WRENCH 11 11 N J Single tab The surface with holes should face up BLACK 1 2 HEX HEAD SCREW 4 used in this step 17 J J J ...

Page 14: ...OM E Tighten four BLACK 1 2 HEX HEAD SCREWS 17 using the L WRENCH 11 å NOTE You should start each SCREW a few turns before completely tightening any of them Step 9 Page 14 11 BLACK 1 2 HEX HEAD SCREW 4 used in this step 17 E J J J J ...

Page 15: ...CREWS 14 using the L WRENCH 11 å Fasten the LEFT END K to the LARGE FIXED SHELF F Tighten two BLACK 1 7 8 HEX HEAD SCREWS 12 using the L WRENCH 11 Step 10 Page 15 11 G K K F BLACK 1 7 8 HEX HEAD SCREW 2 used for the SHELF 12 BLACK 1 3 16 HEX HEAD SCREW 2 used for the TOP 14 ...

Page 16: ...o the DOOR L Use four SILVER 1 2 FLAT HEAD SCREWS 18 å Fasten the PULL 10 to the DOOR L Use two BLACK 3 4 MACHINE SCREWS 15 Step 11 Page 16 L 10 9 8 BLACK 1 2 FLAT HEAD SCREW 2 used for the STRIKE PLATE 19 BLACK 3 4 MACHINE SCREW 2 used for the PULL 15 SILVER 1 2 FLAT HEAD SCREW 4 used for the HINGES 18 ...

Page 17: ...adjustments å DOOR ADJUSTMENTS To adjust the DOOR from side to side horizontal turn the adjusting screw in or out å To adjust the DOOR in or out depth loosen the mounting screw one turn and move the DOOR in or out as needed Tighten the mounting screw after making adjustments Step 12 Page 17 A L SILVER 1 2 FLAT HEAD SCREW 8 used for the HINGES 18 Adjusting screw horizontal Mounting screw depth If y...

Page 18: ...SHELF PINS å Peel APPLIQUES from the APPLIQUE CARDS 7 and stick them onto each visible HIDDEN CAM å NOTE Please read the back pages of the instruction booklet for important safety information å This completes assembly Clean with a damp cloth Wipe dry A M D 5 0 l b s 2 5 l b s 1 5 l b s 2 5 l b s 2 5 l b s 5 4 used To cover HIDDEN CAMS 7 Finished edge ...

Page 19: ...y moving furniture that is not designed and equipped with casters Furniture can tip over or break if improperly moved Physical injury Furniture can be very heavy Breakage of tops particularly with double pedestal furniture drawers at both ends Unload shelves and drawers from top to bottom before moving the unit Do not push furniture especially on a carpeted floor Have a friend help you lift the ite...

Reviews: