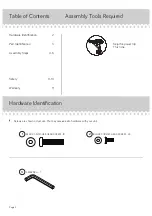
Teknik 5424944 Manual Download Page 7

WARNING

Please use your furniture correctly and safely. Improper use can cause safety hazards,

or damage to your furniture or household items. 

Carefully read the following chart.

Look out for:

What can happen:

How to avoid the problem:

• A chair or stool will be unstable if you

stand on the seat.

• Leaning back in the chair or stool.

• The chair or stool will come out from

under you, causing a risk of a fall and 

severe injury.

• Leaning can cause the chair or stool to

slip out from under you, cause structural 

damage, or can loosen important 

connections that can cause the chair or 

stool to fall apart.

• Never stand on the seat of a chair or stool.

• Don't lean so far back in your chair or

stool that the legs lift up off  the fl oor.

• Loosening of parts or components. –

“Wear and Tear.”

• The normal use of a chair or stool can

result in loosening of components.  The 

chair or stool may break or collapse with a 

person sitting in it.

• At least twice a year, inspect the chair or

stool to make sure all parts or components 

are tightened. Look for loose fasteners and 

evidence of cracks or breakage.  Tighten, 

repair or replace as necessary.

Summary of Contents for 5424944

Page 1: ...www teknikoffice co uk Industrial Style High Stool set of 2 Model 5424944 Keep your options open Teknik ...

Page 2: ...ntification Part Identification Assembly Steps Safety Warranty Skip the power trip This time Page 2 Hardware Identification å Screws are shown actual size You may receive extra hardware with your unit BLACK 3 8 HEX HEAD SCREW 24 2 L WRENCH 1 3 BLACK 1 3 16 HEX HEAD SCREW 8 1 ...

Page 3: ...arts will have a label or an inked letter on the edge to help distinguish similar parts from each other Use this part identification to help identify similar parts Now you know our ABCs A END 4 B UPPER BRACE 4 C LOWER BRACE 4 D SEAT 2 Page 3 A B C D A B C A B C D A B C ...

Page 4: ...S A Tighten two BLACK 3 8 HEX HEAD SCREWS 2 using the L WRENCH 3 å Fasten two LOWER BRACES C to the END A Tighten four BLACK 3 8 HEX HEAD SCREWS 2 using the L WRENCH 3 å Repeat this step for the other stool Page 4 3 B C A B C BLACK 3 8 HEX HEAD SCREW 12 used in this step 2 Surface without holes Surface with four holes Surface with two holes Do not use this hole ...

Page 5: ...he L WRENCH 3 å Fasten the UPPER BRACES B to one of the SEATS D Tighten four BLACK 1 3 16 HEX HEAD SCREWS 1 using the L WRENCH 3 å Repeat this step for the other stool Step 2 Page 5 BLACK 1 3 16 HEX HEAD SCREW 8 used for the SEATS 1 3 BLACK 3 8 HEX HEAD SCREW 12 used in this step 2 D B C A B C B B ...

Page 6: ... Carefully stand the stools upright å NOTE Please read the back pages of the instruction booklet for important safety information å This completes assembly Clean with a damp cloth Wipe dry Step 3 Page 6 ...

Page 7: ...ol to slip out from under you cause structural damage or can loosen important connections that can cause the chair or stool to fall apart Never stand on the seat of a chair or stool Don t lean so far back in your chair or stool that the legs lift up off the floor Loosening of parts or components Wear and Tear The normal use of a chair or stool can result in loosening of components The chair or stoo...

Reviews: