background image

                                                                       105-0717-006                                                                11

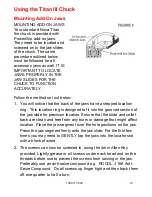
3.  Wind the mounted jaws into the centre of the chuck until they all 

butt against the other. Now finally tighten screws, starting with 
centre screws and then outside screws. Nip screws up firmly but 
DO NOT OVER TIGHTEN.  

4.  Check  there  is  no  light  between  jaw  slides  and  add  on  jaw  

segments  or  that  one  or  more segments is not higher or lower 
than the rest. If this is the case repeat procedure above. 

OPERATING MODES 
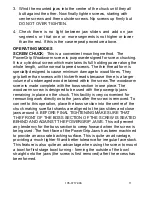
SCREW CHUCK

:  This is a convenient mounting method.  The 

PowerGrip Woodworm screw is purpose-designed for screw chucking. 
It is a cylindrical screw which maintains its full holding power along the 
whole length, unlike normal tapered screws. The thin thread form is 
specially designed to cause minimum damage to wood fibres. They 
grip better than screws with thicker threads because there is a larger 
volume of undamaged wood retained within the screw.The woodworm 
screw is made complete with the boss section in one piece. The 
woodworm screw is designed to be used with the powergrip jaws 
remaining in place on the chuck. This facility is very convenient for 
remounting work directly onto the jaws after the screw is removed. To 
convert to this operation, place the boss section into the centre of the 
chuck making sure flat shanks are aligned to the jaw slides and close 
jaws around it. BEFORE FINAL TIGHTENING MAKE SURE THAT 
THE FRONT OF THE BOSS SECTION OF THE SCREW IS SEATED 
BEHIND AND AGAINST THE POWERGRIP JAWS. This will prevent 
any tendency for the boss section to creep forward when the screw is 
being used. The front face of the PowerGrip Jaws has been machined 
to provide an accurate backing surface. This is quite an advantage, 
providing a much tighter fit and better tolerance for irregular face stock. 
This feature is also quite an advantage when using the screw to mount 
a bowl for first stage bowl turning - forming the outside of the bowl 
straight onto the jaws (the screw is first removed) after the recess has 
been formed. 


Summary of Contents for NOVA Titan III

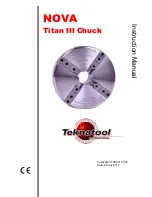
Page 1: ...NOVA Titan III Chuck Publication 105 0717 006 Instruction Manual Date 28 July 2017...

Page 2: ...jaws This provides maximum interchange ability of jaws between all NOVA chucks The Titan using the wide variety of accessory jaws can be used to expand into recesses or contract around round square wo...

Page 3: ...5601 Email service teknatool com Website www teknatool com United States Teknatool Service Center Phone 727 954 3433 Fax 727 623 0902 Email service teknatool com Website www teknatool com Or you can...

Page 4: ...oubleshooting Guide 18 SKU 13061 EUROLOCK VERSION CHUCK ONLY 20 Installation Instructions 20 NOVA Titan III Chuck Exploded View 21 NOVA Titan III Chuck Parts List 22 Titan III Accessories 23 Teknatool...

Page 5: ...Don t use power tools in damp or wet locations or expose them to rain Keep work area well lighted The DVR Wood Lathe is intended for indoor use only Failure to do so may void the warranty 6 KEEP WORK...

Page 6: ...0 DIRECTION OF FEED Feed work into the blade or cutter against the direction of rotation 21 ATTENTION TO WORK Concentrate on your work If you become tired or frustrated leave it for awhile and rest 22...

Page 7: ...est before operating lathe 8 USE LOWEST SPEED when turning a new or unbalanced work piece 9 USE CORRECT SPEED for turning the wood blank as wood speed will vary depending on diameter 10 KEEP TOOL ON T...

Page 8: ...x Fibre washers 1 x pinion handle 8 x M6x10 Jaws screws 1 x Woodworm screw 1 x PowerGrip jaw set 1 x M4 Allen key 1 x M3 Allen key Nova Titan III 5inch Chuck Manual M33 EUROLOCK DIRECT THREADED MODEL...

Page 9: ...athe spindle thread and spigot dimensions even within the same thread size The internal thread size is kept to standard tolerances CHECK THE FOLLOWING Although the Chuck may screw on part way it may n...

Page 10: ...gned to fit into the grooved section of the jaw slide for precision location Ensure that the slide and collet back are clean and free from any burrs or damage that might affect location Place the jaw...

Page 11: ...woodworm screw is made complete with the boss section in one piece The woodworm screw is designed to be used with the powergrip jaws remaining in place on the chuck This facility is very convenient fo...

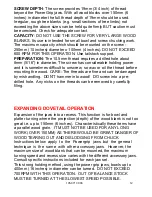
Page 12: ...hreads are fine and can be damaged by mishandling DON T hammer into wood DO screw into a pre drilled hole Any nicks on the threads can be removed by carefully filing EXPANDING DOVETAIL OPERATION Expan...

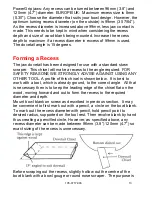
Page 13: ...EASONS WE STRONGLY ADVISE AGAINST USING ANY OTHER TOOL A profile of this chisel is shown below It is best to work with a tool which is already ground to the correct angle All that is necessary then is...

Page 14: ...raps with the end of a chisel handle or wooden mallet around centre of bowl Use pinion handle to give an extra nip up Refer to chuck operation Page 4 Refer again to safety before operation SPIGOT OPE...

Page 15: ...uld not exceed 700 RPM FORMING SPIGOT When selecting wood make sure it is sound without splits or weakness especially around the area where the spigot is to be formed REMEMBER WITH FREE END TURNING TH...

Page 16: ...d be some accumulation of very fine dust in the gearing area behind which may require dismantling of chuck for a full clean Following are steps Refer to exploded chuck diagram Page 5 Using expanding p...

Page 17: ...umbered 1 4 numbering on end of slide Note Travel stop screws need to be removed Refer to previous jaw slide travel lock section When the jaws are removed from the body they need to be reset in sequen...

Page 18: ...hey will appear to be running out but in fact are maintaining concentricity Always evaluate runout from turned wood clamped in jaws 4 Jaw Slides closed to centre and No 1 slide stays in centre when ja...

Page 19: ...nd jaws See Page 9 10 Wooden spigot shifts during turning Check that the spigot area is made correctly for jaws to grip Check that the spigot is not oversize See spigot operation instruction Page 11 U...

Page 20: ...s compatible with both the new M33 Ring spindle and the M33 Standard spindle The Locking Ring supplied by the lathe maker IMPORTANT Release the Grub screw before removing the chuck Installation Instru...

Page 21: ...105 0717 006 21 NOVA Titan III Chuck Exploded View...

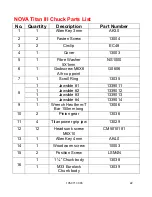
Page 22: ...rew M6X6 A h cup point G0606 7 1 Scroll Ring 13035 8 1 Jawslide 1 1339011 1 Jawslide 2 1339012 1 Jawslide 3 1339013 1 Jawslide 4 1339014 9 1 Wrench Hex 8mm T Bar 150mm long 13006 10 2 Pinion gear 1303...

Page 23: ...5in Chuck TITAN III 5 75 HD Deep Grip Jaw Code 13040 Accessory Jaw for your Titan III chuck Special woodturning dovetail profile The Jaw Spigot length is 22mm 0 866Inchs Contracting 87 116mm 3 5 4 5...

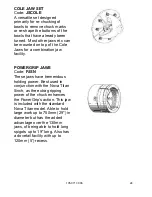
Page 24: ...on jaw facility POWERGRIP JAWS Code PJSN These jaws have tremendous holding power Best used in conjunction with the Nova Titan 5inch as the extra gripping power of the chuck enhances the PowerGrip s a...

Page 25: ...rger chucks for those special jobs the Jumbo Jaws will perform just as well Has a dovetail recess facility up to 149mm 5 86 100mm Jaw Set Code JS100N Have an expanding dovetail grip strong reverse dov...

Page 26: ...allow for a very powerful spigot grip for smaller work like lace bobbins etc It also has a small dovetail to mount small bowls Step Jaw Set Code JS75N Designed primarily to grip footed bowls in the co...

Page 27: ...of the spur is prevented as the shank is slotted to allow the chuck jaws to close over it This spur is the answer for turners who use their Nova Titan almost all of the time but want to be able to do...

Page 28: ...anyone other than an authorized service facility or representative Under no circumstances will Teknatool International Ltd be liable for incidental special indirect and consequential damages or expens...

Page 29: ...105 0717 006 29 Teknatool International 2017 All Rights Reserved Teknatool USA Inc Register your warranty online www teknatool com...

Reviews: