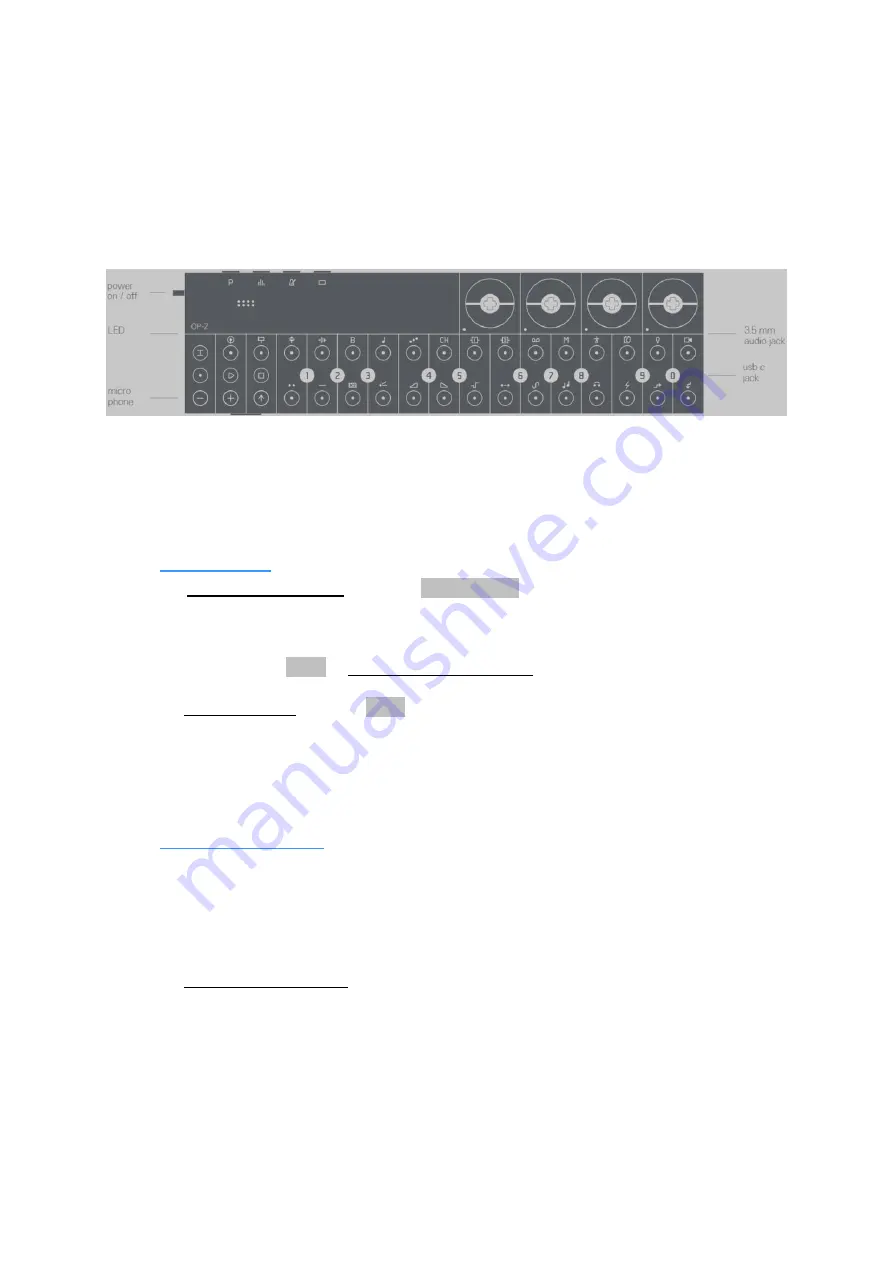
background image

User Guide - 2.1 Hardware overview 


Teenage Engineering 

– User Guide (LD) 

Janvier 2019


6/59 


2.18 

USB


E

RREUR

 !


S

IGNET NON DÉFINI

2.19  MIDI 

44 

2.20  D

ISK MODES


46 

2.21  A

PP


49 

2.22  R

EFERENCE


55 


2.1  Hardware overview 


2.1.1  P

OWER ON 

/

 OFF


2.1.2  C

HARGING THE BATTERY


2.1.3  R

EPLACING THE BATTERY


2.1.4  I

NPUTS AND OUTPUTS


2.1.1  Power on / off 

  To  power  on  your  OP-Z,  turn  the 

yellow  knob

  located  on  the  left  side  of  the  unit 

clockwise, until you feel and hear a click 

The “track LEDs”1-16 will light up in a rainbow pattern  and the internal speaker will play a 
startup sound. OP-Z is now ready to be used. 

  Keep turning the 

knob

 to adjust the master volume 

Always make sure to be careful with your ears. 

  To power off OP-Z, turn the 

knob

 counterclockwise, past the click. 

 
Note: all OP-Z data is stored on-the-fly, so everything will still be there next time you power on 
your unit. 
 
It’s a good habit to occasionally back-up OP-Z using disk mode. 

2.1.2  Charging the battery 

OP-Z has an internal rechargeable battery which can be charged using the included  USB-c 
cable. Connect the unit to a computer or any standard USB charger. 
Keep OP-Z connected for as long as you want to charge. While charging and turned off the 

motion LED

 will be blinking 

green

When connected and fully charged the 

motion led

 will be solid 

green


  To check the battery level press and hold 

SCREEN


The “track LED”1-16 lights will light up to indicate the charge level, from 1 to 16. 

 
Note: when paired with the app, battery level is shown in the main interface. 
 
Pro-tip: USB charging can be disabled by holding 

SCREEN

 and pressing 

e2

 (the right- most 

piano key

). This can sometimes cancel noise related to USB.  

 
When holding 

SCREEN

 in this mode the 

“track led”

1-16

 lights are yellow. 

Summary of Contents for OP-Z1

Page 1: ...EMPO 3 1 12 STEP COMPONENTS 4 1 13 PUNCH IN EFFECTS 4 1 14 PERFORMANCE MODE 4 1 15 COLOR DIALS 1 4 4 1 16 PARAMETER PAGES 4 1 17 MORE CONTROLS 4 2 USER GUIDE 5 2 1 HARDWARE OVERVIEW 6 2 2 INTERFACE OV...

Page 2: ...IN EFFECTS 4 1 14 PERFORMANCE MODE 4 1 15 COLOR DIALS 1 4 4 1 16 PARAMETER PAGES 4 1 17 MORE CONTROLS 4 1 1 Power on Turn the yellow knob clockwise to turn on the OP Z After the startup sound the uni...

Page 3: ...sequencer by pressing the step 1 16 buttons Use the second overlay as an example of where to place the notes Do the same with snare percussion and bass Select the tracks find sounds and place them in...

Page 4: ...hold SHIFT and all tracks are affected Hold TRACK and press PERFORM to go to performance mode While in play mode press the piano keys to add punch in effects Any recorded effects are stored to the ste...

Page 5: ...ring use always make sure to connect the cable to the OP Z first never connect the 3 5mm plugs going from the OP Z s input or output to a mic input on a sound card with phantom power active This could...

Page 6: ...ll OP Z data is stored on the fly so everything will still be there next time you power on your unit It s a good habit to occasionally back up OP Z using disk mode 2 1 2 Charging the battery OP Z has...

Page 7: ...OP Z has two ports located on the right hand side of the unit o Main audio for headphones headset or line out o USB c port for charging file transfers and midi o On the top side you find four expansio...

Page 8: ...tep buttons 6 Record button 7 Transport buttons play stop 8 Musical keyboard piano keys value keys a component keys b 9 Transpose buttons 10 Shift button 11 Pitch bend 12 Microphone 13 Speaker The mai...

Page 9: ...2 8 au dessous Tempo The TEMPO button is used for tempo bpm swing and metronome settings read more here 2 9 au dessous screen Hold the SCREEN button to display the battery charge to navigate the app a...

Page 10: ...pter 2 5 au dessous for more information 2 2 6 Tracks patterns step buttons The 16 top row buttons act both as tracks buttons as pattern select buttons and as steps in the sequencer The functionality...

Page 11: ...ctive track one step left or right offset steps micro timing Press and hold a step 1 16 and repeatedly press to shift timing of that step 1 tick back or forth visualized by a purple LED 1 16 next to t...

Page 12: ...he tape track to add a live tape stop effect Pro tip holding a lit step 1 16 and using the pitch bend lets you modify the velocity for that step 2 2 13 Microphone OP Z features a built in microphone a...

Page 13: ...the active pattern While playing you can press play to restart playback stop Press STOP while the sequencer is playing to stop playback panic Press STOP while sequencer is stopped to end all active n...

Page 14: ...ear all parameter locks on the current track release before to abort To clear parameter locks per step hold the step 1 16 and hold STOP until all steps 1 16 are lit clear track Hold TRACK and STOP and...

Page 15: ...keyboard to record notes step by step Parameter lock Hold record and turn a dial while the sequencer is running to record that parameter to the steps Record lock Hold REC PLAY to lock recording mode A...

Page 16: ...There are four color coded endless color dials 1 4 and the tracks can have up to four pages of parameters each having its unique color By learning to navigate these pages you ll become fluent with the...

Page 17: ...fx2 send pan level fx1 send fx2 send pan level led color green dial blue dial yellow dial red dial led color green dial blue dial yellow dial red dial param 1 param 2 filter resonance param 1 param 2...

Page 18: ...to access its features for example to adjust quantize or Portamento 2 5 2 Track parameters note length Note length controls the duration of notes that are of default note length All other notes remai...

Page 19: ...alue key that corresponds to the desired length of the track For example having a step count of 16 and a step length of 4 will extend the current track to play across four bars 2 5 5 Offset notes To o...

Page 20: ...n the current track Playback will continue but notes with long release or drone notes will be silenced 2 5 10 Link unlink tracks Press and hold TRACK together with the current active track 1 16 then p...

Page 21: ...p components Press and hold SHIFT and select the steps 1 16 you wish to apply step components to The LEDs of these steps will change to green indicating marked steps Keep holding SHIFT and select the...

Page 22: ...steps 1 octave 5 steps 1 octave 6 steps 1 octave 2 steps 3 octaves 3 steps 3 octaves 4 steps 3 octaves 5 steps 3 octaves 6 steps 3 octaves random 2 steps 1 octave 3 steps 1 octave 4 steps 1 octave 5...

Page 23: ...antly or create patterns chains to make longer compositions You can also perform operations such as copying patterns and settings and more 2 7 2 Select project Press and hold PROJECT and press the val...

Page 24: ...settings Keep holding PROJECT and press the destination pattern 1 16 to paste the settings 2 7 7 Copy track Press and hold PROJECT and press SHIFT three times to copy the currently active track Keep...

Page 25: ...apshot will be overwritten 2 7 12 Saving Auto save By default any changes to a project is automatically saved and there is no need to save manually manual save mode You can toggle manual save mode and...

Page 26: ...e gain for the drum group and synth group respectively as well as control the master compressor and overall project gain Press and hold this button to access the project wide mixer functions 2 8 2 Mix...

Page 27: ...io signal to the effect and tape tracks To do this while holding the MIXER button press the SHIFT key The SHIFT key will light red Now when muting tracks they will turn red when muted This will mute o...

Page 28: ...in bpm swing setting and the metronome sound and level By pressing and holding TEMPO you access the different tempo functions 2 9 2 Tempo parameters Bpm Swing metronome sound metronome level 2 9 3 Se...

Page 29: ...g Turn the dial as you wish and listen for that perfect groove Note swing is only applied to step programmed and quantized live recorded notes 2 9 7 Using the metronome To use the metronome when playi...

Page 30: ...arge or used in conjunction with the app to navigate around or to display the current battery status When using the OP Z standalone you can press and hold SCREEN to show the current battery level of t...

Page 31: ...ction to tracks OP Z is a 16 track sequencer It features 8 audio tracks and 8 control tracks The audio tracks are divided into 2 groups the drum group track 1 4 and the synth group track 5 8 The eight...

Page 32: ...fferently For bass lead and chord the parameter pages are the same synth envelope LFO and send ARP has dedicated Arp control instead of the LFO For detailed information please refer to the bass lead A...

Page 33: ...tape track is an audio buffer that is constantly recording when in playback It can be used for tape tricks and beat repeat style looping effects Read more about it here 2 13 au dessous 2 11 8 Master T...

Page 34: ...o 16 fixtures or lights You can use the OP Z sequencer to control these fixtures Learn all about it here 2 15 au dessous 2 11 12 Motion In addition to audio midi and lights sequencing OP Z is also a p...

Page 35: ...urn the green dial to set the arpeggio speed in eight different settings pattern The blue dial sets the arpeggio pattern type manual up down up down down up random style Use the yellow dial to set arp...

Page 36: ...n once again decreases to a full stop speed fine The center position led green will play the buffer at normal speed Rotating left will play at half speed and rotating right will play at double speed f...

Page 37: ...n the bass lead Arp and chord tracks to determine the key of the pattern Using the piano keys it is then possible to change key mode Use the color dials 1 4 to control the master effects and filter 2...

Page 38: ...hold SHIFT and press the different track 1 16 buttons To include a track make sure its track led is lit Use the transpose buttons to change octave used represented by the value keys Pro tip transposi...

Page 39: ...preview mode Toggle between fixture preview and step view 2 15 3 Light parameters main color The main color applied to all connected rgb fixtures alternate color Used by certain effects to instantly s...

Page 40: ...re setup The maximum total number of channels that can be configured is 128 The supported channel types are channel range description red 0 255 red color green 0 255 green color blue 0 255 Blue color...

Page 41: ...and hold SHIFT and hold any of the piano keys to add punch in effects The low octave affects the current track and the high octave affects the current track group the drum group or the synth group Re...

Page 42: ...e mode Press to increase microphone volume Press to decrease microphone volume Press to toggle between fx1 fx2 both fx1 fx2 and no effect Press and hold to enable the microphone The mic led will be re...

Page 43: ...er to the whitelist to see which hubs are supported Some devices present themselves as more than one midi device which currently is not supported by the OP Z Please refer to our device whitelist if yo...

Page 44: ...idi clock shift 6 enable program change enable program change in out shift 7 alt program change On usebank1 16 program1 16tosetactive pattern off pattern 1 16 is activated with bank 1 Program 1 128 an...

Page 45: ...arget 11 1 16 0 127 42 1 16 1 127 lfo shape 12 1 16 0 127 43 1 16 1 127 fx 1 send 13 1 16 0 127 44 1 16 1 127 fx 2 send 14 1 16 0 127 45 1 16 1 127 pan 15 1 16 0 127 46 1 16 1 127 volume 16 1 16 0 127...

Page 46: ...content such as adding your own sounds This is also where you manage your projects and access your bounces Finally you can use content mode to configure MIDI and DMX Enter content mode like this Press...

Page 47: ...when ready do not power off your device during this process To access the new sounds in OP Z select the corresponding track and slot You can store a total of 32 MB of sample data Remove any sample fi...

Page 48: ...LEDs will all be white 2 20 7 Software update To update the OP Z firmware make sure OP Z is in upgrade mode Connect the unit to a computer using USB OP Z will show up in the computer as an external r...

Page 49: ...h features and experience live 3d visuals Download the OP Z app from app store Currently available for iOS 2 21 2 Pairing with OP Z Go to the devices screen in the app if you have navigated somewhere...

Page 50: ...nterface View and tweak the multitude of parameters on your OP Z On most tracks you get an overview of all the control parameters The parameter indicators are grouped into pages just like on the OP Z...

Page 51: ...nge photos with the camera on your iOS device You can sequence the images and apply effects using the OP Z A photomatic camera roll consists of 24 image slots Play the 24 piano keys on track 16 to dis...

Page 52: ...your iOS device Tap the camera button to toggle the camera on your iOS device on off The flip button cycles available cameras the snap button takes a photo and saves it to the current image slot Acces...

Page 53: ...touch pad to edit the midi control change number it sends out Tap the and buttons to edit the midi channel used by this track Toggle the global midi settings by tapping these boxes Refer to the midi r...

Page 54: ...p the photomatic folder from iTunes to your desktop In the folder there are 10 subfolders one for each photomatic camera roll Each roll folder contains up to 24 images and a simple configuration file...

Page 55: ...k oscillator variation oscillator modulati on bow cluster digital electric digital raw engine clustered oscillators string synthesis complex and transforming multi oscillator electric synthesis volt c...

Page 56: ...4 2 USER GUIDE 5 2 1 HARDWARE OVERVIEW 6 2 1 1 POWER ON OFF 6 2 1 2 CHARGING THE BATTERY 6 2 1 3 REPLACING THE BATTERY 7 2 1 4 INPUTS AND OUTPUTS 7 2 2 INTERFACE OVERVIEW 8 2 2 1 INDEX BUTTONS 1 4 9...

Page 57: ...ONENTS INTRODUCTION 21 2 6 2 USING STEP COMPONENTS 21 2 6 3 CLEAR STEP COMPONENTS 22 2 6 4 STEP COMPONENT REFERENCE CHART 22 2 6 5 STEP COMPONENTS APP 22 2 7 PROJECT 23 2 7 1 PROJECT INTRODUCTION 23 2...

Page 58: ...TRANSPOSE TRACKS 38 2 14 4 CHORD PROGRESSIONS 38 2 15 LIGHTS 39 2 15 1 LIGHTS INTRODUCTION 39 2 15 2 LIGHTS OPERATION 39 2 15 3 LIGHT PARAMETERS 39 2 15 4 SETUP 39 2 15 5 CONFIGURE DMX 40 2 16 PUNCH...

Page 59: ...ference Teenage Engineering User Guide LD Janvier 2019 59 59 2 21 6 PHOTOMATIC 51 2 21 7 MOTION 52 2 21 8 DEVICES 53 2 21 9 MIDI SETUP 53 2 21 10 GUIDE 53 2 21 11 VIDEO OUT 53 2 21 12 FILE TRANSFER 54...

Reviews: