Seek Assistance
If you are new to R/C we suggest you find an experienced pilot to check out your aircraft and help you with
the first few flights.This will help prevent damage to your model and will speed up the learning process
and making your R/C experience all the more enjoyable. You can contact local R/C clubs or your dealer
to obtain the names of experienced R/C pilots who would be willingto help you with your first few flights.
Although this is an ARF (Almost-Ready-to-Fly) kit, it does have some construction features that can be
challenging to the less experienced modeler. If you encounter difficulty in any construction sequence,
please feel free to contact one of our technicians, we stand ready to provide any assistance we can.
Contact us at:
E
-
Mail: [email protected]
Copyright
2009
Techonehobby
Http
:
//
www
.
techonehobby
.
com
TM
C
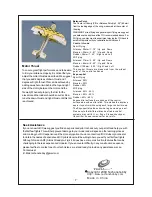
Balance Point
The Center of Gravity (C/G or Balance Point) is 2
.
36" (60mm)
from the leading edge of the wing, measured at the center of
the wing.
WARNING For test flying and general sport flying, we suggest
you balance the airplane at the C/G recommended above. For
3D flying, you may want to experiment moving the C/G back in
small increments until you're satisfied with the result.
Control
throws
Sport Flying
Ailerons: 28mm
(
1
.
10
")
Up
and
Down
Elevator: 22mm
(
0
.
87
")
Up
and
Down
Rudder: 36mm
(
1
.
42
")
Right
and
Left
3D Flying
Ailerons: 77mm
(
3
.
03
")
Up
and
Down
Elevator: 66mm
(
2
.
60
")
Up
and
Down
Rudder: 108mm
(
4
.
25
")
Right
and
Left
The
control
throws
are
measured
from
the
widest
point
of
the
control
surfaces
Exponential
Sport Flying
Ailerons: 20%
Elevator: 20%
Rudder: 20%
3D Flying
Ailerons: 45% - 55%
Elevator: 45% - 60%
Rudder: 45% - 60%
Exponential softens the response of the control
surfaces around neutral stick. This makes the airplane
easier to control while using such large control throws.
The Exponential values shown are given as a percent.
Please note that different brands of radio control
systems may call for + or - Expo. Please check your
transmitter's owners manual for more info.
-
7
-
Motor Thrust
To ensure great flight performance and to be able
to trim your airplane properly, it is critical that you
adjust the motor thrust as described. We suggest
that you add 2 degrees of down-thrust and 1
degrees of right-thrust. This can be achieved by
adding a washer or two behind the top and right
side of the motor (between the motor and the
firewall). When set properly, the trim for the
elevator and the rudder should be neutral. Fine-
tune the down-thrust and right-thrust until this trim
is achieved.
Made
in
China

