background image


22

• 

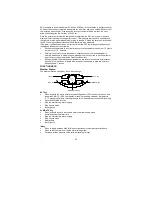
Stop the alarm during alarm ringing 

• 

Stop snooze mode 

• 

Back-light on 


OUT/+ key  

• 

Press shortly to toggle between MAX/MIN and current outdoor temperature/humidity 
data 

• 

Increase, change, toggle all values in manual set mode 

• 

Press to set the alarm minute (inside alarm setting mode) 

• 

Stop the alarm during alarm ringing 

• 

Stop snooze mode 

• 

Back-light on 


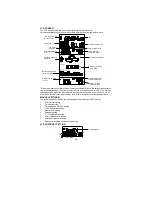
SNOOZE/CH key  

• 

Active snooze function during alarm ringing


• 

Exit the manual set mode and alarm setting mode


• 

Back-light on


Summary of Contents for WS 9032

Page 1: ...duct is simple and straightforward By reading this operating manual the user will receive a better understanding of the Weather Station together with the optimum benefit of all its features FEATURES T...

Page 2: ...e LED back light Low battery indicator Table standing or wall mounting Thermo Hygro Transmitter Remote transmission of outdoor temperature and humidity to weather station by 868 MHz signals Wall mount...

Page 3: ...e transmitter The outdoor temperature and humidity should then be displayed on the weather station If this does not happen after 2 minutes the batteries will need to be removed from both units and res...

Page 4: ...ms basements superstructures the received signal is naturally weakened In extreme cases please place the unit close to a window and or point its front or back towards the Frankfurt transmitter During...

Page 5: ...outdoor temperature humidity data Increase change toggle all values in manual set mode Press to set the alarm minute inside alarm setting mode Stop the alarm during alarm ringing Stop snooze mode Back...

Page 6: ...al settings can be changed when pressing the SET key for LCD contrast setting Time zone setting Time reception ON OFF setting 12 24 hour format setting Manual time setting Calendar setting C F tempera...

Page 7: ...ock will then work as a normal Quartz clock Default setting is ON 1 The digit ON will start flashing on the LCD 2 Use the OUT key to turn OFF the time reception function 3 Confirm with the SET key and...

Page 8: ...lly updated However if the signals are not received the date can also be set manually 1 The year starts flashing 2 Use the OUT key to set the year between year 2003 2029 3 Press the SET key again to c...

Page 9: ...icon sensitivity setting WEATHER FORECASTING ICON SENSITIVITY SETTING For locations with rapid changes of weather conditions the weather icons sensitivity can be set to a different level for faster di...

Page 10: ...s in Snooze mode To stop the snooze function when it is in snooze period press any key except the SNOOZE CH key To stop the alarm press any key during alarm ringing except the SNOOZE CH key MOON PHASE...

Page 11: ...sunny icon or worse with rainy icon since the icons are already at their extremes The icons displayed forecasts the weather in terms of getting better or worse and not necessarily sunny or rainy as e...

Page 12: ...ast 24 hours in 7 steps 0h 3h 6h 9h 12h 18h and 24h The 0h represents the current full hour air pressure recording The columns represent the hPa 0 2 4 6 at specific time The 0 in the middle of this sc...

Page 13: ...outdoor section of the Weather station during normal operation please check the following points 1 The distance of the Weather station or transmitters should be at least 2 meters away from any interfe...

Page 14: ...it may then either reduce or increase the transmitting range For this reason we recommend not placing the unit on any metal surfaces or in any position where a large metal or highly polished surface...

Page 15: ...the environment Please contact your local or and regional authorities to retrieve the addresses of legal dumping grounds with selective collection All electronic instruments must from now on be recycl...

Reviews: