background image

Seite 1 

WT290 

– BEDIENUNGSANLEITUNG 

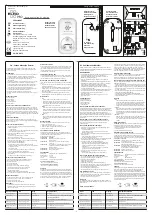
Displayanzeige: 


Frontansicht:


Summary of Contents for WT290

Page 1: ...Seite 1 WT290 BEDIENUNGSANLEITUNG Displayanzeige Frontansicht ...

Page 2: ...4 Runter Taste 5 Tag und Monat 14 ALARM 1 Taste 6 Innentemperatur 15 ALARM 2 Taste 7 Anzeige bei schwacher Batterie 16 SNOOZE LIGHT Taste 8 Zeitzonensymbol 17 Batteriefach mit aufgesetztem Deckel 9 Alarmzeit 1 mit Symbolen INBETRIEBNAHME 1 Öffnen Sie die Batterieabdeckung auf der Rückseite Ihrer Uhr 2 Legen Sie 3 x neue AAA Batterien unter Beachtung der korrekten Polarität und in das Batteriefach ...

Page 3: ...ang Symbol verschwindet AUTOMATISCHER EMPFANG Die Uhr startet den automatischen Funkempfang täglich um 1 00 2 00 und 3 00Uhr Wenn das DCF Signal nicht empfangen wurde beginnt die Uhr die Suche erneut um 4 00 Uhr gegebenen falls um 5 00Uhr Wurde das Signal bis dahin immer noch nicht empfangen startet die Suche automatisch am nächsten Tag um 1 00Uhr MANUELLER EMPFANG DER FUNKUHRZEIT Halten Sie währe...

Page 4: ... C F UP oder 12 24 DOWN um die Minute einzustellen Drücken Sie zur Bestätigung die SET Taste und die Jahresziffern blinken Drücken Sie die Taste C F UP oder 12 24 DOWN um das Jahr einzustellen Drücken Sie zur Bestätigung die SET Taste und die Monatsstellen blinken Drücken Sie die Taste C F UP oder 12 24 DOWN um den Monat einzustellen Drücken Sie zur Bestätigung die SET Taste und die Datumsziffern ...

Page 5: ...eigt wenn Alarm 1 nicht aktiv ist Halten Sie die Taste ALARM 1 gedrückt um in die Einstellung Alarm 1 zu gelangen Die Stundenziffern blinken Drücken Sie die Taste C F hoch oder 12 24 runter um die Stunde des Alarms 1 einzustellen Drücken Sie zur Bestätigung die Taste ALARM 1 und die Minutenziffern blinken Drücken Sie die Taste C F hoch oder 12 24 runter um die Minute des Alarms 1 einzustellen Drüc...

Page 6: ...blinken Der Alarm ertönt nach 5 Minuten wieder Drücken Sie eine beliebige Taste außer der SNOOOZE Taste während des aktiven Alarmtons um den Alarm zu stoppen und der Alarm ertönt am nächsten Tag zur gleichen Zeit erneut HINTERGRUNDBELEUCHTUNG Drücken Sie die SNOOOZE LIGHT Taste um die Hintergrundbeleuchtung für 5 Sekunden einzuschalten TEMPERATURANZEIGE IN C oder F Drücken Sie im normalen Anzeigem...

Page 7: ...Funkempfang durch folgende Einflüsse beeinträchtigt sein lange Übertragungswege naheliegende Berge und Täler nahe Autobahnen Gleisen Flughäfen Hochspannungsleitungen etc nahe Baustellen inmitten hoher Gebäude in Betonbauten nahe elektrischer Geräte Computer Fernseher etc und metallischer Gegenstände in bewegten Fahrzeugen Platzieren Sie die Uhr an einem Ort mit optimalem Empfang z B in der Nähe vo...

Page 8: ...nicht auf und werfen Sie sie nicht ins Feuer Sie könnten explodieren Bewahren Sie die Batterien nicht in der Nähe von Metallobjekten auf da ein Kontakt einen Kurzschluss verursachen kann Setzen Sie Batterien keinen hohen Temperaturen extremer Feuchtigkeit oder direktem Sonnenlicht aus Bewahren Sie Batterien außerhalb der Reichweite von Kindern auf Verschlucken der Batterien kann zum Ersticken führ...

Page 9: ...gesetz Laut Elektro und Elektronikgerätegesetz ElektroG gehört Elektroschrott nicht in den Hausmüll sondern ist zu recyceln oder umweltfreundlich zu entsorgen Entsorgen Sie ihr Gerät in einen Recycling Container oder an eine lokale Abfallsammelstelle ...

Page 10: ...Page 1 WT290 INSTRUCTION MANUAL Display overview Front view ...

Page 11: ... 12 24 DOWN button 5 Date and Month 14 ALARM 1 button 6 Indoor temperature 15 ALARM 2 button 7 Low battery indicator 16 SNOOZE LIGHT button 8 Time zone icon 17 Battery compartment with cover on 9 Time of alarm 1 with icon INITIAL OPERATION 1 Open the battery cover at the back of your clock 2 Insert 3 x new AAA batteries into the battery compartment by observing the correct and polarity ...

Page 12: ...ock starts automatic reception everyday at 1 00 2 00 and 3 00 If it fails to receive the DCF time signal at 3 00 it will start reception at 4 00 If it fails again it will start reception at 5 00 If it fails again it will start automatic reception at 1 00 again in the next day MANUAL RECEPTION While viewing normal time display press and hold the 12 24 DOWN button to start DCF77 reception and the ra...

Page 13: ...x Press the SET button to confirm and the month digits flash Press the C F UP or the 12 24 DOWN button to set the month x Press the SET button to confirm and the date digits flash Press the C F UP or the 12 24 DOWN button to set the date x Press the SET button to confirm and the time zone digits flash Press the C F UP or the 12 24 DOWN button to set the time zone value between 12 and 12 hours For ...

Page 14: ...setting to set alarm 2 Notes x Press and hold the the C F UP or the 12 24 DOWN button to speed up setting process x The setting will automatically return to time display mode if no button is used for 30 seconds x Press any button except the SNOOZE button during the active alarm sound to stop the alarm and the alarm will sound again on the next day at the same time x Alarm sound duration is 2 minut...

Page 15: ...on TROUBLE SHOOTING If your clock displays irrelevant time or does not function properly which maybe caused by electro static discharge or other interference slide open the battery cover take out the batteries and reinstall them by observing the correct polarity Your unit will be reset to default settings and you need to set it again ENVIRONMENTAL RECEPTION EFFECTS The clock obtains the accurate t...

Page 16: ... not subject the unit to excessive force or shock x Do not expose the unit to extreme temperatures direct sunlight dust or humidity x Do not immerse in water x Avoid contact with any corrosive materials x Do not dispose this unit in a fire as it may explode x Do not open the inner back case or tamper with any components of this unit BATTERY SAFETY WARNINGS x Use only alkaline batteries not recharg...

Page 17: ...estic waste because they could cause damages of health and environment You can return used batteries free of charge to your dealer and collection points As end user you are committed by law to bring back needed batteries to distributors and other collecting points Consideration of duty according to the law of electrical devices This symbol means that you must dispose of electrical devices separate...

Page 18: ...Page 1 WT290 MODE D EMPLOI Vue d ensemble de l affichage Vue avant ...

Page 19: ...tion de signal antenne radio 12 Touche C F HAUT 4 Icônes des jours de la semaine 13 Touche 12 24 BAS 5 Date et mois 14 Touche ALARM 1 6 Température intérieure 15 Touche ALARM 2 7 Indicateur de piles faibles 16 Touche SNOOZE LIGHT 8 Icône de fuseau horaire 17 Compartiment à pile avec couvercle mis 9 Heure de l alarme 1 avec icône PREMIÈRE UTILISATION ...

Page 20: ...t à recevoir le signal DCF L icône clignote Réception du signal DCF l icône clignote Réception réussie l icône ne clignote plus Réception impossible l icône disparaît RÉCEPTION AUTOMATIQUE L horloge lance la réception automatique chaque jour à 1h00 2h00 et 3h00 S il ne parvient pas à recevoir le signal horaire DCF à 3h00 la réception démarre à 4h00 En cas de nouvel échec la réception démarre à 5h0...

Page 21: ... BAS pour régler l heure Appuyez sur la touche SET pour confirmer et les chiffres des minutes clignotent Appuyez sur la touche C F HAUT ou 12 24 BAS pour régler les minutes Appuyez sur la touche SET pour confirmer et les chiffres de l année clignotent Appuyez sur la touche C F HAUT ou 12 24 BAS pour régler l année Appuyez sur la touche SET pour confirmer et les chiffres du mois clignotent Appuyez ...

Page 22: ...fiche lorsque celle ci est active et n est pas affichée si elle n est pas active Maintenez enfoncée la touche ALARM 1 pour accéder au réglage de l alarme 1 et les chiffres des heures clignotent Appuyez sur la touche C F HAUT ou 12 24 BAS pour régler l heure de l alarme 1 Appuyez sur la touche ALARM 1 pour confirmer et les chiffres des minutes clignotent Appuyez sur la touche C F HAUT ou 12 24 BAS ...

Page 23: ...arme retentira de nouveau après 5 minutes Appuyez sur n importe quelle touche sauf la touche SNOOZE quand l alarme active retentit pour l arrêter et celle ci retentira à nouveau le jour suivant à la même heure RETROECLAIRAGE Appuyez sur la touche SNOOZE LIGHT pour allumer le rétroéclairage pendant 5 secondes TEMPÉRATURE EN C OU EN F En mode d affichage normal appuyez sur la touche C F HAUT pour ré...

Page 24: ...tre horloge obtient l heure exacte grâce à la technologie sans fil Comme pour tout appareil sans fil la réception peut être affectée dans les cas suivants Distance de transmission longue Montagnes et vallées toutes proches Près d autoroutes chemins de fer aéroports câbles à haute tension etc À proximité d un chantier de construction Entouré de bâtiments élevés À l intérieur de bâtiments en béton À...

Page 25: ...AVERTISSEMENTS DE SÉCURITÉ CONCERNANT LES PILES Utilisez uniquement des piles alcalines non rechargeables Installez les piles en respectant les polarités Remplacez toujours toutes les piles en même temps Ne mélangez pas des piles usagées avec des piles neuves Lorsque les piles sont déchargées les retirer immédiatement de l appareil Retirez les piles lorsque vous n allez pas utiliser l appareil N e...

Page 26: ...s à votre revendeur et aux points de collecte En tant que consommateur vous êtes obligé par la loi de ramener les piles usagées aux revendeurs et aux points de collecte Respect de l obligation de la loi sur les appareils électriques Ce symbole signifie que les appareils électriques ne doivent pas être jetés aux ordures ménagères à la fin de leur vie utile Ramenez votre appareil à un point de colle...

Page 27: ...Página 1 WT290 MANUAL DE INSTRUCCIONES Vista general de la pantalla Vista delantera ...

Page 28: ...Icono de recepción de señal antena de radio 12 Botón C F ARRIBA 4 Iconos de días de la semana 13 Botón 12 24 ABAJO 5 Fecha y mes 14 Botón ALARM 1 6 Temperatura interior 15 Botón ALARM 2 7 Indicador de batería baja 16 Botón SNOOZE LIGHT 8 Icono de zona horaria 17 Compartimento de las pilas con cubierta 9 Hora de la alarma 1 con icono ...

Page 29: ...AL DCF77 Después de encender su reloj este empieza a recibir la señal DCF El icono parpadea Recepción de la señal DCF icono parpadeando Recepción correcta el icono permanece estático Recepción errónea el icono desaparece RECEPCIÓN AUTOMÁTICA El reloj inicia la recepción automática todos los días a las 1 00 2 00 y 3 00 Si no consigue recibir la señal horaria DCF hasta las 3 00 volverá a iniciar la ...

Page 30: ...ntrar en la configuración de la hora y los dígitos de la hora parpadearán Pulse el botón C F ARRIBA o el botón 12 24 ABAJO para configurar la hora Pulse el botón SET para confirmarlo y los dígitos de los minutos parpadearán Pulse el botón C F ARRIBA o el botón 12 24 ABAJO para configurar los minutos Pulse el botón SET para confirmarlo y los dígitos del año parpadearán Pulse el botón C F ARRIBA o e...

Page 31: ...dos CONFIGURACIÓN DE LA ALARMA Pulse el botón ALARM 1 para conectar desconectar la alarma 1 Se muestra el icono de la alarma 1 cuando la alarma 1 está activa y no se muestra cuando la alarma 1 no está activa Mantenga pulsado el botón ALARM 1 para entrar en la configuración de la alarma 1 y los dígitos de la hora parpadearán Pulse el botón C F ARRIBA o el botón 12 24 ABAJO para configurar la hora d...

Page 32: ...enta durante su duración FUNCIÓN RETARDO Cuando el sonido de la alarma esté active pulse SNOOZE LIGHT para entrar en el modo retardo y parpadearán el icono Zz y el icono de la alarma La alarma volverá a sonar después de 5 minutos Pulse cualquier botón excepto el botón SNOOZE durante el sonido active de la alarma para detener la alarma y la alarma volverá a sonar al día siguiente a la misma hora IL...

Page 33: ... configuración predeterminada de fábrica y necesitará ajustarla de nuevo EFECTOS AMBIENTALES EN LA RECEPCIÓN El reloj obtiene la hora exacta usando tecnología inalámbrica Y al igual que en el resto de los dispositivos inalámbricos la recepción puede verse afectada por las circunstancias siguientes largas distancias de transmisión proximidad de montañas y valles proximidad de autopistas vías de tre...

Page 34: ...deshaga de la unidad arrojándola al fuego ya que podría explotar No abra la carcasa posterior interna ni altere ningún componente de la unidad ADVERTENCIAS DE SEGURIDAD DE LAS PILAS Use solamente pilas alcalinas no use pilas recargables Instale las pilas correctamente haciendo coincidir las polaridades Siempre cambie el juego completo de pilas Nunca mezcle baterías usadas y nuevas Quite las pilas ...

Page 35: ...usadas sin cargo alguno a su distribuidor y puntos de recogida Como usuario final tiene la obligación de devolver las pilas que utilice a su distribuidor y otros puntos de recogida Consideración de obligaciones según las leyes sobre dispositivos electrónicos Este símbolo indica que no debe deshacerse de los aparatos eléctricos en la basura doméstica general cuando lleguen al final de su vida útil ...

Page 36: ...Strana 1 WT290 NÁVOD K OBSLUZE Přehled displeje Pohled zepředu ...

Page 37: ...týdnu 13 Tlačítko 12 24 DOLŮ 5 Datum a měsíc 14 Tlačítko ALARM 1 6 Vnitřní teplota 15 Tlačítko ALARM 2 7 Indikátor slabých baterií 16 Tlačítko SNOOZE LIGHT 8 Ikona časového pásma 17 Bateriový prostor s krytem 9 Čas budíku 1 s ikonou PRVNÍ POUŽITÍ 1 Otevřete kryt bateriového prostoru v zadní části budíku 2 Vložte do bateriového prostoru 3 nové baterie AAA Dbejte přitom na správnou polaritu a ...

Page 38: ...cky přijímat každý den v 1 00 2 00 a 3 00 hodiny Pokud nedojde k úspěšnému příjmu signálu DCF ve 3 00 hodiny začne příjem ve 4 00 hodiny Pokud se příjem signálu opět nezdaří začnou hodiny signál přijímat v 5 00 hodin Pokud se příjem signálu opět nezdaří dojde k automatickému příjmu signálu následující den v 1 00 hodinu MANUÁLNÍ PŘÍJEM Během normálního zobrazení času spustíte příjem signálu DCF77 s...

Page 39: ...a SET volbu potvrďte Začnou blikat číslice roku Stisknutím tlačítka C F NAHORU nebo 12 24 DOLŮ nastavte rok Stisknutím tlačítka SET volbu potvrďte Začnou blikat číslice měsíce Stisknutím tlačítka C F NAHORU nebo 12 24 DOLŮ nastavte měsíc Stisknutím tlačítka SET volbu potvrďte Začnou blikat číslice data Stisknutím tlačítka C F NAHORU nebo 12 24 DOLŮ nastavte datum Stisknutím tlačítka SET volbu potv...

Page 40: ...1 Stisknutím tlačítka ALARM 1 volbu potvrďte Začnou blikat číslice minut Stisknutím tlačítka C F NAHORU nebo 12 24 DOLŮ nastavte minuty budíku 1 Stisknutím tlačítka ALARM 1 volbu potvrďte a ukončete nastavování budíku Chcete li nastavit budík 2 stiskněte místo tlačítka ALARM 1 tlačítko ALARM 2 a postupujte výše uvedeným postupem Poznámky Stisknutím tlačítka C F NAHORU nebo 12 24 DOLŮ a jeho podrže...

Page 41: ...bu 5 sekund zapnete stisknutím tlačítka SNOOZE LIGHT ZOBRAZENÍ TEPLOTY VE C NEBO F V režimu normálního zobrazení času nastavíte jednotku teploty C nebo F stisknutím tlačítka C F NAHORU Poznámka Rozsah zobrazované teploty je 0 až 50 C INDIKÁTOR SLABÝCH BATERIÍ Jakmile budou baterie téměř vybité zobrazí se indikátor slabých baterií Vložte v brzké době novou sadu baterií ŘEŠENÍ PROBLÉMŮ Pokud budík z...

Page 42: ...dení vysokého napětí apod Blízkost staveniště Umístění mezi vysokými stavbami Umístění uvnitř betonových staveb Blízkost elektrických zařízení počítačů televizorů apod a kovových předmětů Umístění uvnitř jedoucích vozidel Budík umístěte na místo s optimálním signálem tj blízko oknu a v dostatečné vzdálenosti od kovových povrchů a elektrických spotřebičů BEZPEČNOSTNÍ OPATŘENÍ Tento budík je určen k...

Page 43: ...ní nepoužíváte vyjměte z něj baterie Baterie nenabíjejte a nevhazujte je do ohně mohou explodovat Baterie skladujte mimo dosah kovových předmětů kontakt s nimi může způsobit zkrat Nevystavujte baterie extrémním teplotám vlhkosti či přímému slunečnímu svitu Veškeré baterie skladujte mimo dosah dětí Hrozí riziko udušení Výrobek používejte pouze k zamýšlenému účelu Likvidace baterií podle předpisů St...

Page 44: ... elektrická zařízení na konci jejich životnosti je třeba likvidovat odděleně od běžného domácího odpadu Zařízení vraťte do místního sběrného místa nebo centra pro recyklaci To platí pro všechny země Evropské unie a ostatní evropské země se samostatným systémem shromažďování odpadu ...

Page 45: ...Pag 1 WT290 MANUALE DI ISTRUZIONI Panoramica display Vista anteriore ...

Page 46: ...Pulsante 12 24 GIÙ 5 Data e mese 14 Pulsante ALARM 1 6 Temperatura interna 15 Pulsante ALARM 2 7 Indicatore di batteria in esaurimento 16 Pulsante SNOOZE LIGHT 8 Icona fuso orario 17 Vano batteria con coperchio 9 Orario della sveglia 1 con icona FUNZIONAMENTO INIZIALE 1 Aprire il coperchio della batteria sul retro dell orologio 2 Inerire 3 batterie AAA nuove nello scompartimento delle batterie ris...

Page 47: ...Ricezione fallita L icona scompare RICEZIONE AUTOMATICA La radiosveglia avvia la ricezione automatica ogni giorno alle ore 1 00 2 00 e 3 00 Se la ricezione del segnale orario DCF alle 3 00 fallisce essa sarà riprovata alle 4 00 Se la ricezione fallisce nuovamente essa sarà riavviata alle 5 00 Se fallisce nuovamente essa sarà riavviata automaticamente all 1 00 del giorno successivo RICEZIONE MANUAL...

Page 48: ...il pulsante SET per confermare e le cifre dei minuti lampeggiano Premere il pulsante C F SU o il pulsante 12 24 GIÙ per impostare i minuti Premere il pulsante SET per confermare e le cifre dell anno lampeggiano Premere il pulsante C F SU o il pulsante 12 24 GIÙ per impostare l anno Premere il pulsante SET per confermare e le cifre del mese lampeggiano Premere il pulsante C F SU o il pulsante 12 24...

Page 49: ...e la sveglia 1 non è attiva Tenere premuto il pulsante ALARM 1 per accedere all impostazione della sveglia 1 e le cifre dell ora lampeggiano Premere il pulsante C F SU o il pulsante 12 24 GIÙ per impostare l ora della sveglia 1 Premere il pulsante ALARM 1 per confermare e le cifre dei minuti lampeggiano Premere il pulsante C F SU o il pulsante 12 24 GIÙ per impostare i minuti della sveglia 1 Preme...

Page 50: ...a sveglia lampeggiano La sveglia suona nuovamente dopo 5 minuti Premere qualsiasi pulsante eccetto SNOOZE durante il suono della sveglia attivo per arrestare la sveglia e la sveglia suonerà nuovamente il giorno successivo alla stessa ora RETROILLUMINAZIONE Premere il pulsante SNOOZE LIGHT per accedere la retroilluminazione per 5 secondi TEMPERATURA IN C O F In modalità di visualizzazione normale p...

Page 51: ...fre un orario accurato grazie alla tecnologia wireless Come per tutti i dispositivi wireless la ricezione può essere influenzata dalle seguenti circostanze Lunga distanza di trasmissione Prossimità di montagne e valli Prossimità di autostrade stazioni aeroporti cavi di alta tensione e così via Prossimità di cantieri Collocazione tra edifici alti Collocazione all interno di edifici in cemento Pross...

Page 52: ...ne non batterie ricaricabili Installare le batterie correttamente rispettando la polarità Sostituire sempre un set completo di batterie Non utilizzare mai batterie usate e nuove contemporaneamente Rimuovere immediatamente le batterie scariche Rimuovere le batterie inutilizzate Non ricaricare e non smaltire le batterie nel fuoco in quanto possono esplodere Assicurarsi che le batterie siano conserva...

Page 53: ...legge a portare le batterie esauste ai distributori e agli altri punti di raccolta Considerare il carico in base alla normativa sui dispositivi elettrici Questo simbolo indica che i dispositivi elettrici alla fine del loro ciclo di vita devono essere smaltiti separatamente dai rifiuti domestici generali Portare l unità al proprio punto di raccolta rifiuti locale o a un centro per la raccolta diffe...

Page 54: ...Blad 1 WT290 GEBRUIKSHANDLEIDING Overzicht display Vooraanzicht ...

Page 55: ...am radio antenne 12 C F OMHOOG toets 4 Weekdag pictogrammen 13 12 24 OMLAAG toets 5 Datum en maand 14 ALARM 1 toets 6 Binnentemperatuur 15 ALARM 2 toets 7 Lage batterij indicator 16 SNOOZE LIGHT toets 8 Tijdzone pictogram 17 Batterijvak met de cover geplaatst 9 Tijd van alarm 1 met pictogram INBEDRIJFSTELLING 1 Open het batterijvak aan de achterkant van uw klok ...

Page 56: ...st icoontje blijft constant Mislukte Ontvangst icoontje verdwijnt AUTOMATISCHE ONTVANGST De klok start de automatische ontvangst iedere dag om 1 00 u 2 00 u en 3 00 u Als de klok het DCF tijdsignaal om 3 00 niet heeft ontvangen zal het de ontvangst starten om 4 00 Als de ontvangst weer mislukt zal het de ontvangst starten om 5 00 Als het nogmaals mislukt zal het de automatische ontvangst de volgen...

Page 57: ...gen de minuten gaan knipperen Druk op de toets C F OMHOOG of 12 24 OMLAAG om de minuten in te stellen Druk op de toets SET om te bevestigen het jaar gaat knipperen Druk op de toets C F OMHOOG of 12 24 OMLAAG om het jaartal in te stellen Druk op de toets SET om te bevestigen de maanden gaan knipperen Druk op de toets C F OMHOOG of 12 24 OMLAAG om de maand in te stellen Druk op de toets SET om te be...

Page 58: ...wordt niet weergegeven terwijl alarm 1 niet actief is Hou de toets ALARM 1 ingedrukt om naar het instellen van alarm 1 te gaan de uurcijfgers gaan knipperen Druk op de toets C F OMHOOG of 12 24 OMLAAG om het uur van alarm 1 in te stellen Druk op de toets ALARM 1 om te bevestigen de minuten gaan knipperen Druk op de toets C F OMHOOG of 12 24 OMLAAG om de minuten van alarm 1 in te stellen Druk op de...

Page 59: ... terug af na 5 minuten Druk op een willekeurige toets behalve de toets SNOOZE terwijl het alarm afgaat om het alarm te stoppen het alarm zal de volgende dag op dezelfde tijd weer afgaan ACHTERVERLICHTING Druk op de toets SNOOZE LIGHT om het backlight 5 seconden aan te doen TEMPERATUUR IN C OF F Druk in de normale weergavemodus op de toets C F OMHOOG om C of F in te stellen als temperatuureenheid O...

Page 60: ...aadloze technologie Zoals met alle draadloze apparatuur kan de ontvangst in de volgende gevallen worden aangetast Grote afstand tot de zender Nabij bergen en valleien Nabij snelwegen treinsporen vliegvelden hoogspanningkabels enz Nabij bouwterreinen Tussen hoge gebouwen Binnenin betonnen gebouwen Nabij elektrische apparatuur computers TV s enz en metalen structuren Binnenin bewegende voertuigen Pl...

Page 61: ...iste polariteit in acht Vervang altijd alle batterijen tegelijk Gebruik nooit nieuwe en gebruikte batterijen door elkaar Verwijder lege batterijen onmiddellijk Verwijder de batterijen als het toestel niet wordt gebruikt Herlaad de batterijen niet en gooi ze niet in vuur de batterijen zouden kunnen ontploffen Zorg ervoor dat de batterijen uit de buurt van metalen voorwerpen worden bewaard omdat hie...

Page 62: ...tributeurs of andere inzamelpunten Houd rekening met heffingen in het kader van wetgeving m b t het afvoeren van elektrische apparatuur Dit symbooltje betekent dat u elektrische apparaten aan het einde van hun levensduur niet als algemeen huishoudelijk afval mag afvoeren Lever uw apparaat in bij een plaatselijk inzamelpunt voor afvalverwerking of bij een recyclingcentrum Dit geldt voor alle landen...

Page 63: ...Strona 1 WT290 INSTRUKCJA OBSŁUGI Wyświetlacz Widok z przodu ...

Page 64: ...wa 12 Przycisk C F W GÓRĘ 4 Ikony dni tygodnia 13 Przycisk 12 24 W DÓŁ 5 Data i miesiąc 14 Przycisk ALARM 1 6 Temperatura wewnętrzna 15 Przycisk ALARM 2 7 Wskaźnik rozładowania baterii 16 Przycisk SNOOZE LIGHT 8 Ikona strefy czasowej 17 Komora baterii zamknięta pokrywą 9 Czas budzika 1 i ikona CZYNNOŚCI WSTĘPNE 1 Otwórz pokrywę komory baterii z tyłu zegara ...

Page 65: ... Nieudany odbiór ikona znika ODBIÓR AUTOMATYCZNY Zegar rozpoczyna automatyczny odbiór codziennie o godz 1 00 2 00 i 3 00 Jeśli nie uda się odbiór sygnału czasu DCF o godz 3 00 kolejny odbiór rozpocznie się o godz 4 00 Jeśli nie uda się ponownie kolejny odbiór rozpocznie się o godz 05 00 Jeśli znowu się nie uda kolejny odbiór rozpocznie się automatycznie ponownie o godz 1 00 następnego dnia ODBIÓR ...

Page 66: ...k C F W GÓRĘ lub przycisk 12 24 W DÓŁ Naciśnij przycisk SET aby potwierdzić Cyfry minut zaczną migać Aby ustawić minuty naciśnij przycisk C F W GÓRĘ lub przycisk 12 24 W DÓŁ Naciśnij przycisk SET aby potwierdzić Cyfry roku zaczną migać Aby ustawić rok naciśnij przycisk C F W GÓRĘ lub przycisk 12 24 W DÓŁ Naciśnij przycisk SET aby potwierdzić Cyfry miesiąca zaczną migać Aby ustawić miesiąc naciśnij...

Page 67: ...sk ALARM 1 aby włączyć wyłączyć budzik 1 Ikona budzika 1 jest wyświetlana gdy włączony jest budzik 1 i nie jest wyświetlana gdy budzik 1 jest wyłączony Przytrzymaj przycisk ALARM 1 aby przejść do konfiguracji budzika 1 Cyfry godziny zaczną migać Aby ustawić godzinę budzika 1 naciśnij przycisk C F W GÓRĘ lub przycisk 12 24 W DÓŁ Naciśnij przycisk ALARM 1 aby potwierdzić Cyfry minut zaczną migać Aby...

Page 68: ...ewa sygnał budzika naciśnij przycisk SNOOZE LIGHT aby przejść do trybu drzemki Ikona Zz i ikona budzika będą migać Budzik uruchomi się ponownie za 5 minut Aby wyłączyć wybrzmiewający sygnał budzika naciśnij dowolny przycisk inny niż przycisk SNOOZE Budzik uruchomi się ponownie o tej samej porze kolejnego dnia PODŚWIETLENIE Naciśnij przycisk SNOOZE LIGHT aby włączyć podświetlenie na 5 sekund TEMPER...

Page 69: ...h ustawień i należy je ponownie ustawić WPŁYW ŚRODOWISKA NA ODBIÓR Zegar zawdzięcza dokładny odczyt czasu technologii bezprzewodowej Podobnie jak w przypadku wszystkich urządzeń bezprzewodowych odbiór może być zakłócony następującymi czynnikami duża odległość przekazu góry i doliny znajdujące się w pobliżu autostrada kolej porty lotnicze kable wysokiego napięcia itd znajdujące się w pobliżu teren ...

Page 70: ...ami korodującymi Urządzenia nie wolno utylizować w ogniu ponieważ może wybuchnąć Nie otwierać tylnej obudowy wewnętrznej ani nie ingerować w żadne komponenty urządzenia OSTRZEŻENIA DOTYCZĄCE BATERII Używać wyłącznie baterii alkalicznych a nie baterii akumulatorowych Włożyć baterie prawidłowo zgodnie z biegunowością Zawsze należy wymieniać cały zestaw baterii Nigdy nie wolno mieszać zużytych i nowy...

Page 71: ...baterie można oddać bezpłatnie u swojego sprzedawcy lub w punktach zbiórek Użytkownik końcowy jest zobowiązany prawem do zwrotu odpowiednich baterii sprzedawcom lub w innych punktach zbiórek Zobowiązania według przepisów prawa dotyczących urządzeń elektrycznych Ten symbol oznacza że użytkownik musi utylizować urządzenia elektryczne z dala od ogólnych odpadów domowych kiedy osiągną one koniec okres...

Reviews: