background image

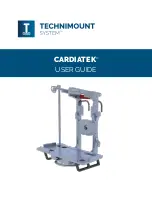
CARDIATEK

®

USER GUIDE

Summary of Contents for Cardiatek

Page 1: ...CARDIATEK USER GUIDE ...

Page 2: ...filiate companies Trademark Attributions CARDIATEK is a registered trademark of Technimount System 100128 013 The Cardiatek Bracket Wall Mount and Floor Mount is patented under reference 62 909 Impella is a registered trademark from Abiomed Technimount System does not have a commercial relationship with Abiomed Abiomed does not promote or sell Technimount Products In order to ensure continuous imp...

Page 3: ...hnimount com T 1 581 998 9820 F 1 855 339 6351 or customerservice technimount com techsupport technimount com NOTE Please have the serial number of your Technimount product available as shown in the figure below when calling Technimount Customer Service or Technical Support Include the serial number in all written communications SERIAL NUMBER LOCATION Contact Information Made in Canada S N TECHNIM...

Page 4: ...PRECAUTIONS 19 Warning Caution Note 19 INSTALLATION GUIDE 22 Removing the Packaging for Installation 22 Installation of the Fluid Bag Pole 24 Using the back Hooks 25 Installation of the cardiatek Wall Mount onto the Rails 26 Installation of the Bracket onto the Vertical Base of the Wall Mount 27 Removing the Cardiatek Bracket from the Wall Mount 28 Installation of the Cardiatek Floor Mount onto th...

Page 5: ... 40 Limited Responsibility and Warranty 40 Warranty Options 41 three Warranty Options for Technimount Products 41 International Warranty Clause 41 RETURN POLICY 42 Return of Merchandise 42 Prior to 30 Days 42 Prior to 45 Days 42 Prior to 60 Days 42 Return Merchandise Authorization 42 Damaged Merchandise 42 SAE CERTIFICATION 43 FAA CERTIFICATION 44 CE CERTIFICATION 45 ...

Page 6: ...t this bracket is compatible with the floor platform of air ambulances in Europe The wall mount and bracket can be used for ground ambulances in Europe and North America The Cardiatek Bracket is compatible with all of Technimount s products CARDIATEK WALL MOUNT The Cardiatek Wall Mount is designed for the Automated Impella Controler AIC mounting bracket It is comprised of a high density aluminum f...

Page 7: ...rn To Table of Contents Introduction POSSIBLE MOUNTING OPTIONS FOR THE CARDIATEK BRACKET Mounting Bracket Wall Mount System Ground Ambulance in Europe Technimount Stretcher Safety Arm System Air Ambulance Floor Mount Technimount Universal Standard Base ...

Page 8: ... 8 CARDIATEK UG 202001 R01 www technimount com Introduction SYMBOLS AND DEFINITIONS SYMBOL DESCRIPTION Caution special attention is required Consult accompanying documents Safe working load symbol Pinch Point Load balance symbol ...

Page 9: ...or serious injury It may also describe potential serious adverse reactions and safety hazards Caution Alerts the reader of a potentially hazardous situation which if not avoided may result in minor or moderate injury to the user or patient or damage to the equipment or other property This includes special care necessary for the safe and effective use of the device to avoid damage that may occur as...

Page 10: ...oduction Top Down Movable Handle to Enclose or Release the AIC from its Bracket The Red Quick Release Mechanism is used to Easily Lift the Handle and Remove the AIC from its Bracket Acetal Feet to Protect the Disc Bracket and the AIC when Placed on the Floor or Ground Fluid Bag Pole Electric Power Cord Holder Fluid Bag Pole Holder when not in Use Standard Bottom Disc ...

Page 11: ...e Mechanism is used to Easily Lift the Handle and Remove the AIC from its Bracket Top Down Movable Handle to Enclose or Release the AIC from its Bracket Retractable Hooks for Temporary Transfer Between Hospital and Ambulance The small Anti Rotation Disc on the Back is used for Vertical Support on Different Wall or Arm Systems Red Quick Release Mechanism to Easily Remove the Fluid Bag Pole When not...

Page 12: ... Figure 3 CARDIATEK WALL MOUNT SYSTEM FRONT VIEW Vertical Micro Base with Long Red Quick Release Button for Easy Access Quick Release Clamps QR Gripp Red Quick Release Mechanism to Easily Remove Bracket from Vertical Micro Base High Density Aluminum Mount with Gray Anodized Finish Red Quick Release Mechanism to Position or Release QR Gripp Clamp Blue Handle ...

Page 13: ...ATION CONTINUED CARDIATEK WALL MOUNT SYSTEM CONTINUED Back View Introduction Quick Release Clamps QR Gripp Reinforced Wall Platform with Lightweight Design Figure 4 CARDIATEK WALL MOUNT SYSTEM BACK VIEW Red Quick Release Mechanism to Easily Remove Bracket from Vertical Micro Base Blue Handle ...

Page 14: ...STRATION CONTINUED CARDIATEK FLOOR MOUNT SYSTEM Introduction T Shape Handle with Stainless Steel Plunger for Installation onto the Floor Rails Red Quick Release Mechanism to Easily Remove Bracket from Technimount Standard Surface Base High Density Aluminum Plate Technimount Standard Base ...

Page 15: ...Movement Tested Tested 20 424 Cycles Press and Release Movement with Minor Use Fully Functional 5 Year Service Life Retaining System 2 Locking Discs Standard Bottom Section Anti Rotation Back Micro Disc Quick Release Mechanism One Hand Quick Release Mechanism to Easily Remove Device from Bracket Canister Fluid Bag Holder Removable Canister and Fluid Pole Holder Transportation Compatibility System ...

Page 16: ...g System Device Retained on Wall Rails with Quick Release Clamps QR Gripp Mechanical Resistance of 1000 lbs Each Clamp Medical Device Mount Retaining System The Cardiatek Bracket is Retained on the Wall System with its Anti Rotation Back Disc Inserted and Locked Inside Micro Base Locking Mechanism Movement Tested Tested Press and Release Movement with Minor Use Fully Functional 5 Year Service Life...

Page 17: ... Flight FAA FAR DOT 27 561 DOT 27 562 up to 20G European Standard CE Mark Medical Device Retaining System Device Retained on the Standard Surface Base with Locking Mechanism Quick Release Mechanism Red Quick Release Button to Easily Remove Device from Standard Surface Base Transportation Compatibility System EMS Aircraft or Ground Ambulance Equipped with Floor Rails Features Access to all Connecto...

Page 18: ...ments and other relevant provisions of the Directive 1999 5 EC and SAE J3043 A copy of the original declaration of conformity can be obtained by contacting Technimount System s Regulatory Affairs Department Technimount System C O Regulatory Affairs info technimount com 1 581 998 9820 WARNING End User Administrator is responsible to validate regulations and standards for safety in their region in o...

Page 19: ...perator and may damage the product Always secure the medical device within the Bracket and mounting system during transport 9 Practice loading and unloading the medical device Locked during transportation and unlocking to unload and load medical equipment until operation of the product is fully understood Improper use may cause injury to the operator 9 Always hold the Cardiatek Bracket securely ne...

Page 20: ... or damage to the product Maintain the Cardiatek Mounting Systems as described in this user guide Use only Technimount approved parts and maintenance procedures Using unapproved parts and procedures could cause unpredictable operation and or injury and will void the product warranty 9 Failure to properly clean or dispose of corrosive products will increase the risk of premature damage and may caus...

Page 21: ...on the surface possibly causing premature corrosion of critical components 9 When ordering it is important to identify on which mounting system you need to mount the bracket on as there are different systems for different EMS applications e g EMS ground or air mounting systems 9 A maintenance program should be established for all Technimount equipment Preventive maintenance may need to be performe...

Page 22: ...st work properly before they are put into service 5 Refer to the identification of components at the beginning of this user guide if needed NO TOOLS REQUIRED FOR INSTALLATION There are no tools required for installation as the Cardiatek Mounting Systems are already fully assembled when received However it is possible that some screws might have loosened during delivery A basic Allen Key set could ...

Page 23: ...ed part of the handle towards you 4 While quick release mechanism is engaged lift the handle upwards towards the back of the mount 5 Bring handle all the way to the back and leave it rest on the back of the mount while installing the AIC into the bracket 6 Position the Automated Impella Controller onto the aluminum plate The AIC should fit tightly within the bracket s frame Installation Guide INST...

Page 24: ...nsport WARNING Ensure that the handle is properly locked into position prior to manipulating it or installing it onto another mounting system Failure to do so can cause injury to the patient or operator or cause damage to the equipment INSTALLATION OF THE FLUID BAG POLE 1 Install the Fluid Bag Pole into the nano base located on the bottom plate at the back of the mount 2 Push in the Red Quick Rele...

Page 25: ...in addition to Technimount s Safety Arm System developed for Stryker Stretchers See details on compatibility between Technimount equipment in specifications section of this user guide USING THE BACK HOOKS 5 To open the hooks open one hook at a time by pulling the hook towards you 6 To close the hooks close one hook at a time by pushing the hook back into closed position WARNING The Cardiatek Back ...

Page 26: ...ng on the red button turn the handle counter clockwise to unlock the mechanism 3 Install the Cardiatek Wall Mount on the wall rails of the ambulance 4 While holding the Quick Release button push upwards to position each clamp appropriately on the rails 5 Release the Quick Release buttons to hold Wall Mount on both rails 6 Turn handle approximately 1 4 turn to securely lock into place NOTE 9 All 4 ...

Page 27: ...WALL MOUNT 1 To install the AIC into the Wall Mount lift the AIC bracket higher than the wall mount to slide disc into the vertical base 2 Slide back anti rotation disc into the vertical base and lock into place 3 Installation is complete when AIC bracket is securely locked into the vertical base on the Wall Mount Back Anti Rotation Disc Vertical Base ...

Page 28: ... release the Cardiatek Bracket from the Wall Mount push red quick release button located on the vertical base behind the bracket 2 While button is pressed lift the Cardiatek Bracket upwards until it slides out of the vertical base of the Wall Mount 3 Place the Cardiatek Bracket onto a stable surface unti it is transferred to another mounting system ...

Page 29: ...ILS Installation Guide 1 To install the Cardiatek Floor Mount turn counter clockwise to loosen the red T Shape Handles 2 Lift both red T Shape Handles 3 Slide and fit into floor rails and release the red T Shape handles once positioned appropriately inside the rail 4 Turn handles clockwise to securely lock into position on floor rails ...

Page 30: ... THE AIC BRACKET ONTO THE FLOOR MOUNT SURFACE BASE 1 To install the Cardiatek bracket onto the floor mount slide bottom disc towards the front of the base 2 Ensure that the bracket is securely locked into the base 5 Once inside the suface base the Cardiatek Bracket can rotate 360 clockwise or counter clockwise ...

Page 31: ...RACKET FROM THE FLOOR MOUNT SURFACE BASE 1 To remove the Cardiatek Bracket from the Floor Mount push the red Quick Release Button inwards while sliding the Cardiatek Bracket out of the Surface Base of the Floor Mount 2 Slide the unit outwards and place on a stable surface until transfer to another mounting system ...

Page 32: ...nts of these system Modifying the products can cause unpredictable operation resulting in injury to the patient or operator NOTE Technimount reserves the right to change Part Numbers and Products without notice Please refer to Customer Service to ensure product part number availability For any replacement parts or for repair please contact Technical Support at techsupport technimount com Cardiatek...

Page 33: ...ver saturation and ensure that the product does not stay wet longer than the cleaner manufacturer s guidelines for proper disinfecting WARNING 9 When cleaning always use appropriate personal protection equipment PPE based on established protocols e g gloves eyewear etc CAUTION 9 Do not steam clean or use ultrasonic cleaners on the system or any of its components 9 Do not immerse the metal parts co...

Page 34: ...mponents will increase the risk of exposure to blood borne pathogens and may cause injury to the patient or the operator PREVENTIVE MAINTENANCE A preventive and regular maintenance program should be established for all Technimount equipment Preventive maintenance may be required more frequently based on the usage level of the product The Cardiatek System requires regular preventative maintenance E...

Page 35: ...damaged or worn out parts if necessary Follow table below in accordance to the timetable whichever comes first ITEM ROUTINE 1 M OR 2 H 3 M OR 6 H 6 M OR 12 H 12 M OR 24 H Bracket 9 Inspect Bracket Inspect the hexagon screws Inspect Quick Release Mechanism and Handle Ensure it is working properly and there are no particles obstacles or debris Inspect Top Handle side screws Must Lock into Place once...

Page 36: ... Gripp Clamps are not loose or missing 9 Inspect the Micro base for cracks visual damage or malfunction X Floor Mount 9 Inspect the 2 Red T Shape Handles Inspect spring locking system of the red T Shape handles 9 Ensure the Standard Base is clear of particles obstacles or debris 9 Inspect the feet locking into the track for any damage or missing parts 9 Inspect spring locking system of the red T S...

Page 37: ...www technimount com CARDIATEK UG 202001 R01 37 Return To Table of Contents Maintenance Guide INSPECTION AND MAINTENANCE RECORD PREVENTIVE MAINTENANCE PERFORMED BY DATE TIME ...

Page 38: ...o Table of Contents 38 CARDIATEK UG 202001 R01 www technimount com Maintenance Guide TRAINING RECORD TRAINING DATE TRAINING METHOD USER GUIDE IN SERVICE IN CLASS ETC TRAINEE NAME BASIC TRAINING TRAINING UPDATE ...

Page 39: ...ice or Technical Support 1 581 998 9820 or at customerservice technimount com or techsupport technimount com for availability and pricing DESCRIPTION PART NUMBER Cardiatek Mount Top Red Handle TCM 032 014 Anti Rotation Back Disc TCM 052 006 Standard Bottom Disc 926 00 SS Left Swivel Hook 963 00 LF Right Swivel Hook 963 00 RH Power Cord Hooks TCM 032 042 Fluid Bag Pole TCM 032 048 Fluid Bag Pole Ho...

Page 40: ...Hardware will be free from Defects in workmanship and material under normal use for a period of one 1 year from the date that the Floor Mount and Wall Mount was first purchased and three 3 years from the date that Bracket was purchased which is defined as the Warranty Period During the Warranty Period the Hardware will be repaired or replaced according to the Limited Warranty without charge to the...

Page 41: ... the original warranty for parts and labor has terminated Technimount guarantees to the original purchaser that its products should be free from manufacturing nonconformities that affect product performance and customer satisfaction for a period of two 2 years following the end date of the original warranty Technimount s obligation under this warranty is limited to supplying replacement parts and ...

Page 42: ...customer service department is responsible for approving any merchandise return and will provide an RMA Return Merchandise Authorization number to be printed on any returned merchandise Technimount reserves the right to charge shipping and restocking fees on returned items Customized modified or discontinued items not subject to return DAMAGED MERCHANDISE ICC Regulations require that claims for da...

Page 43: ...www technimount com CARDIATEK UG 202001 R01 43 Return To Table of Contents SAE Certification ...

Page 44: ...Return To Table of Contents 44 CARDIATEK UG 202001 R01 www technimount com FAA Certification ...

Page 45: ...www technimount com CARDIATEK UG 202001 R01 45 Return To Table of Contents CE Certification ...

Page 46: ...Technimount System Brand of Technologies CGC Corporate Headquarters 3770 Jean Marchand Street Suite 100 Quebec QC G2C 1Y6 Canada T 1 581 998 9820 F 1 855 339 6351 technimount com info technimount com Copyright 2020 Technimount System All Rights Reserved Printed in Canada ...

Reviews: