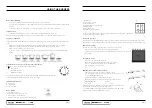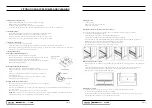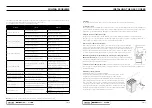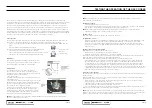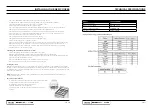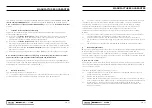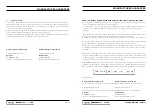
PG 18
PG 19
This appliance is suitable for connection with rigid pipe or flexible hose. The isolating manual shut-off valve
connection point must be accessible when the appliance is installed. For connection with a flexible hose assembly.
The flexible ose assembly must be certified to AS/NZS 1869 class B or D. 10mm internal diameter, be kept as
short as possible (not exceedomg 1200mm), must not be in contact with the floor or any hot or sharp surfaces.
The hose assembly must not be subject to strain, abrasion, kinking or deformation. Gas leakge and operation of
the appliance must be tested by the installer before leaving. Check burner flames are blue in colour, stable and
completely ignire at both high and low flame settings with no appreciable yellow tipping, carbon deposition, lifting,
floating, lighting back or objectionable odour. Test burners individually and in combination. When satisfied with the
operation of the cooker, please instruct the used on the correct method of operation.
Gas Connection
The gas intake connection of the appliance has a “male thread”. When making the connection, take care not to
apply stresses of any kind to the appliance. Read these points before connecting to the gas supply;
•
The gas connection point is a 1/2” BSP external thread located at the rear of the appliance (50mm from the
edge).
•
Ensure installation allows withdrawal of appliance.
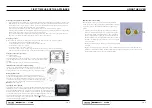
Read these points about operation and look carefully at the diagram:
•
The appliance regulator provided must be orientated.
•
The arrow showing the direction of the flow must be pointed correctly.
•
The regulator has a 1/2” BSP internal thread at inlet and outlet.
Natural Gas
The supplied regulator must be fitted to the appliance inlet
connection. Gas pressure must be adjusted to 1.0 kPa when
approximately 50% of the burners are on high flame.
Universal LPG
(The appliance test point is located at the injector)
Gas pressure must be checked to confirm the appliance
operation pressure is 2.75 kPa, the appliance test point is the
rapid burner injector as shown below.
1. Disconnect power.
2. Light the auxiliary burner and set to high flame. Ensure all
other burners are off.
3. Zero manometer, then apply flexible tubing to seal over the
Rapid burner injector, hold securely in place and check the
gas pressire by pressing in the corresponding burner control
knob in, then turning to high flame position.
4. If the pressure is 2.75 kPa, reassemble the burner and
perform the final checks as per this instruction manual.
5. If the pressure is not 2.75 kPa, disconnect the appliance
and check/adjust/replace the LPG cylinder regulator(s) as
appropriate in accordance with AS/NZS 5601
NOTE:
When the installation is complete, always check that all the unions are absolutely tight using a soapy solution.
Never use a flame to make this check.
A. Inlet pipe joint
B. Gasket
C. Stable union
TESTING THE OPERATION OF THE GAS COOKER
NOTE:
You must test the cooker after instalation, before you hand it over to the customer. You must have a
manometer and a connecting tube.
Checking Gas Supply
•
Check the manometer zero point is correct.
•
Connect the manometer to the cooker pressure test point. This is located on the regulator or LPG inlet fitting.
•
Turn on the gas supply and the electricity (if applicable) and try to ignite the gas.
NOTE:
It will take additional time to light the gas for the first time as air needs to be purged from the pipes.
•
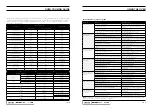
Check the operating pressure for the particular gas type (see table).
For LPG cookers
Adjust the regulator if necessary (this may be remote from the cooker).
For Natural Gas cookers
•
Regulators are supplied pre-adjusted and configured by the component maker for use with Natural Gas. The
appliance installer is not required to make an adjustment to obtain the correct outlet pressure setting.
•
An arrow on the base of the regulator indicates the direction of gas flow when the inlet and outlet of the
regulator are orientated correctly. When the regulator has been fitted check for leaks from the connections
with soapy water.
Checking the Function of the Regulator
With the appliance operating check the outlet pressure:
•
When all burners of the appliance are operating at maximum,
•
When the smallest burner of the appliance is operating at minimum.
Under these conditions the outlet pressure should not vary from the nominal outlet pressure of 1.0kPa by more
than ±20% of the nominal outlet pressure (±0.20kPa for Natural Gas).
If the regulator appears to not be performing satisfactorily then check the following points.
•
If the outlet pressure is consistently too low then the inlet pressure may be too low and adjustment of an
•
upstream regulator may be needed, or an upstream regulator or valve with insufficient flow capacity may
be present in the gas supply line. If this is suspected then it may be necessary to repeat the checks whilst
measuring both the inlet and outlet pressure to determine if the inlet pressure is in the range 1.13 – 5kPa.
•
Check that the regulator has been fitted to the gas supply line in the correct orientation, the arrow on the base
of the body indicates the direction of gas flow. Once these checks have been completed, if the regulator still
fails to perform in a satisfactory manner it should be replaced.
Testing the Cooker Features
Observe the flame appearance on each burner. If it is much smaller or larger than expected, then the injector size
needs checking.
When maximum flame appearance is correct, then check the turn-down setting on each burner. If the settings
appear to be incorrect, proceed as follows:
•
Adjust the bypass screw mounted on the body of each burner control cock. This is accessible when the
•
control knob and the control panel are removed.
•
Check the ignition on all burners both separately and in combination.
•
Check the operation of the electrical components, if applicable.
•
If you are satisfied that the cooker is operating correctly, then turn it off and show the customer how to use it.
Make sure you ask the customer to operate the clock and controls.
NOTE:
If the cooker cannot be adjusted to perform correctly, then inform the customer off the problem and put a
warning notice on the cooker. If the problem is dangerous, then disconnect the cooker. If there is a fault, then the
customer should be advised to contact the manufacturer’s local service organisation or the retailer.


