


14
RQT6301
Basic operations
C
A
B
8cm CD
12cm CD
a
b
c
d
e
4
,
5
[
4
]
[
5
]
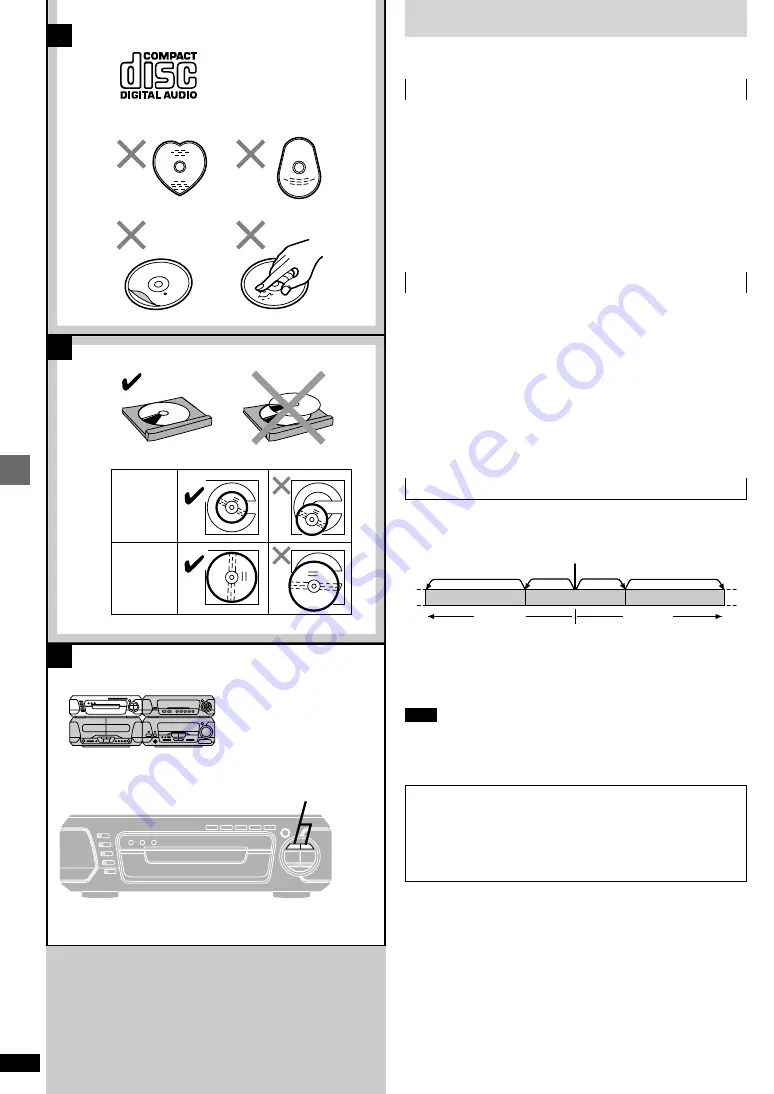
CDs
See pages 8 and 9 for basic CD play.
»
A
CD selection
Choose discs with this mark (
=
).
Do not;
³
use irregularly shaped discs (
>
).
³
attach extra labels and stickers.
³
use discs with labels and stickers that are coming off or with adhesive
exuding from under labels and stickers (
?
).
³
attach scratch-proof covers or any other kind of accessory.
³
write anything on the CD.
³
clean CDs with liquids. (Wipe with a soft, dry cloth.)
³
use CDs printed with label printers available on the market.
»
B
To prevent damage
Always observe the following points.
³
Load only 1 CD per tray (
@
).
³
Load CDs as shown in figure (
A
).
An adaptor is not needed with 8 cm CDs (singles).
³
Set the system on a flat, level surface.
³
Always unload all CDs before moving the system.
Do not;
³
set it on top of magazines, inclined surfaces, etc.
³
move the system while tray is opening/closing, or when loaded.
³
put anything except CDs in trays.
³
use cleaning CDs or CDs which are badly warped or cracked.
»
C
Skipping and searching through tracks
Skipping tracks
Press [
4
] (backward), or [
5
] (forward).
Searching through tracks
During play
Press and hold [
4
] (backward), or [
5
] (forward).
Note
³
Skipping is done in the selected order in program play (
á
page 15).
³
You cannot skip to tracks already played in random play
(
á
page 16).
³
You can search only within tracks in program and random play.
Twice
Once
Twice
Track
Current position
Once
Track
Track
Note on CD-R and CD-RW
This unit can play CD-DA format audio CD-R and CD-RW that have
been finalized
¤
upon completion of recording. It may not be able to
play some CD-R or CD-RW due to the condition of the recording.
¤
Finalizing is a process that enables CD-R/CD-RW players to play
audio CD-R and CD-RW.


