


5
WiFi (Join Network)
The DG-1000 can join a wireless network using one of
these methods.
1. The DG-1000 can search for nearby wireless networks
and populate a list so one can be selected and joined.
2. A wireless network name (SSID) can be manually
typed in, searched for and then joined.
Once the DG-1000 joins a wireless network, the gauge can be
accessed using TEC software if the computer or mobile device
running the software is also connected to the same network.
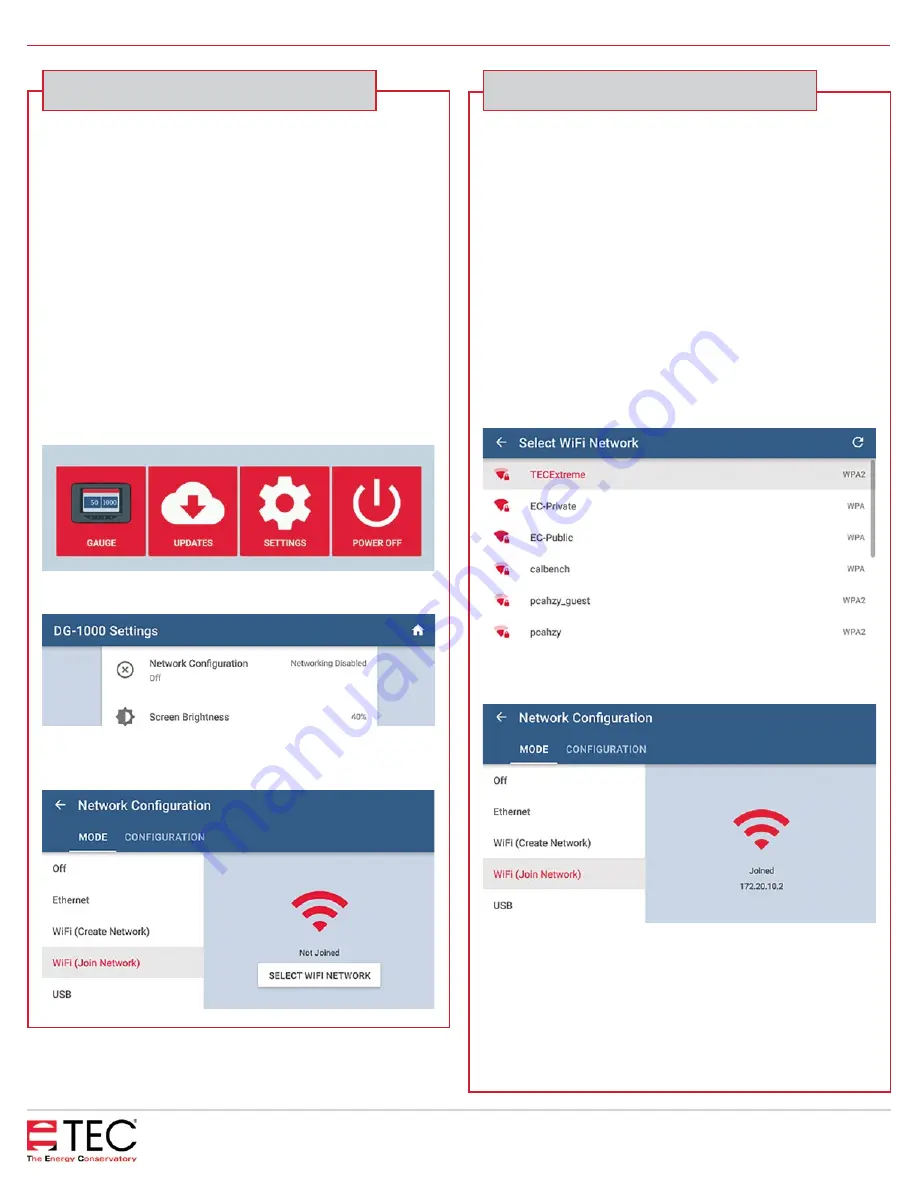
Enable WiFi (Join Network)
1. From the Home screen, touch Settings
2.
Touch Network Configuration
3. Touch WiFi (Join Network), then touch
Select WiFi Network
4. Select which WiFi network the DG-1000 should
connect to from the populated list. A screen will popup
asking for the password. Use the keypad provided to
enter the password, then touch Connect.
• Notes: Should the password require a character
that is not part of the keyboard on the gauge,
connect a keyboard using the USB port on the
gauge and enter the info using the external
keyboard. In addition, the DG-1000 does not
have an option for entering a username, so
WiFi networks that require a username can’t be
connected to by the DG-1000. Older software
versions may need to manually enter the WiFi
network SSID. To do this, touch the Configure tab
after touching WiFi (Join Network) and provide
the required information.
5. The status on the Mode screen will say Joined if the
DG-1000 was able to connect.
6. Connect the computer or mobile device to the same
wireless network. Once the computer or mobile device
is connected to the network, TEC software installed
on the device should be able to detect the gauge and
create a communication link.
Wireless connection options continued
Wireless connection options continued
CONNECTING A SINGLE DG-1000 QUICK GUIDE


