3. TELESCOPE ASSEMBLY
Telescope assembly will be the same regardless of the assembly method.
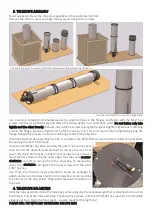
Remove the carton covers and align the parts according to the arrows.
Use a nail (pin included in the hardware box) to align the holes in the flanges, and fasten with the 5/32” hex
screws. Use the included hex key and fasten the screws lightly in a consecutive order. Do not fasten only side
tightly and the other loosely. Instead, install all 8 hex screws along the flange and lightly tighten each. Working
around the flange, gradually tighten each of them one by one. This will ensure uniform tightening along the
flange. Repeat the process on the second flange to attach the objective.
Use the red indicators to maintain alignment.
When the Optical Tube Assembly has been completed, the APO250FL can be mounted. Follow the procedure
to securely mount the telescope.
Once the APO250FL has been securely mounted, remove the blue
tape around the objective and proceed to remove the lens front
cover. Use the 1/16” hex key included in the hardware box to loosen
the three hex screws along the outer edge, turn the cover counter-
clockwise, and lift to remove from the objective. To replace the
cover, turn clockwise and tighten the outer screws with the same
1/16” hex key.
Use three 6-32 thumb screws (included in hardware package) to
attach and secure the Dew Shield to the objective. Avoid touching
the interior of the dew shield, fingerprints leave white residue on
the paint.
Use another person to securely hold the telescope while assemblying vertically.
Slide the tube assembly inside the tube rings while adjusting the counterweight that is attached to the rail on
the focuser end of the tube assembly. Continue this process, until the APO250FL has reached a comfortable
viewing position. Open the front cover - you are ready for the night sky!
PLEASE CALL TEC WITH ANY QUESTIONS: 303 273 9322
4. TELESCOPE BALANCING


