Z
LP-R500 Quick-Start Recording Guide
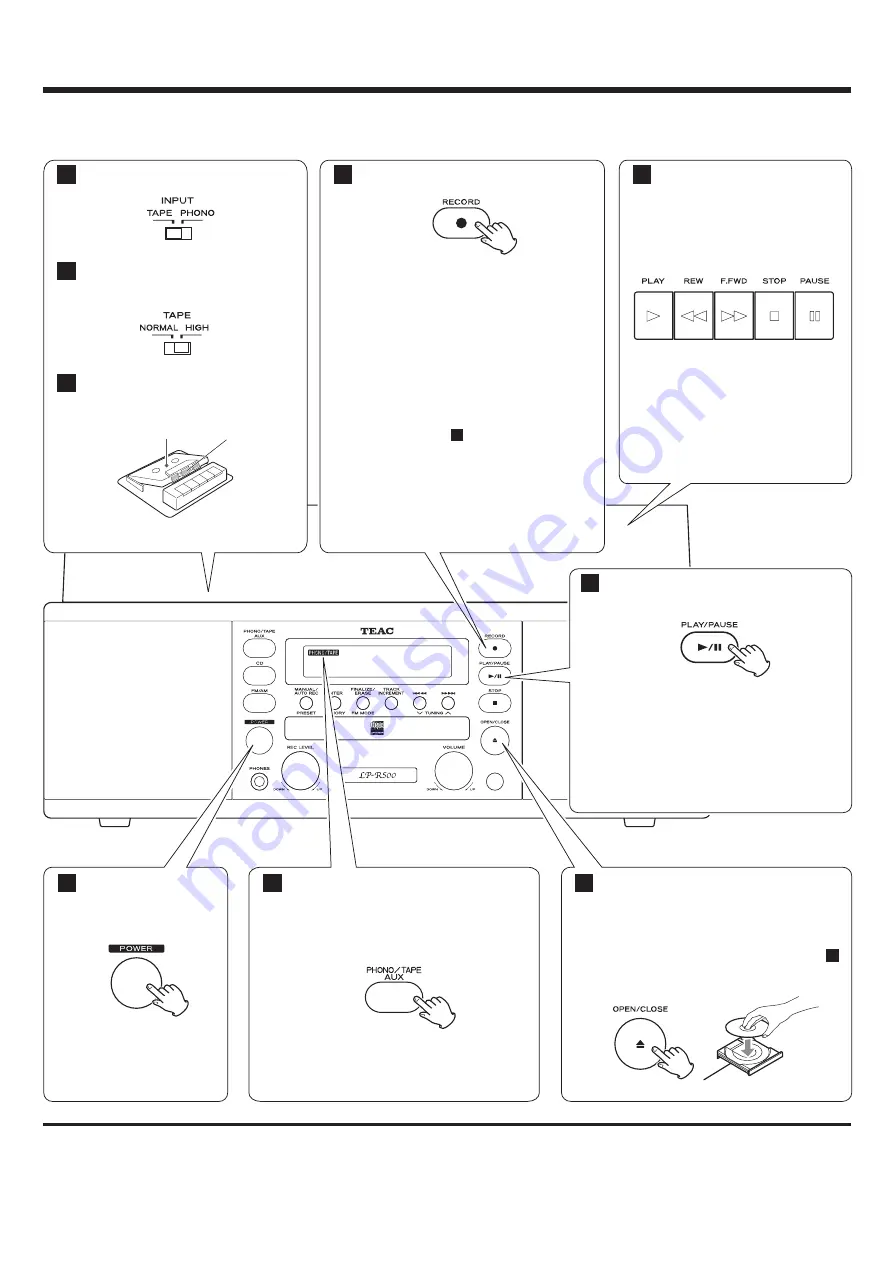
If the PHONO/TAPE indicator does
not appear in the display, press the
PHONO/TAPE/AUX button repeatedly
to select PHONO/TAPE.
2
Load a recordable CD-R or CD-RW
disc into the unit.
Make sure “NO TOC” and “CD-R” (or
“CD-RW”) indicators lights on the
display, or the RECORD button in step
will not work.
7
3
Press the PLAY button (
y
)
of cassette tape.
To prevent the beginning part
from being cut out, see page
26 of Owner's manual.
8
Press the POWER
switch to turn the
unit on.
1
Press the RECORD button.
The red indicator on the RECORD
button blinks.
The unit enters record pause mode.
“REC” indicator blinks and the
J
indicator lights on the display.
The recording does not start in this
step. To start recording, make sure
to press the PLAY/PAUSE button
(
G
/
J
) in step .
• To adjust the recording level, turn the
REC LEVEL knob. See page 26 of
Owner’s manual for detail.
9
7
Set the INPUT switch to “TAPE”.
Set the TAPE switch to fit your
cassette tape.
Set a recorded cassette tape in
the cassette holder.
6
5
4
Press the PLAY/PAUSE button (
G
/
J
)
to start recording.
When the playback of a cassette tape
finishes, the recording will stop
automatically.
Not to record excessive operation sound,
press the STOP button (
H
) to stop
recording as soon as the number on a
cassette tape to be recorded finishes.
9
From Cassette Tape
Tape
Side to play
Manual track division
It is possible to divide the recording into tracks while recording.
While the recording is taking place, press the TRACK INCREMENT button.
The current track number will be incremented by one.


