background image


28


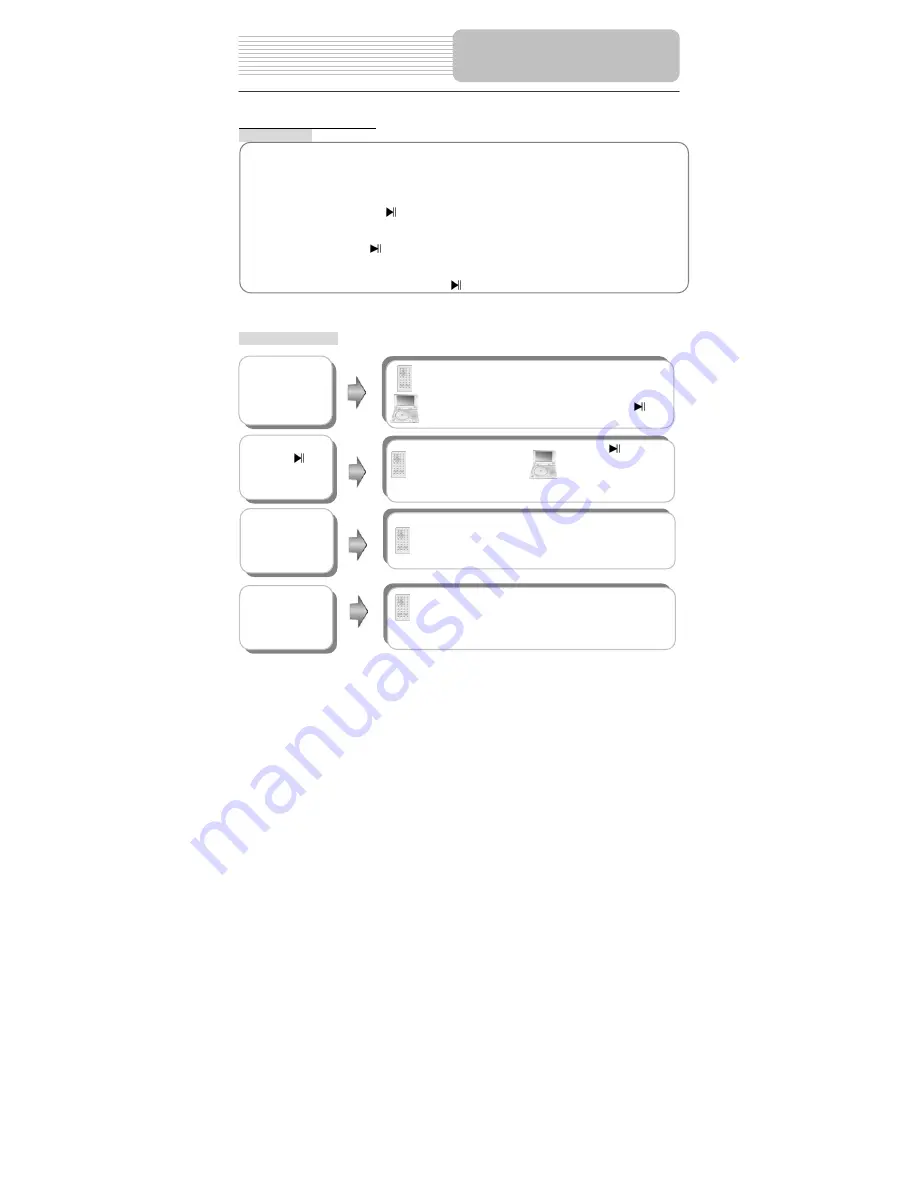
Picture CD Playback 

Pre-operation 


Note: Many discs have other items besides pictures. 
 

Buttons Operation


playP 


Playback Operation 

1. 

Load a Picture CD in the disc tray, the player will search and play the disc 
automatically. 

2. 

The screen displays the Root Folder with several subdirectories/subfolders. Use 
the

,

 buttons on the remote control to select the desired folder. 

Then you can 

press any of the buttons below to confirm your selection: ENTER, PLAY buttons on 
the remote control or 

, OK button on the front panel.


3. 

The screen enters the selected subfolder with several files. Use the 

,

 buttons on 

the remote control to select the desired file. Then press the ENTER button on the 
remote control or 


button on both remote control and front panel to confirm your 

selection. 

4. Press 

the

button to return to the last folder or directory. then press the ENTER 

button on the remote control or the 

  button on front panel to confirm.   


INFO button 

Press the INFO button for detailed information on 
the disc playing. 

This function is only available under folder mode. 


STOP/


button 

Press the 

STOP(on the remote control)

 or 

(on 

the front panel)

 button to preview the pictures while 

playing as thumbnail images. 


Press the PLAY(

on the remote control

) or 


(on 

the front panel) 

button to resume normal playback. 


PAUSE

/  

button 

Press the 

PAUSE

 button 

to pause playback. Press 
it again to resume normal 
playback.


Press the 

 button to 

pause playback. Press 
it again to resume 
normal playback.


&


buttons 

Press the 

 PREV button to go to the previous file. 

Press the 

NEXT button to go to the next file.


Summary of Contents for DV-P701

Page 1: ...PLAYER PORTABLE DVD PLAYER DV P701...

Page 2: ...ised Service Centre Where in home service is not available the purchaser is required to send the product to the nearest TEAC Authorised Service Centre for repair In this event a copy of this warranty...

Page 3: ...e any obligation on it in connection with the sale of any equipment other than as stated in this warranty and outlined above 11 In no event will TEAC be responsible or liable for indirect or consequen...

Page 4: ...Service Centre 3 Please have your purchase receipt as your proof of purchase and the following details completed for a valid Warranty Owner s Name Owner s Address Postcode Model Name No Serial No Dea...

Page 5: ...ns CAUTION TO REDUCE THE RISK OF ELECTRIC SHOCK DO NOT REMOVE COVER OR BACK NO USE SERVICEABLE PARTS INSIDE REFER SERVICING TO QUALIFIED SERVICE PERSONNEL The lightning flash with arrowhead symbol wit...

Page 6: ...rong is provided for your safety If the provided plug does not fit into your outlet consult an electrician for replacement of the obsolete outlet 10 Protect the power cord from being walked on or pinc...

Page 7: ...ohibited Region code information DVD players and discs are coded by region If the region number described on the DVD disc does not correspond to the region number of this product this product cannot p...

Page 8: ...U S and other countries On screen Display You can choose from English Spanish French etc for On screen Display language Compatibility Compatible with DVD CD PICTURE CD and DIVX disks Particular Perfo...

Page 9: ...Remote Control 1 Owner s Manual 1 Power supply Cord with AC adapter 1 Audio Video Cable 1 Rechargeable battery pack 1 DC Adapter Car Adapter 1 NOTE Accessories and their parts numbers are subject to m...

Page 10: ...ing Specifications Definitions System Setup View of Side Panels View of Main Unit Bottom Power Supply Preparation Rechargeable Battery Notes on Discs Playback Operation Remote Control Preparation and...

Page 11: ...rs output high quality sound 3 button Press to increase decrease the level of the selected item 4 MODE button Press to change the aspect ratio or change the brightness contrast and color level 5 ZOOM...

Page 12: ...button press the direction button to select items press to play the previous track or the next track 11 OK button Press to confirm your selection 12 STOP button 13 PLAY PAUSE button Press to start pla...

Page 13: ...ut output Jack For connecting to an external amplifier or audio source 4 VIDEO input output Jack For connecting to an external monitor or video source 5 DVD AV IN Switch Switch to AV IN to input the e...

Page 14: ...10 View of the bottom 1 Rechargeable Battery Contacting Point For connecting with the rechargeable battery pack View of Main Unit Bottom...

Page 15: ...Press the button again to remove information from screen 3 TITLE button Press to display title menu if the titles are coded in the disc 4 Direction button Press to select menu items 5 ENTER button Pre...

Page 16: ...ng the zoom icon will always be displayed when in ZOOM mode 14 REP button Press to repeat a chapter track title or the entire disc 15 MENU button Display the actual DVD Disc Menu on screen in playback...

Page 17: ...l use at room temperature Using of Remote Control 1 For best results aim the remote control directly at the player s receiving window within the range of 15 feet and angles of 60 degree and without ob...

Page 18: ...observe the color coding when connecting audio and video cables Connecting to TV Audio Video connections Please follow the drawings below to connect the DVD player to TV s Audio Video inputs with Audi...

Page 19: ...to AV IN Notes noise may occur in speakers when input an external audio signal while playing a DVD disc Unplug the audio cord to clear the noise When the AV switch is set to AV IN the unit will displ...

Page 20: ...lease detach the battery pack when using the car adapter as the power source We advise you to disconnect the player from the Cigarette Lighter at the instant of car start up Your portable DVD player c...

Page 21: ...fire or water Do not expose the battery to high temperatures or store in hot sunny places Maintain well ventilated conditions around the product to avoid overheating Don t put the product on a bed so...

Page 22: ...layer and push the battery pack into the DVD player 3 Slide the Battery Pack until you hear it click Charging the Battery Pack The battery pack must be attached to the DVD player to charge it using th...

Page 23: ...the battery Make sure the power is turned OFF before detaching the Battery Pack Refer to the following steps for detaching the Battery Pack 1 With one hand push the battery fastener ahead and the othe...

Page 24: ...Care of Discs Holding Discs Cleaning When loading or removing discs try not to touch their playing surfaces as the right figure Fingerprints or stains on the disc may affect the quality of sound and p...

Page 25: ...ial image 3 Press the OPEN button on the unit put a disc in the disc tray with the printed side facing up then close the disc cover See the figure below 4 The player will search the disc and enter the...

Page 26: ...player will search the disc and play it automatically press the direction buttons to highlight the item that you prefer and press the ENTER button or the OK button on the front panel to start playbac...

Page 27: ...ack Press the direction buttons to select the desired title or disc menu item and press the ENTER button or OK button on the front panel to confirm Or press the 0 9 buttons to select the item you pref...

Page 28: ...uence Press the GOTO button to select desired disc starting time track or title During DVD playback press it to display as follows GOTO button Press the buttons to move the yellow light bar to the ite...

Page 29: ...ivided into several titles there can be several menus in a title Press the TITLE button during playback The title menu will appear on the screen Press the direction buttons or press the 0 9 number but...

Page 30: ...to stop playback then press PLAY to resume normal playback from the place where it was stopped Press it twice repeatedly to stop playback completely During playback press the button once to stop playb...

Page 31: ...ay as follows Note refers to the playing track number N refers to the total track numbers of the disc INFO button AUDIO button Press the AUDIO button to select the desired sound effect Press it repeat...

Page 32: ...remote control or button on both remote control and front panel to confirm your selection 4 Press the button to return to the last folder or directory then press the ENTER button on the remote control...

Page 33: ...ck Press the REP button to repeat a file folder in sequence Press it repeatedly to display as follows Shuffle Random Single Repeat One Repeat All Repeat Off Shuffle refers to Plays back the files of t...

Page 34: ...an press the direction buttons to rotate the current picture Press the button to rotate the current picture clockwise as in the following drawings Press the button to rotate the current picture anti c...

Page 35: ...of 2X 4X 8X 16X 32X in sequence Press the button to start fast reverse playback Press it repeatedly to fast reverse at the speed of 2X 4X 8X 16X 32X in sequence Press the PLAY button or button on the...

Page 36: ...der Single plays the current file As soon as it comes to an end play will be stopped Repeat One refers to repeating the current file Repeat All refers to repeat all files of the current folder accordi...

Page 37: ...as follows INFO button GOTO button Press the GOTO button to select the desired discs starting track or track starting time During DIVX playback press it repeatedly to display as follows Select Go To P...

Page 38: ...ime during setting 3 Press the or direction buttons on the remote control or on the front panel to select a sub menu that you want to set up 4 Press the or button on the remote control or on the front...

Page 39: ...ction button to exit this item 5 Captions This item is used to turn the captions on or off during playing Press the or button to highlight this item Press the ENTER or to enter the setup of this item...

Page 40: ...tup 7 Last Memory This item is used to set last memory state Note The last memory refers to resume playback from the point that you stopped last time Press the or button to highlight this item Press t...

Page 41: ...the direction button to exit this item 2 Dynamic This item is used to adjust linear dynamic compression rate to get different signal compression Effects Press the or button to highlight this item Pres...

Page 42: ...adjust contrast level of the Screen Press the or button to highlight this item Press the ENTER or to enter the item Press the or button to adjust to desired level The default level is 00 Press the ENT...

Page 43: ...R or button to enter the item The available languages are English French Spanish Chinese Japanese Korean Russian and Thai Off by default Press the or button to choose the preferred Language Press the...

Page 44: ...item is used to reset the unit Press the or button to highlight this item Press the ENTER or button to enter this item Press the ENTER button to reset Then all the settings of your unit will return to...

Page 45: ...le 2 Chapter1 Chapter 1 Chapter2 Track CD CDs are divided into some sections tracks Each section is numbered these numbers are called Track number Track 1 Track 2 Track 3 JPEG DIVX DIVX is the name of...

Page 46: ...isc in to the DVD drive The disc may not be put in with the right way Put the disc in with the label side up The disc may be dirty or warped Clean or change the disc The player s region code may not a...

Page 47: ...e The system connection may be not correct Connect the system correctly The unit may be not in AV out mode Switch AV tab on the bottom of the unit to out Poor AV performance The disc may be dirty or w...

Page 48: ...namic Range 80dB 1kHz Audio Out Analog Audio Out Out Level 1 5V 0 2 1 0 Load 10K Video Out Video Out Out Level 1VP P 0 1 Load 75 Unbalanced Negative Power AC 100 240V 60 50Hz Power Consumption 25W Dim...

Page 49: ...50 0152 Electronics 2000 Shop 3 190 Sharp Street COOMA 2630 02 64 52 4179 02 64 52 4179 Lachlan Valley TV 49 Vaux Street COWRA 2794 02 63 42 2189 02 63 42 2189 Greg s TV 2 Bingalong Street DALMENY 25...

Page 50: ...YMOND TCE 2324 02 49 87 7032 02 49 87 6194 QQ Electronics Pty Ltd Unit 5 14 38 Bellona Avenue REGENTS PARK 2143 1300 883 229 0297 38 1311 Quickfix Repairs Shop 17 West Market Street RICHMOND 2754 02 4...

Page 51: ...1 Hart Street MACKAY 4740 07 49 57 6498 07 49 51 3737 Sunland TV Service Unit 5 Centre One Norval Court MAROOCHYDORE 4558 07 54 43 6444 07 54 43 6464 Telefix Unit 1 96 Aerodrome Road MAROOCHYDORE 4558...

Page 52: ...C Phone Fax VIC Border Video TV Service 362 Griffith Road ALBURY 2641 02 60 40 2229 02 60 40 2184 Greene s Television Services 149 Hummfray Street BALLARAT 3350 03 53 32 6256 03 53 32 7597 Ted Rivett...

Page 53: ...ON 6280 08 97 54 4457 08 97 54 4824 Electronic Plus Unit 3 11 Egan Street CARNARVON 6701 08 99 41 3690 08 99 41 3660 Esperance Communications 33 Norseman Road ESPERANCE 6450 08 90 71 3344 08 90 71 454...

Page 54: ...TEAC CUSTOMER CARE CENTRE TCCC Free call 1800 656 700 Between Monday to Friday EST 9AM to 5PM...

Reviews: