


page 2
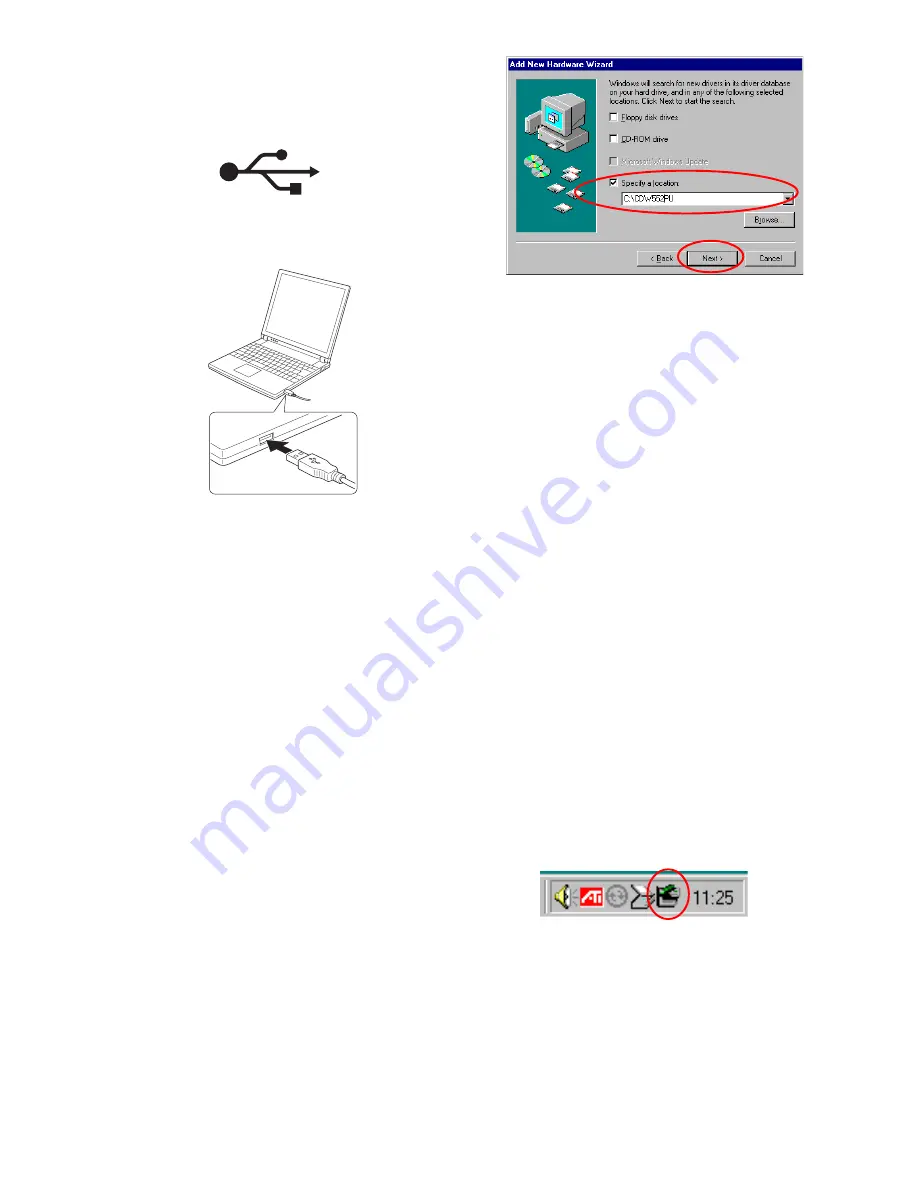
Insert the A plug of the USB connector to
the USB terminal of the computer.
(5) Locate the USB terminal of your computer.
Refer to the instruction manual of your com-
puter for its location. The following logo is
usually indicated near the USB terminal.
(6) There appear some messages on the screen
followed by the appearance of an CD-ROM
icon in the window My Computer. Now the
drive is ready to use.
Very important:
When you are using Windows 98SE and
the drive is connected for the first time,
it is required to read and install the de-
vice driver file from the provided CD.
Driver installation under Windows98SE
(1) Connect as described before the dedicated
AC adapter to the drive, then connect the
USB interface cable between the drive and
your computer.
(2) Add New Hardware Wizard starts automati-
cally.
(3) Ensure your driver CD is inserted correctly
into a CD-ROM drive and select “Search for
the best driver for your device (Recom-
mended)”. Click Next.
(4) When specifying the location to search the
driver, select “CD-ROM drive” or check
“Specify a location” and input the location of
the driver folder if you have saved them in
advance on your computer (The window
below is an example if the folder CDW552PU
in drive C: is specified). Click Next.
(5) If the driver was found (TTP300.INF for
USB2.0; TTPSL11R.INF for USB1.1), click
on Next.
(6) After sucessfully finishing the installation the
hardware assistant is closed with Finish.
Important:
If an error message appears you may
move one step backwards or cancel the
process (using Cancel) and try it again
later. If installation of the driver fails you
will see in the device manager an excla-
mation mark (!) or a question mark (?).
Remove the driver and start the installa-
tion process again.
Disconnecting the drive
The drive can be disconnected from the PC if it
is not used any longer during the actual session.
It is of major importance to logoff the drive at the
PC before disconnecting it.
(1) Close the program that uses the drive.
(2) Confirm that the busy indicator of the drive
is off.
(3) Click the Remove icon on the Taskbar.
(4) Select the removing drive with the name
assigned to the drive.
(5) The Remove Hardware confirmation mes-
sage „Save to remove storage device“ ap-
pears. Click the OK button.
(6) Remove the plug of the USB cable from the
USB terminal of the computer.


