408-4087
2 of 5
Rev C
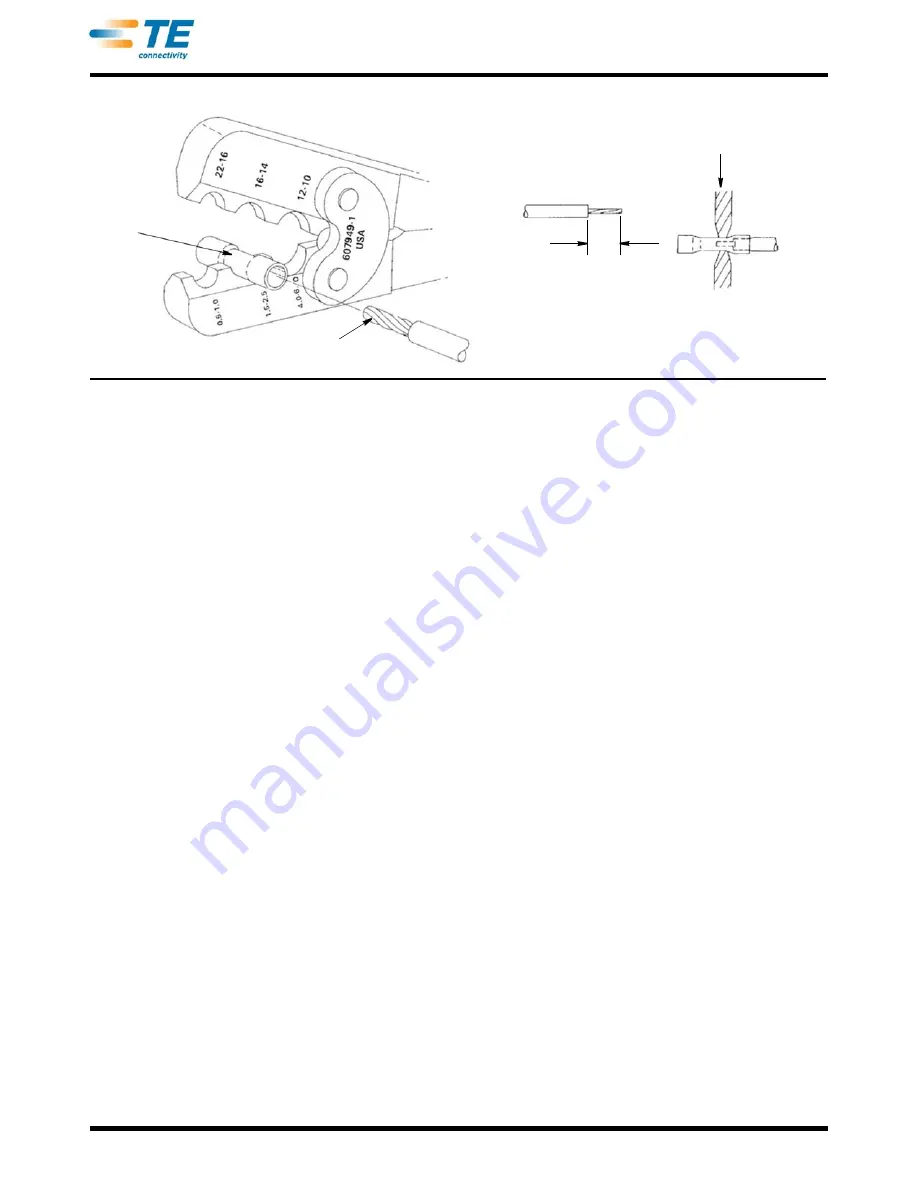
Figure 2
4.2. Periodic Inspection
Hand tool should be immersed (handles partially
closed) in a reliable commercial degreasing
compound which does not attack paint or plastic
material, to remove accumulated dirt, grease, and
foreign matter. The tool should be re-lubricated after
cleaning. The tool may then be wiped clean with a
soft, lint-free cloth. Do NOT use hard or abrasive
objects that could damage the tool. Ensure that the
tool conforms to the information in Figure 6.
A. Lubrication
Lubricate all pins, pivot points, and bearing surfaces
with SAE
†
20 motor oil as follows:
•
Tools used in daily production - lubricate daily
•
Tools used daily (occasionally) - lubricate weekly
•
Tools used weekly - lubricate monthly
Wipe excess oil from tool, particularly from crimping
area. Oil transferred from the crimping area onto
certain terminations may affect the electrical
characteristics of an application.
B. Visual Inspection
1. Close tool handles until ratchet releases and then
allow them to open freely. If they do not open
quickly and fully, the tool is defective and must be
replaced. See Section 6, REPLACEMENT.
2. Inspect jaws for worn, cracked, or broken areas.
If damage is evident, the tool must be replaced. See
Section 6, REPLACEMENT.
C. Gaging the Crimping Chamber
This inspection requires the use of plug gages
conforming to the dimensions in Figure 3.
TE Connectivity does not manufacture or market these
gages. To gage the crimping chamber, proceed as
follows:
1. Remove traces of oil or dirt from crimping
chamber and plug gages.
2. Close the tool handles until it is evident that the
jaws have bottomed, then HOLD in this position. Do
NOT force the jaws beyond initial contact.
3. Align the GO element with the crimping chamber.
Push element straight into the crimping chamber
without using force. The GO element must pass
completely through. Refer to Figure 3.
4. Now align the NO-GO element and try to insert it
straight into the same crimping chamber. The NO-
GO element may start entry but must not pass
completely through as shown in Figure 3.
If the crimping chamber conforms to the gage
inspection, it is considered dimensionally correct and
should be lubricated with a THIN coat of any good
SAE 20 motor oil. If not, the tool must be replaced.
See Section 6, REPLACEMENT.
D. Ratchet Inspection
Obtain a .025 mm [.001 in.] shim that is suitable for
checking the clearance between the bottoming
surfaces of the crimping jaws. (See Figure 3).
Proceed as follows:
1. Select a contact and wire (maximum size) for the
tool (see Figure 3).
Conductor
Crimp
Area
Stripped Wire
Crimping
Jaws
L = 7.14 [.281] 22-16-14 AWG
L= 9.53 [.375] 12-10 AWG
Splice
L
†
SAE is a trademark.


