9
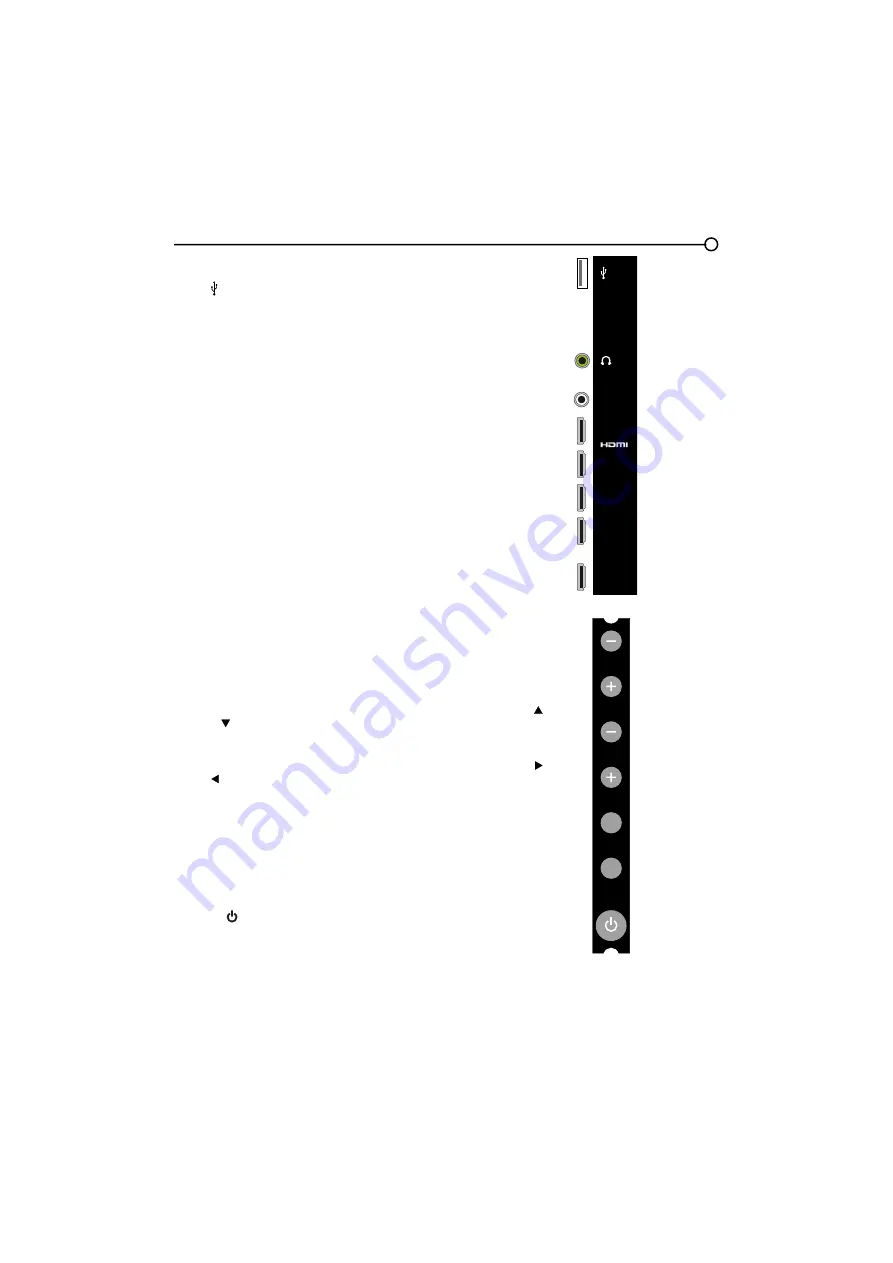
6LGH,QSXW-DFNV
USB ( )
Allows you to connect a compatible mass storage device using a USB
MDFN
HEADPHONE
Allow you to connect headphones to listen to the sound
FRPLQJIURPWKH79
AUDIO OUT Adapter
(you must connect an Audio adpter cable with two
FRORUMDFNVWRWKLVDGSDWHUMDFN¿UVWUHGDQGZKLWHMDFNVIRU5$8',2DQG
/$8',2FRQQHFWLRQ
8VHDQ5&$DXGLRFDEOHWRFRQQHFW\RXU79WRDFRPSDWLEOHDXGLR
receiver. (not availble in USB mode)
HDMI IN 2 / HDMI IN 3 / HDMI IN 4 / HDMI IN 5
Lets you connect a
FRPSRQHQWVXFKDVDGLJLWDOFDEOHER['0,RXWSXWIRUWKH
best picture quality.
HDMI/DVI IN 1
+LJK'H¿QLWLRQ0XOWLPHGLD,QWHUIDFH'LJLWDO9LVXDO
Interface) Provides an uncompressed digital connection that carries
both video and audio data by way of an integrated mini-plug cable.
6LQFH+'0,WHFKQRORJ\LVEDVHGRQ'LJLWDO9LVXDO,QWHUIDFH'9,WKH
MDFNRQWKHEDFNRI\RXU79LVDOVRFRPSDWLEOHZLWK'9,FRPSRQHQWV
Note:
If using a DVI component, remember to connect the audio cable
because the DVI cable carries only the picture signal, not the sound.
Side Panel Buttons
If you cannot locate your remote, you can use the side panel buttons on
\RXU79WRRSHUDWHPDQ\79IHDWXUHV
CH+/-
Press
CH+/-
to select channels stored in the channel list or to move up ( )
or down ( ) through the menu items.
VOL+/-
Press
VOL +/-
to increase or decrease the volume or to move right ( )
or left ( ) through the menu items.
VOL+(=OK)
When in the menu system, press to display sub-menus and
select highlighted items.
MENU
Press the
MENU
EXWWRQWREULQJXSWKH79¶V0DLQPHQX
INPUT
Press the
INPUT
button to select the signal source.
POWER ( )
3UHVVWKH32:(5EXWWRQWRWXUQWKH79RQDQGRII
HDMI/DVI IN 1
HDMI IN 2
HDMI IN 3
HDMI IN 4
HDMI IN 5
AUDIO OUT
adapter
VOL
CH
MENU
INPUT


