TCL L32HDF11TA User Manual Download Page 23


23

Default Audio Language


– 

Choose the language you 

prefer for dialog on digital channels. If the preferred 

language is not broadcasted with the program, then the TV 

plays the default audio for the program (usually 

English

 in 

the US). There are 3 available default languages (

English, 

French, Spanish

).

Current Audio Language


 Press the left or right arrow 

(

) to choose from the list of languages available for the 

program you’re watching. The language chosen becomes 

your preferred language for all digital channels until you turn 

the TV off. If the language chosen is not being broadcasted 

with a program, the TV plays the default language for the 

program (usually English in the US).

only available for digital channels
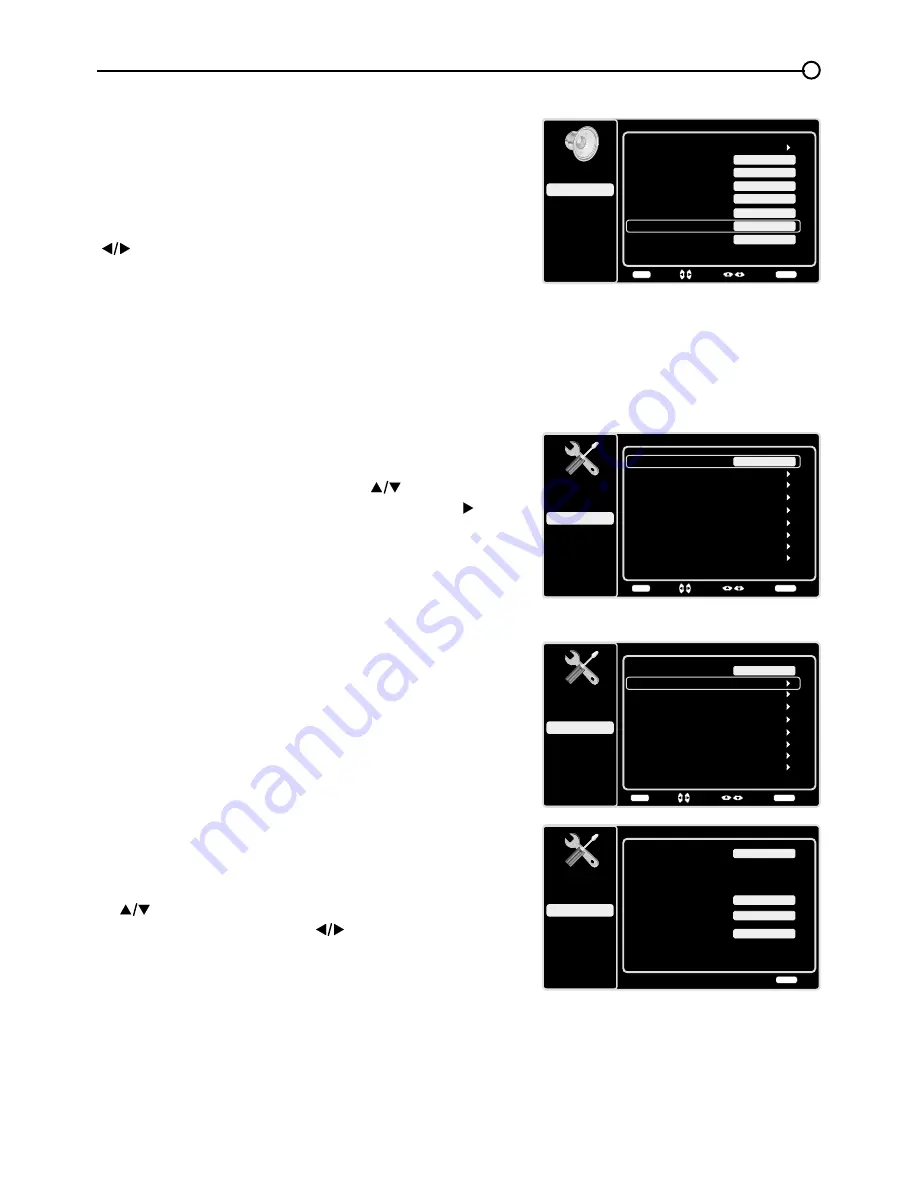
Sound

Setup

Parental Control

Language

Sound

Picture

Equalizer
Balance
Surround

Default Audio Language

USB

Exit

0

On

English

Current Audio Language

Unknown 5.1CH

Speaker

On

SPDIF Type

Dolby Digital

Auto Volume Control

Off

Back

MENU

Adjust

Select

Exit

CLEAR

Setup Menu

The 

Setup

 Menu allows you to configure the TV with your 

preferences. Press 

MENU

 on the remote to open the Main 

Menu. Press the up and down arrows (

) to select 

Setup

; then press the 

OK

 button or the right arrow ( ) to 

display the following options:

Signal Type

Choose the type of signal (

Cable/Antenna

) you have 

connected to the 

ANTENNA/CABLE IN

.

Channel Scan 

When you perform a Channel Scan, your TV searches for 

channels with signals and stores the channel information 

in the Channel List. Then, as you watch TV and press 

CH+


or 

CH-

, your TV goes to the next or previous channel in 

the Channel List and skips the channels that do not have 

signals.

If the TV signal source changes – for example, if you 

change from an outdoor antenna to cable TV – you will 

need to rescan for channels.

To automatically scan for channels:

1. After choosing a signal type, press the up or down arrow  

  (

) to highlight 

Channel Scan

.

2. Press the left or right arrow (

) to start the scan. You  

  can see the search progress and how many channels  

  are found in the on-screen menu. 

(

Note:

 If you wish to  

  stop the search, press the 

CLEAR

 button.)

3. After the scan is complete, press the 

MENU 

button to  

  return to the previous menu, or press the 

CLEAR

 button  

  to close the menu.

Setup

Setup

Parental Control

Language

Sound

Picture

Signal Type
Channel Scan

USB

Exit

Cable

Channel Skip
Channel Edit
Input Skip
Input Labels

Closed Caption

Time Setup

Reset All

Back

MENU

Adjust

Select

Exit

CLEAR

Setup

Setup

Parental Control

Language

Sound

Picture

Signal Type
Channel Scan

USB

Exit

Cable

Channel Skip
Channel Edit
Input Skip
Input Labels

Closed Caption

Time Setup

Reset All

Back

MENU

Enter

Select

Exit

CLEAR

Channel Scan

Setup

Parental Control

Language

Sound

Picture

Signal Type

Status: Scanning...

USB

Exit

Cable

Progress

10%

Analog Channels Found

0
0

Digital Channels Found

Exit

CLEAR

Summary of Contents for L32HDF11TA

Page 1: ...1 LCD TV User s Guide For use with models L24HDF11TA L26HDF11TA L32HDF11TA Need Assistance Please visit our website at www tclusa com or call 1 877 300 8837...

Page 2: ...y low power standby mode but will not completely turn the power off In order to completely shut the power off you will need to disconnect the power cord from the outlet Therefore you should ensure tha...

Page 3: ...he TV is placed on a cart use caution when moving the cart to avoid injury from tip over 12 Unplug this component during lightning storms or when unused for long periods of time 13 Refer all servicing...

Page 4: ...ng Muting the Volume 17 Screen Formats 18 Channel Banner 18 Chapter 3 Using the Remote Control Remote Control Buttons 19 Chapter 4 Using the TV Menu Using the Menu System 20 Picture Menu 20 Picture Se...

Page 5: ...n cables properly insert each cable firmly into the designated jack If you place components above the TV route all cables down one side of the back of the TV instead of straight down the middle If you...

Page 6: ...Remove the table stand which is attached to the back of the TV Use a screwdriver to remove the screw securing it to the TV Step 1 Remove the TV bag and place it on a large flat surface such as a tabl...

Page 7: ...ace down to avoid scratching the screen Step 3 Attach the table stand to the bottom of the TV cabinet To do this use a screwdriver to tighten the three M4 st screws Mounting Your TV to the Wall The VE...

Page 8: ...CMPT VIDEO inputs The right audioconnector is usually red SPDIF DIGITAL AUDIO OUT coaxial Use a digital coaxial cable to connect your TV to a compatible audio receiver HDMI IN 3 Lets you connect a com...

Page 9: ...ity Side Panel Buttons If you cannot locate your remote you can use the side panel buttons on your TV to operate many TV features CH Press CH to select channels stored in the channel list or to move u...

Page 10: ...nna with Coaxial Cable Plug the antenna or coaxial cable from the wall outlet into the ANTENNA CABLE INPUT on the back of the TV You are ready to receive off air local digital and analog channels Cabl...

Page 11: ...Component Video Audio Jacks Used Cable Needed Go to HDMITM HDMI DVI Adapter OR Audio Audio Audio Audio HDMI DVI Y Pb Pr Audio L and R Audio L and R Video VGA VGA PC IN HDMITM HDMI the HDMI logo and H...

Page 12: ...t Video Better Component video connection offers better picture quality for video devices connected to the unit To connect a component that has Y Pb Pr jacks such as a DVD player follow these steps Ex...

Page 13: ...select HDMI 1 Connecting a Component with HDMI Best High Definition Multimedia Interface HDMI technology is an uncompressed digital connection that carries both video and audio data by way of an inte...

Page 14: ...works the same on all menu screens highlight your choice and select it To highlight an item in the menu list press the up or down arrow to move up or down Use the left or right arrows to view other s...

Page 15: ...or the TV Location assigns the optimal picture settings for most home environments Choosing Retail which is not Energy Star compliant sets the unit up with predefined settings for retail displays In t...

Page 16: ...Scan or by pressing the CLEAR button you will need to follow this process the next time you decide to complete this procedure 1 Select the TV as input using the INPUT key 2 Go through the menu options...

Page 17: ...rom the TV into an AC power outlet 2 Press to turn on the TV 3 Press to turn off the TV When you turn the TV off it automatically goes into Standby Mode Note When your TV is in Standby Mode it is stil...

Page 18: ...s of the different formats appear below Each format is available for analog video but it might not be available for digital video Channel Banner There are several indicators that may appear when you p...

Page 19: ...m guide details are only available on digital channels 10 POWER Press the POWER button to turn the TV on and off 11 INPUT Press the INPUT button to open the Input list then press the INPUT button repe...

Page 20: ...s Picture Settings Picture Preset Displays a list that lets you select one of the preset picture settings Natural Vibrant Cinematic Sports ECO or Personal Choose the setting that is best for your view...

Page 21: ...e is especially useful for providing a clearer picture in weak analog signal conditions Press the left or right arrow to choose between these options Low for a softer smoother picture that retains pic...

Page 22: ...n On Off When you select the Off option the sound speaker on the TV will be turned off SPDIF Type Press the left or right arrow to select SPDIF Type This option controls the type of audio stream sent...

Page 23: ...ANTENNA CABLE IN Channel Scan When you perform a Channel Scan your TV searches for channels with signals and stores the channel information in the Channel List Then as you watch TV and press CH or CH...

Page 24: ...ital channels To edit an analog channel name 1 In the Setup Menu press the up or down arrow to highlight Channel Edit 2 Press the left or right arrow to open the Channel List screen 3 Press the up or...

Page 25: ...urn to the previous menu or press the CLEAR button to close the menu Input Labels You can add a label to a video input source to make it easier to identify 1 In the Setup Menu press the up or down arr...

Page 26: ...o select between Off and On options On mode allows you to set the options below Digital CC Style This option lets you customize the following display options if available Caption Style Select either A...

Page 27: ...t the time 1 In the Time Setup Menu press the up or down arrow to highlight Time 2 Press the left or right arrow to proceed to the next screen 3 Options on this screen include a Auto Synchronization P...

Page 28: ...When you select this option a confirmation box opens Note If some channels are blocked you must enter the V chip password then you can follow the operation below 1 Press the left or right arrows to s...

Page 29: ...4 Analog 5 Analog 6 Analog 7 Analog 8 Analog 9 Analog 10 Analog Setup Parental Control Language Sound Picture USB Exit Back MENU Set Select Exit CLEAR OK Parental Control Channel Block Button Block S...

Page 30: ...eft or right arrow to enter the next screen 5 U S TV Ratings is highlighted Press the left or right arrow 6 Use the up down left and right arrows to select the desired rating 7 Press the OK button rep...

Page 31: ...am ratings follow these steps 1 Press the up or down arrow to select V Chip in the Parental Control submenu 2 Press the left or right arrow to enter the next screen 3 Press the up or down arrow to sel...

Page 32: ...V Chip in the Parental Control submenu 2 Press the left or right arrow to proceed to the next screen 3 Select this option to reset the downloadable V Chip data When you select this option a confirmat...

Page 33: ...by pressing the to highlight the song then press OK for playback For slideshow options press MENU again to go to the Playback Options menu Thumbnail Size You can select to display the files or folder...

Page 34: ...rid of them Most digital video is sent in a 16 9 format which fills your screen but is sometimes sent in 4 3 which does not fill your screen It depends on how the station or device connected to your T...

Page 35: ...onent you ve connected to your TV you might have your video cables connected to the wrong jacks A yellow video cable connects to the yellow VIDEO INPUT jack on the side or back of your TV three video...

Page 36: ...up menu Go to page 26 for more instructions You are having problems with the HDMI Connection Make sure the HDMI or DVI component is turned on and the cables are firmly connected If problems still occu...

Page 37: ...rately in order to view movies with an NR rating What else can I do If you ve been through the Troubleshooting section and nothing has fixed your problem try rebooting your TV Note that after a reboot...

Page 38: ...o frighten younger children Canadian English V Chip Rating System 18 Adult Programming intended for adults 18 and older It may contain elements of violence language and sexual content which could make...

Page 39: ...extremely violent scenes 16 ans Viewer 16 and over Programming is not suitable for those under age 16 This program contains frequent scenes of violence or intensely violent scenes 13 ans Viewer 13 an...

Page 40: ...ent At the sole discretion of TTE television screen sizes 32 and smaller will either be repaired at an Authorized TCL Service Center or directly exchanged for a new or refurbished remanufactured unit...

Page 41: ...AND LIMITED WARRANTY ARE GOVERNED BY THE LAWS OF THE STATE OF INDIANA EXCEPT TO THE EXTENT PROHIBITED BY APPLICABLE LAW ANY IMPLIED WARRANTY OF MERCHANTABILITY OR FITNESS FOR A PARTICULAR PURPOSE ON T...

Page 42: ...42...

Page 43: ...43...

Page 44: ...re of the following measures Reorient or relocate the receiving antenna Increase the separation between the equipment and receiver Connect the equipment into an outlet on a circuit different from that...

Reviews: