background image

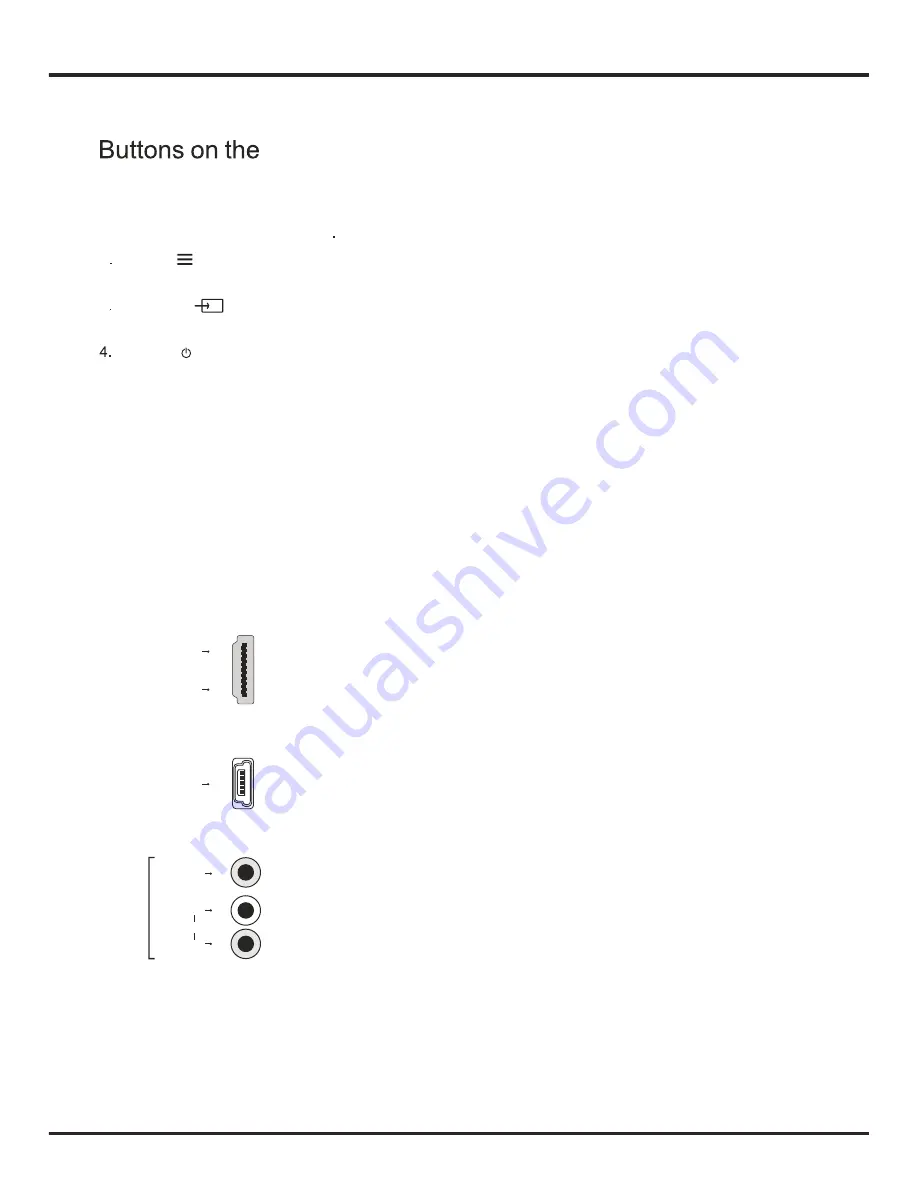
MENU

(


.

Brings up the main menu or press to return to the previous menu

1

VOLUME UP/DOWN (VOL+/-)button

    Increases/decreases the volume. In the menu system, they act like the right/left direction buttons on the 
    remote and adjust menu controls 


Turns the set on or standby

.  (

Note

for some models

the POWER button turns the set on or off

.) 


Note

The


location


and


names


of


the


function


buttons


and


power


button


on


the


set


may


vary


according


to


the model

SOURCE

 (          ) button


Press to select signal source

.

Sockets


available


on


all


models


HDMI 1

HDMI1 and HDMI2 socket 

(

input

HDMI 2

or

The HDMI 

can


be


used


to


connect


a


PC


with


a


compatible


video


card


installed

certain


DVD


players


or


a


high

-

definition


compatible digital satellite decoder

This socket p

(

High

-

Definition Multimedia Interface

socket 

rovides


an


uncompressed


digital


connection


that


carries


both


video


and


audio


data


by


way


of


an


integrated


mini

-

plug


cable

.

USB socket (input) 

This


socket

Note

The number of USB sockets on the set may vary according to 

 model. 

set


USB

AV 1 RCA audio 


video sockets 


input   

Note

AV


1


IN


adapter


The 

socket


can


be


used


to


connect


the


attached


AV


adapter


cable


with


VIDEO


and


AUDIO


L


&


R


IN


sockets

.

R

L

AUDIO

VIDEO

AV 1 IN

The


AV


IN


sockets


can


be


used


to


connect


a


range


of


equipment

including


video


recorders

camcorders

decoders

satellite


receivers

DVD


players

or


games


consoles

The


VIDEO


IN1


socket


provides

 composite video connection.


button

2

POWER

 ( ) button

 +   

(

(

can be used to connect an USB device.

set

Note

The


location


and


names


of


the


sockets


on


the


s

et


may


vary


according


to


t

he


model

and


not


all


sockets


Getting started           


EN

4

This socket is only used to update program.

3

Summary of Contents for H46F3500G

Page 1: ...72 MS280G S03AG 2013 9 10 MS28 李紫云 ...

Page 2: ...液晶显示器 液晶显示器 使用显示器 显示器 显示器 使用 显示器 显示器 显示器 版本 72 MS280G S03AG 公司维修服务部地址请咨询4008 123456 H46F3500G H55F3500G H65F3500G 液晶显示器使用说明书 ...

Page 3: ......

Page 4: ......

Page 5: ......

Page 6: ...07 08 05 01 ...

Page 7: ...02 产品使用注意事项 显示器 显示器 显示器 显示器 显示器 显示器 显示器 显示器 显示器 显示器 显示器 显示器 显示器 显示器 显示器 显示器 液晶 显示器 ...

Page 8: ...液晶显示器 中英文菜单 03 ...

Page 9: ... 以H46F3500G为例 以H46F3500G为例 P P V V 上 下选择键 菜单打开时有效 确认键 04 ...

Page 10: ...电池不得暴露在诸如日照 火烤或类似过热环境中 7 FORMAT PRESETS S EFFECT FREEZE SOURCE MENU EXIT INFO 显示器 100V 240V 显示器 显示器 显示 器 显示器 显示器 显示器 显示器 显示器 05 ...

Page 11: ...英文 06 ...

Page 12: ...F3500G H46F3500G 最大工作电流 2 3A 1 3A 1 4A 100V 240V 50 60Hz 100V 240V 50 60Hz 100V 240V 50 60Hz 1058 7 627 7 56 5 1250 735 59 2 14 4 20 33 5 164cm 1470 864 54 1 英文 工作温度0 40 工作相对湿度20 80 非冷凝 存储温度 20 60 存储相对湿度20 80 非冷凝 07 ...

Page 13: ...信号源 信号源 信号 08 ...

Page 14: ...LCD MONITOR OPERATION MANUAL H46F3500G H55F3500G H65F3500G ...

Page 15: ...Getting started EN 1 ...

Page 16: ...EN 2 ...

Page 17: ...y a few nonactive pixels may appear on the screen as the performance of your product a soft cloth and mild detergent to clean the rest of the set Important Using strong detergents alcohol based and abrasive products may damage the screen Dust the vents at the back and sides regularly Using solvents abrasive or alcohol based products could damage the set If an object or liquid enters the appliance ...

Page 18: ...is socket p High Definition Multimedia Interface socket rovides an uncompressed digital connection that carries both video and audio data by way of an integrated mini plug cable USB socket input This socket Note The number of USB sockets on the set may vary according to model set USB AV 1 RCA audio video sockets input Note AV 1 IN adapter The socket can be used to connect the attached AV adapter c...

Page 19: ...nent sockets input Note Y Pb Cb Pr Cr COMPONENT These YPbPr sockets can be used to connect a device that has component video sockets such as a DVD player The component sockets can recognize if the device you re connecting to is Y Pb Pr compatible or Y Cb Cr compatible The component sockets provide excellent picture quality because the video is separated into three separate parts Note The audio inp...

Page 20: ...s sunshine fire or the like If the batteries in your remote control are run down you can use the buttons on your set In mode they have the same functions as the corresponding buttons on the remote control In the menus they have the following functions For models with OK button on the set For models without OK button on the set VOL or VOL VOL or VOL VOL orVOL VOL orVOL MENU or MENU MENU or MENU OK o...

Page 21: ...onitor witch the set on by pressing the power button 2 Connect the power cable FIRST to the monitor THEN to a mains socket Note If the power cable is connected to the please only connect the monitor power cable to the mains socket Your set should only be connected to an AC supply It must not be connected to a DC supply If the plug is detached from the cable do not under any circumstances connect i...

Page 22: ...splay the menu items of the Picture to access option items of the Sound 2 3 Function 45 min 60 min 90 min 120 min off time Setting Current Time Press OK and a number keyboard appears on the screen Press to choose numbers and press OK to confirm To delete the inputted numbers press DEL on the soft keyboard Press Finished on the soft keyboard to save what you have inputted Power Off Style Once Every...

Page 23: ...ion If this equipment does cause harmful interference to radio or television reception which can be determined by turning the equipment off and on the user is encouraged to try to correct the interference by one or more of the Reorient or relocate the receiving antenna Increase the separation between the equipment and receiver This Class B digital apparatus complies with Canadian ICES 003 Please d...

Reviews: