P.2
2. Installation
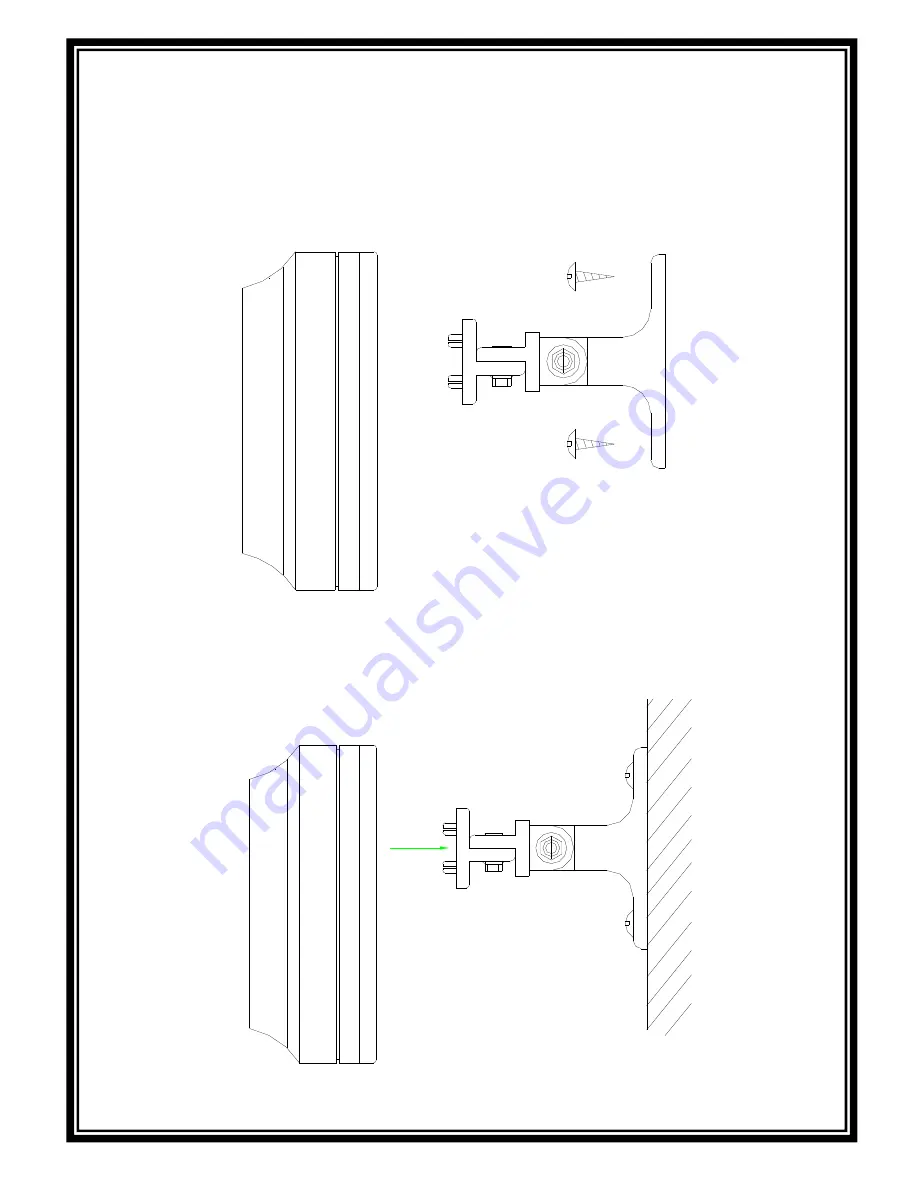
STEP 1: Secure the bracket to the wall with screws. ( included as shown in
Figure 1 )
STEP 2: Attach the Camera Case to the bracket as shown in Figure 2.
Page 1: ...N CCD Camera uses high sensitive 1 3 1 4 interline transfer CCD Image Sensor CCD Charge Coupled Device and all state circuitry which provides extremely long life and high reliability This Camera offer...
Page 2: ...P 2 2 Installation STEP 1 Secure the bracket to the wall with screws included as shown in Figure 1 STEP 2 Attach the Camera Case to the bracket as shown in Figure 2...
Page 3: ...and by turning the bracket vertically and horizontally 3 Wiring instructions STEP 1 Connect the coaxial cable between the camera and the monitor using a 75Ohm coaxial cable STEP 2 Insert the AC plug...
Page 4: ...X F2 0 0 4 LUX F2 0 Scanning System Interlace 2 1 Auto Electronic Shutter EIA 1 60s 1 120 000s CCIR 1 50s 1 120 000s EIA NTSC 1 60s 1 100 000s CCIR PAL 1 50s 1 110 000s S N Ratio More than 48 dB Gamma...
Page 5: ...e to detect longer distance and wider pattern B To lower sensitivity Turn counter clockwise for detection in narrow areas 3 Dwell Time Adjustment Adjustable from 2 to 40 sec For closure period of N C...
Page 6: ...tects someone and either the alarm or Security control panel or Recording control will be triggered immediately Position 2 Set to Twice when PIR detects someone 2 times within 15 seconds 6 Output Term...