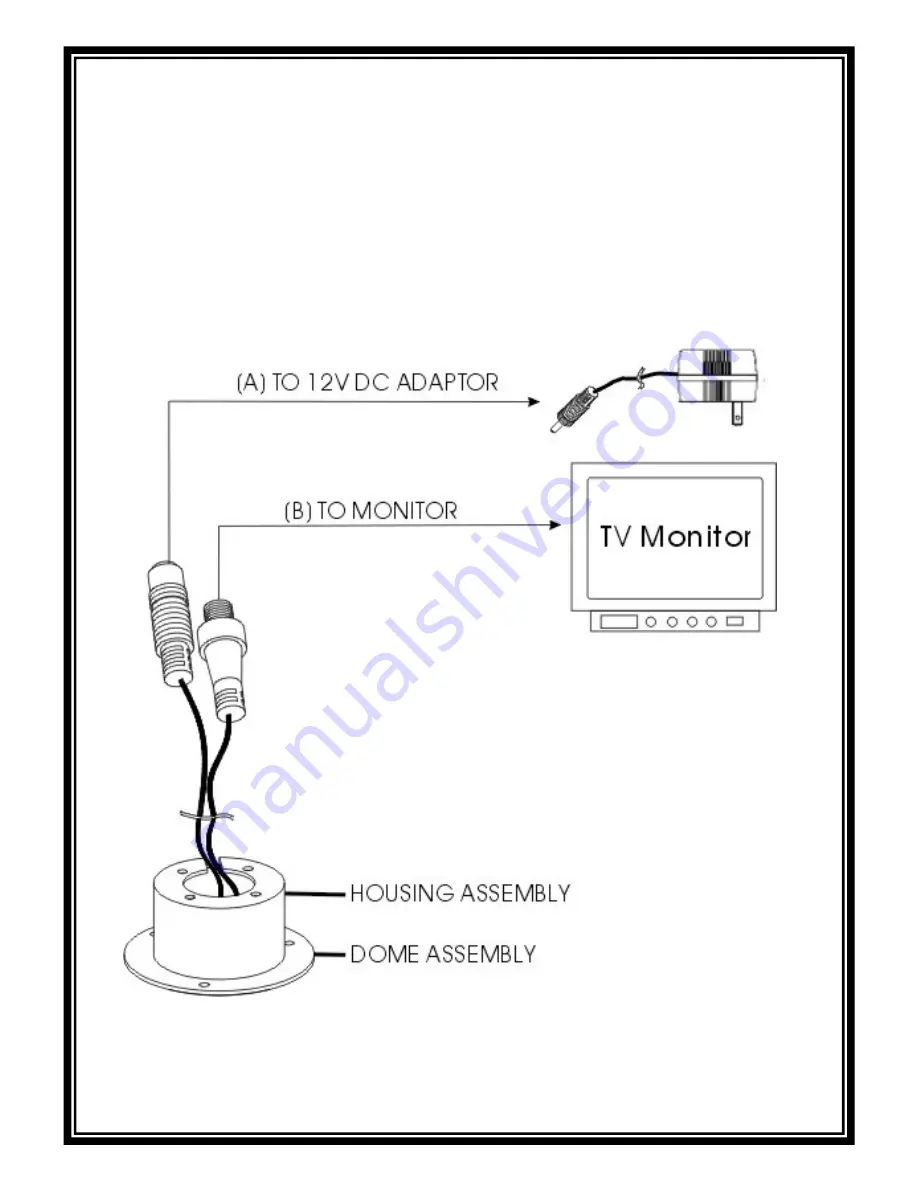
HOW TO OPERATE
1. Connect the power Jack (A) (on camera, +12V DC in Jack center)
to the DC plug (on AC adaptor).
2. Connect the Video (B) to the monitor or other video device through
a 75 Ohms type coaxial cable.
Note: AC Adaptor Sold separately.
P5
Page 1: ...AMERA This Instruction Manual applies to the following two models SURFACE TYPE IN CEILING TYPE CONTENTS Page IMPORTANT SAFETY GUARD AND WARNINGS 2 DESCRIPTION 2 INSTALLATION 3 HOW TO OPERATE 5 SPECIFI...
Page 2: ...SCRIPTION Thank you for purchasing our product This Mini DOME uses SONY high sensitive Super HAD 1 3 interline transfer CCD Image Sensor CCD Charge Coupled Device and all state circuitry which provide...
Page 3: ...INSTALLATION Surface Unit Installation In ceiling Installation P3...
Page 4: ...ssembly G turning in clockwise direction 6 Determine the lens position in accordance with the location of the objects to be viewed positioning it by slowing turning the viewing hole on top of the came...
Page 5: ...Connect the power Jack A on camera 12V DC in Jack center to the DC plug on AC adaptor 2 Connect the Video B to the monitor or other video device through a 75 Ohms type coaxial cable Note AC Adaptor So...
Page 6: ...60s 1 100 000s CCIR 1 50s 1 110 000s NTSC 1 60s 1 100 000s PAL 1 50s 1 110 000s Auto Gain Control Build in Auto White Balance Color Temperature 2500 K 9500 K Gamma Characteristic 0 45 Synchronous Sys...