background image

Low Battery Warning:

 when the batteries on the receiver unit or the 

remote unit are low, the Low Battery Indicator icon will light up on the 
relevant displays. Follow the steps above to replace the batteries. 

1. Radio-Controlled Clock

The Home Receiver will automatically start synchronizing the clock 
after battery/adapter installation or reset.  To force searching of the 
radio-controlled Atomic Clock signal , press the “     “ button inside the 
receiver's battery  compartment during normal mode. The antenna 
icon (     ) will appear near the Time display during synchronization. 
If the “     ” icon disappears afterwards, Atomic time signal is not 
available at the moment. 

Try other locations later.

  Place the unit 

away from source of interference such as mobile phones, appliances, 
TV etc.
When the Atomic Clock is successfully synchronized, a full strength 
antenna icon (     ) will appear.  The Atomic Clock will have a daily 
synchronization at 

2:03 am

 everyday. Each reception cycle is 2.5 

minutes minimum and 10 minutes maximum.

2. U.S. Time Zone & DST Setting

Press the 

“ZONE“

 button inside the receiver's battery compartment to 

select between Pacific (“PA”), Mountain (“MO”), Central (“CE”) and 
Eastern (“EA”) time zones. Press 

“CLOCK”

 on the front of the receiver 

to confirm the zone selection.
Press and hold 

“ZONE”

 to enter DST (Daylight Saving Time) setting 

mode. Press 

p

or 

q

 on the front of the unit to enable or disable 

the DST setting. Press 

“ZONE”

 to confirm DST setting.

A maximum of 3 remote sensor units can be registered. One 

remote sensor is included. To purchase additional Remote 

Sensors (Taylor model 1438), please call 1-877-858-0065 

Monday-Friday 9am to 6pm CST or visit www.partshelf.com.

Power Sources

(

continued

)


Setting the Time & Alarm

7

Summary of Contents for 1507

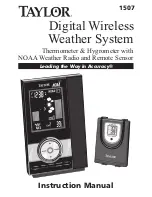
Page 1: ...Instruction Manual Digital Wireless Weather System Thermometer Hygrometer with NOAA Weather Radio and Remote Sensor Leading the Way in Accuracy 1507...

Page 2: ...nd designed to meet the highest quality standards to assure you uncompromising accuracy and consistently dependable convenient performance In order to optimize its function please read this instructio...

Page 3: ...1 2 3 or auto scroll which will show each display for 10 seconds Press and hold 3 seconds to search for a remote sensor signal 4 Memory Button Receiver Unit Press once to view maximum temperature and...

Page 4: ...ll control what is displayed on the receiver 15 Reset Button inside battery compartment of Receiver Unit Press to reset system to default settings 16 Tx Button inside battery compartment of Remote Uni...

Page 5: ...Trend icon Max Min icon Barometric pressure display Max Min icon Trend icon Snooze icon NOAA Channel icons Sleep Standby icons Weather icon Zone icon Bell alarm setting icons Antenna icon Remote Unit...

Page 6: ...off the battery compartment on the back of the unit install 3 alkaline AA batteries according to the polarity indicated and close the battery cover Note to conserve battery power the LCD screen will...

Page 7: ...rtment cover replace and tighten screws and reattach the bracket stand 8 Press and hold the CHANNEL button on the front of the receiver unit to search for the remote sensor signal A beep sounds when a...

Page 8: ...appliances TV etc When the Atomic Clock is successfully synchronized a full strength antenna icon will appear The Atomic Clock will have a daily synchronization at 2 03 am everyday Each reception cycl...

Page 9: ...ent calendar 5 ALARM SETTING Press and hold ALARM on the front of the unit The alarm time and an AL icon appear to the right of the alarm display The hour digits will flash Press p or q buttons to cha...

Page 10: ...her conditions of the next 12 hours Sunny Partly Cloudy Cloudy Rainy or and Stormy Predictions are based on altitude and changes in barometric pressure Barometric pressure refers to the pressure exert...

Page 11: ...ne minute To input the current Altitude during Automatic Altitude Setting mode 1 Press p or q to toggle to the desired Barometric Pressure display mb inHg or hPa 2 Press PRESSURE to confirm mb inHg or...

Page 12: ...Exercise more fatiguing than usual EXTREME CAUTION Heat cramps exhaustion possible DANGER Heat exhaustion likely EXTREME DANGER Heat stroke imminent INDOOR OUTDOOR DEW POINT Dew point is the saturati...

Page 13: ...to forest fires to oil spills NWR broadcasts National Weather Service warnings watches forecasts and other hazard information 24 hours a day These broadcasts air on one of 7 channels To check the NOAA...

Page 14: ...interference to radio communications However there is no guarantee that interference will not occur in a particular installation If this equipment does cause harmful interference to radio or televisio...

Page 15: ...cessive force shock dust temperature or humidity This may result in malfunction shorter electronic life span damaged battery or distorted parts 5 Do not tamper with the unit s internal components Doin...

Page 16: ...above This warranty gives you specific legal rights and you may have other rights which vary from state to state Range of temperature measurement Receiver unit indoor only 32 F to 122 F 0 C to 50 C Re...

Reviews: