background image

5

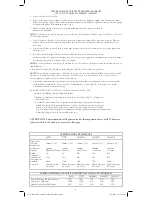
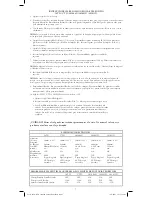
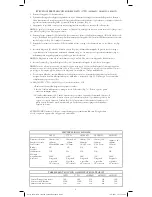
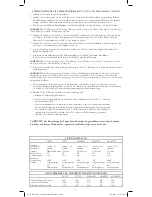
INSTRUCTIONS FOR TELESCOPE MODELS

56TN / 57TN / 301004N / 301005N / 301051N

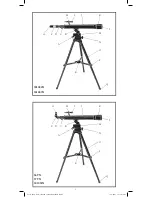
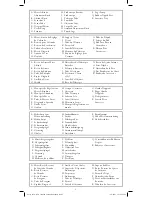
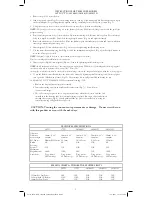
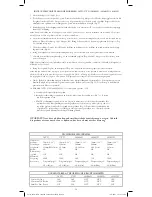
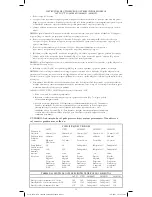
1.  Remove tripod (O) from the box.
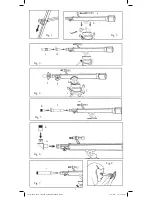
2.  Stand tripod and spread legs. Loosen adjusting locks on each leg. Grab mount and lift. Extend the tripod legs to 

the desired height (at equal lengths) and tighten each leg's adjusting locks to hold it in position (Fig. 1).

3.  Using the accessory tray set screw, attach the accessory tray (R) to its mount or housing.

NOTE

:

NOTE

NOTE

 The guides for the correct setting are in the bottom of the tray. Make sure the flanges stay within the guides for 

proper mounting.

4.  Remove telescope main body (J) from the box. Unscrew mounting bolt (B) from telescope base. Place telescope 

body onto tripod mount (M). Insert bolt through tripod mount (Fig. 2c) and tighten securely.

5.  Remove the finderscope (I) from the box. Place the finderscope in the finderscope bracket and secure with three 

finderscope bracket set screws (Fig. 2a).

6.  Insert diagonal (E) into the focus tube (Fig. 6n). Secure by tightening small retaining screw.
7.  Use the micro-altitude adjusting knob (Fig. 4i) and the azimuth adjusting knob (Fig. 4j) in the tripod mount to 

move the telescope as desired.

NOTE:

NOTE

NOTE

 Diagonal is only to be used in combination with the eyepieces (oculars).

::

Never use the diagonal and Barlow at the same time.

8.  Insert eyepiece (Fig. 6k) into diagonal (Fig. 6n). Secure by tightening small retaining screw.

NOTE:

NOTE

NOTE

 In all astronomical telescopes, the image appears upside down. With the use of the diagonal the image appears 

::

erect but with a left to right inversion (mirror like). To use the

telescope for terrestrial view and to correct the mirrored image, remove the diagonal and replace with the erecting eyepiece.  

9.  To use the Barlow, insert Barlow into the focus tube. Secure by tightening small retaining screw. Insert eyepiece 

into open end of Barlow and secure (Fig. 5l). The telescope is now fully assembled and ready for use. 

10. Models 56TN, 57TN and 301051N: for terrestrial viewing - 35X 

  a. Remove the diagonal mirror/eyepiece assembly.
  b. Insert the erecting eyepiece and tighten the ocular screw (Fig. 7o). You will now 

    see an erected image.

  c. The 35X erecting eyepiece is also a 14 power microscope when the objective end (the end 

    inserted into the focusing tube for terrestrial viewing) is placed flat on an object and viewed 

    through the eyepiece (Fig. 8). Gently push/pull the eye piece to focus. Before re-using for

    terrestrial viewing, fully push the eyepiece in.

CAUTION: Viewing the sun can cause permanent eye damage.  Do not view the sun 

with this product or even with the naked eye.

TECHNICAL SPECIFICATIONS


56TN 

57TN 

301004N 

301005N 

301051N

Objective

Diameter: 

50mm (1.96") 

50mm (1.96") 

50mm (1.96") 

50mm (1.96") 

50mm (1.96")

Focal Length: 

600mm 

630mm 

600mm 

600mm 

600mm

Eye Lenses: 

H6mm/H12.5mm  12.5mm 

10-30 Zoom 

8-24 Zoom 

12.5mm

Barlow: 

2X 

3X 

N/A 

N/A 

2X

Erecting 

Eyepiece: 

35X 

35X 

N/A 

N/A 

35X

N/A

N/A

Maximum 

Magnification: 

200X 

150X 

60X 

75X 

100X

Accessories: 

Diag. mirror, 

Diag. mirror, 

Diag. mirror, 

Diag. mirror, 

Diag. mirror,

2X Finderscope

2X Finderscope 

2X Finderscope

2X Finderscope

2X Finderscope

EYE LENS CHART & THEORETICAL POWER LIMITS


56TN 

57TN 

301004N 

301005N 

301051N 

12.5mm Eye Lens Power: 

50X 

50X 

N/A 

N/A 

50X

12.5mm with 3X Barlow: 

150X 

150X 

N/A 

N/A 

50X

18mm Eye Lens Power:

18mm Eye Lens Power: 

35X 

35X 

N/A 

N/A 

35X

Tasco 56TN-57TN-301051N-301004N-301005N.indd   5

12/3/2007   11:11:11 AM

Summary of Contents for 301004N

Page 1: ...RE MANUAL DEL USUARIO MANUALE DELL UTENTE BENUTZERHANDBUCH HANDLEIDING MANUAL DO UTILIZADOR Model s 56TN 57TN 301005N 301051N 301004N 301004N 301005N 56TN 57TN 301051N Tasco 56TN 57TN 301051N 301004N 301005N indd 1 12 3 2007 11 10 59 AM ...

Page 2: ...2 301004N 301005N H I J K L G F D C B A M N O P R Q 56TN 57TN 301051N H I J K L G E D C B A M N O P R Q Tasco 56TN 57TN 301051N 301004N 301005N indd 2 12 3 2007 11 11 01 AM ...

Page 3: ...Zoom G Oculaire H Support Viseur I Viseur J Tube du Télescope K Pare soleil L Lentille Téléobjectif M Monture du Télescope N Bouton de Réglage pour L azimut O Pieds du Trépied P Serrage du Pied Q Pied Avec Base en Caoutchouc R Plateau Pour Accessoires A Botón de Ajuste Micro Altitud B Botón de Altura C Botón de Enfoque D Tubo de Enfoque E Espejo Diagonal F Anillo de Zoom G Mirilla H Abrazadera del...

Page 4: ...4 Fig 2 Fig 3 Fig 4 Fig 8 b a c d f Fig 6 k n Fig 7 o g h i j e Fig 1 Fig 5 k m l Tasco 56TN 57TN 301051N 301004N 301005N indd 4 12 3 2007 11 11 05 AM ...

Page 5: ...ppears erect but with a left to right inversion mirror like To use the telescope for terrestrial view and to correct the mirrored image remove the diagonal and replace with the erecting eyepiece 9 To use the Barlow insert Barlow into the focus tube Secure by tightening small retaining screw Insert eyepiece into open end of Barlow and secure Fig 5l The telescope is now fully assembled and ready for...

Page 6: ...Le miroir diagonal rétablit cette inversion verticale NOTE mais inverse le champ horizontal comme un miroir Pour observer la terre et obtenir une image correcte enlevez le miroir diagonal et remplacez le par l oculaire de redressement 9 Pour utiliser l oculaire Barlow introduisez l oculaire Barlow dans le tube de focalisation Serrez à l aide des petites vis Introduisez l oculaire dans le côté ouve...

Page 7: ... todos los telescopios astronómicos la imagen aparece al revés Con la utilización de la diagonal aparece la NOTA imagen recta pero con una inversión de izquierda a derecha como un espejo Para utilizar el telescopio para vistas ter restres y para corregir la imagen reflejada hay que quitar la diagonal y sustituirla por la mirilla recta 9 Para utilizar el Barlow hay que insertar el Barlow en el tubo...

Page 8: ...e il telescopio per osservazioni terrestri e per correggere l immagine riflessa rimuovere la diagonale e sostituirla con l oculare raddrizzatore 9 Per adoperare il Barlow inserite il Barlow nel tubo di messa a fuoco Assicuratelo stringendo la piccola vite di sostegno Inserite l oculare nel terminale aperto del Barlow e assicuratelo Fig 5l Il telescopio è ora assemblato completamente e pronto per l...

Page 9: ...mischen Teleskopen erscheint das Bild auf dem Kopf stehend Durch Verwendung des ANMERKUNG Diagonalspiegels erscheint das Bild aufrecht aber seitenverkehrt spiegelbildlich Zur Verwendung des Teleskops für Erdbeobachtungen und zur Korrektur des Spiegelbildes entfernen Sie bitte den Diagonalspiegel und ersetzen Sie ihn durch das aufrichtende Okular 9 Zur Verwendung der Barlowlinse setzen Sie die Barl...

Page 10: ...en voor observaties op aarde en om het gespiegelde beeld te corrigeren verwijdert u de diagonaal en vervangt die door het rechtzettingsoogstuk 9 Om de Barlow te gebruiken brengt u de Barlow in de scherpstellingbuis Vastzetten door de borgschroefjes vast te draaien Breng het oogstuk in het open uiteinde van de Barlow en zet vast Fig 5l De telescoop is nu helemaal gemonteerd en klaar voor gebruik 10...

Page 11: ... da esquerda para a direita como num espelho Para utilizar o telescópio para observações terrestres e para corrigir a imagem espelhada deve retirar o espelho diagonal e substitui lo pela ocular erectora de imagem 9 Para utilizar a lente Barlow é necessário introduzi la no tubo de focagem e fixá la apertando o pequeno parafuso de retenção Introduza a ocular na extremidade aberta da lente Barlow e f...

Page 12: ... 2007 B O P Tasco 56TN 57TN 301051N 301004N 301005N indd 12 12 3 2007 11 11 14 AM ...

Reviews: