HD-R1
Owner's Manual Addendum
2
TASCAM HD-R1
CAUTION
Not all of the settings that can be made on the unit can
be made from the setting screen. For example, network
settings cannot be made from this screen.
5 To return to the Transport Screen from the Setting
Screen, click the
Transport
hyperlink.
CAUTION
Do not open the Transport Screen and
Setting Screen at
the
same time using tabs, for example.
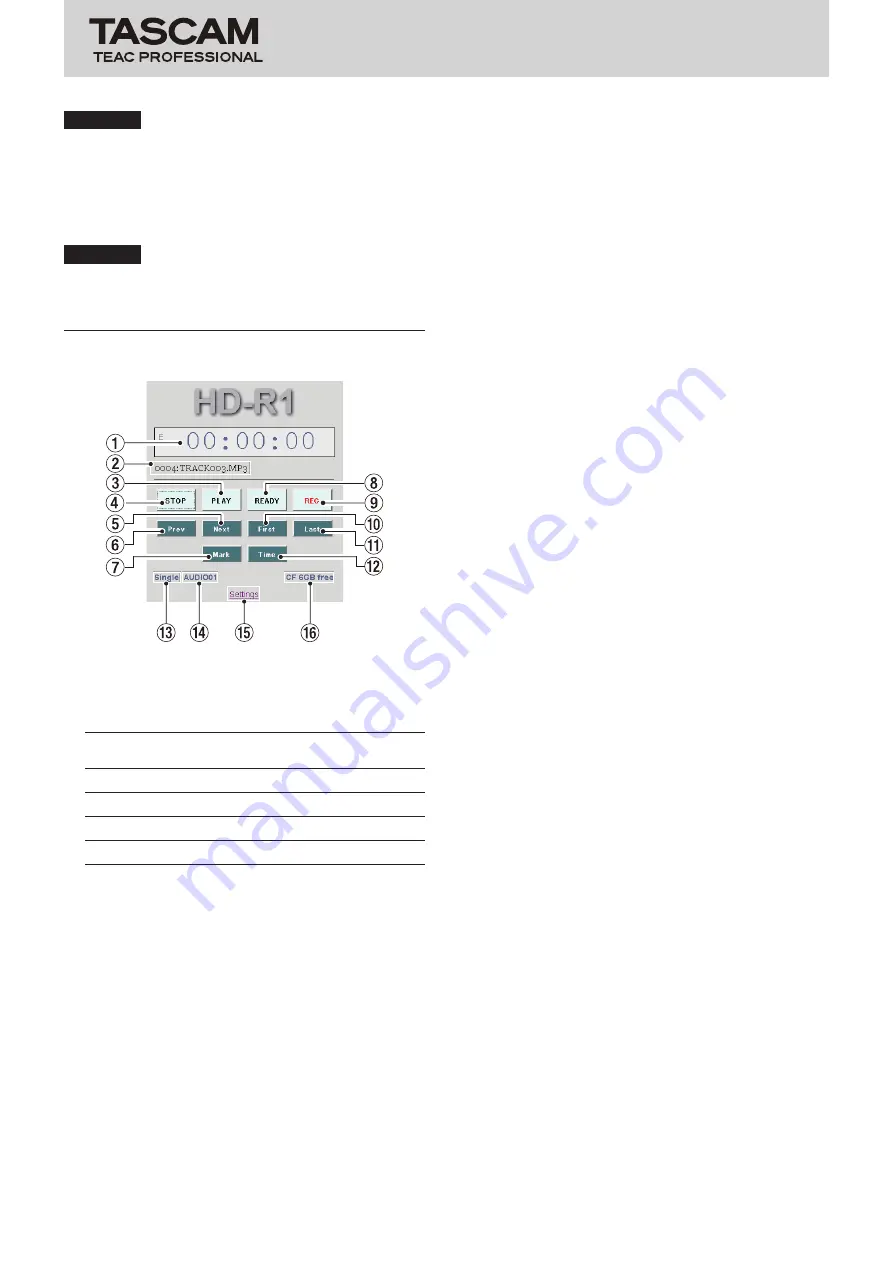
Transport Screen
1
Time Display
Displays the total time, total time remaining, current
track time, or current track remaining time as
"hours:minutes:seconds".
Icon(s)
shown
Meaning of time shown
E
Elapsed time of current track
R
Remaining time of current track
E
and
T
Elapsed time from play area beginning
R
and
T
Remaining time in play area
2
Current Track
Shows the current track.
3
PLAY button
Has the same functions as the unit's PLAY transport
key.
Press to start playback from the current transport
position. Press to start recording when the unit is
ready-to-record. This button appears green during
playback.
4
STOP button
Has the same functions as the unit's STOP transport
key.
Stops the transport and otherwise performs the same
roles as the unit's STOP transport key.
5
Next button
Functions like the SKIP
¯
transport key.
Skips to the beginning of the next track. If pressed
while located at the last track, locates to the first track
beginning.
Unlike the SKIP
¯
key, clicking and holding will not
skip-play or search forward. It also does not function
as a shortcut key if pressed with the SHIFT key.
6
Prev button
Functions like the SKIP
Â
transport key.
Skips to the beginning of the current track if located
more than one second from its beginning. Skips to the
beginning of the previous track if located less than
one second from the beginning of the current track.
Skips to the beginning of the last track if located less
than one second from the beginning of the first track.
Unlike the SKIP
Â
key, clicking and holding will not
skip-play or search backward. It also does not function
as a shortcut key if pressed with the SHIFT key.
7
Mark button
Functions like the MARK transport key.
Creates a new marker at the current time. The marker
is given a name beginning with
MARK
. It does not
function as a shortcut key if pressed with the SHIFT
key.
8
READY button
Functions like the READY transport key.
While stopped, press to put the transport into a
ready-to-play state. While playing, press to pause the
transport and press
PLAY
to continue. While recording,
press to pause the transport while continuing to
monitor the input and press
PLAY
to create a new track
and continue recording.
Nothing happens if
READY
is pressed while the
transport is already in the ready-to-record or ready-
to-play state. Appears yellow when ready-to-play or
ready-to-record.
9
REC button
Functions like the RECORD transport key.
While stopped, press to make the unit ready-to-record,
turning on input monitoring. While ready-to-record,
press
PLAY
to start recording. When the unit is ready-
to-record or recording, the
REC
button appears red.
Pressing this key while already recording will cause the
HD-R1 to save the recording to that point and create a
new track from then on.
0
First button
Locate to the beginning of the first track.
q
Last button
Locate to the beginning of the last track.
w
Time button
Functions like the TIME transport key.
Cycles through time display modes.


