


10
TASCAM FW-1804
Monitor Mixing
Setting and Checking Clock Rates
The FW-1804's audio clock rate and source are checked or
changed from the software Control Panel.
Expected Sample Rate
If a digital input is selected as the clock source and it does
not have a usable clock signal, the
CLOCK
indicator flash-
es to indicate a problem, and the unit switches to its own
internal clock and waits for a valid clock signal. If the sam-
ple rate is off by 3% or more, the FW-1804 switches to the
internal clock.
Monitor Mixing
The FW-1804 has a hardware monitor mixer which is con-
trolled by a software mixer window accessed from the soft-
ware Control Panel. The primary benefit of this is to pro-
vide a means of monitoring your audio inputs in a zero-
latency environment.
By using the monitor mixer to monitor the audio at the
inputs along with the audio return from your DAW applica-
tion, it is possible to overdub tracks to your DAW software
with none of the audio processing delays inherent in DAW
applications.
Monitoring Setups
The source of the signal being sent to the balanced stereo
analog outputs is dependent on which of the three keys is
selected:
COMPUTER
,
INPUTS
or
BOTH
.
COMPUTER key
Only the audio from the host computer is monitored. This
can be useful if you're doing a mixdown of your DAW
tracks and want to mute the monitor mixer without losing
its settings.
INPUTS key
Only the audio from the FW-1804's analog, ADAT and
S/PDIF inputs is monitored. This can be useful for setting
up live inputs or tracking into your DAW.
BOTH key
The audio signals from the host DAW and the FW-1804's
inputs are monitored.
• The default setting is
BOTH
.
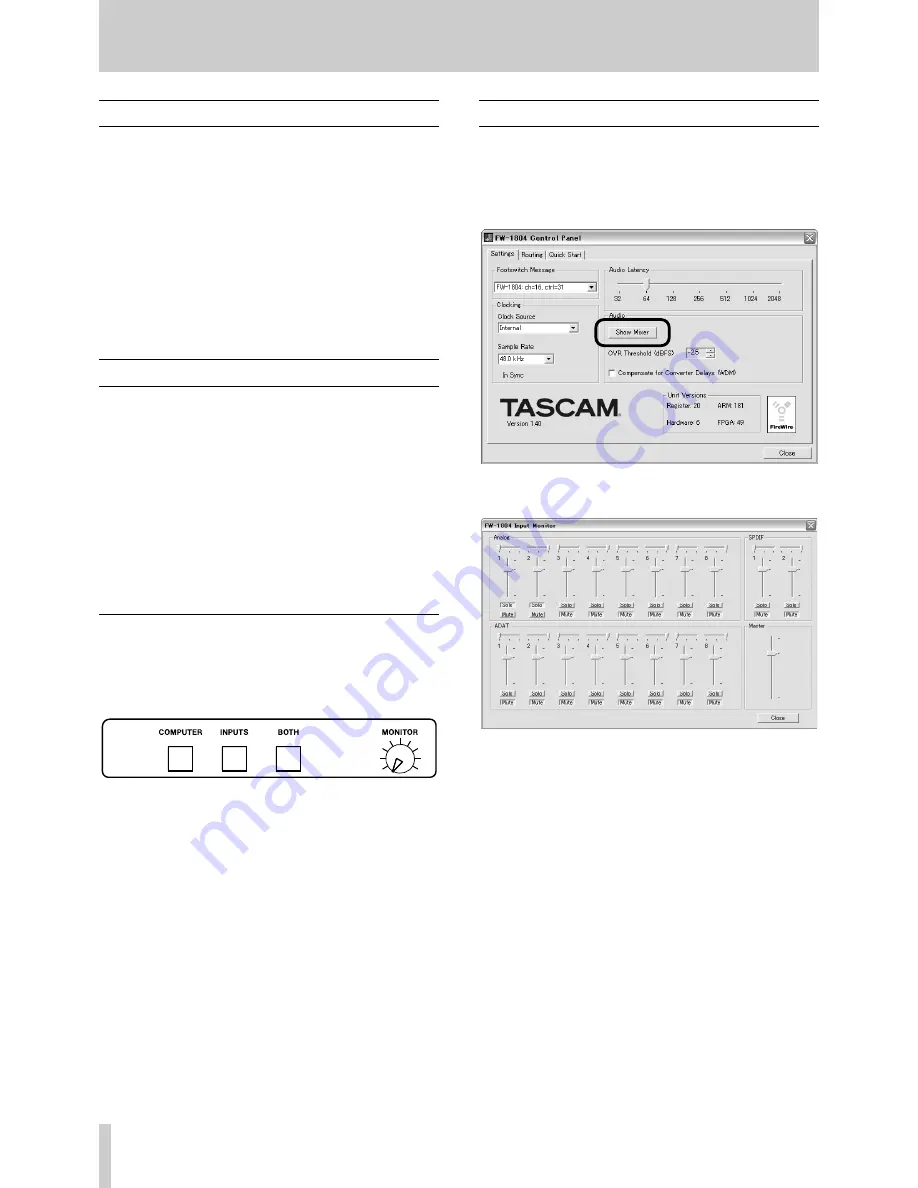
Making Mixer Settings
Once the monitor setup has been made, it is possible to use
the software mixer interface to set the levels and pan posi-
tion. Click the Show Mixer button on the Settings tab of
the Control Panel.
The following screen will appear:
Setting the master fader to 0 dB (unity gain)
Hold [Shift] and click the master fader.
Setting a channel's monitor level to 0 dB (unity gain)
Hold [Shift] and click the channel fader.
NOTE
It is important to understand that when using the monitor
mixer, the FW-1804's software mixer interface is control-
ling the monitor levels of the FW-1804's input sources.
While you will still hear the audio returns from your DAW,
moving the faders in the FW-1804's software monitor mixer
has no effect on your DAW's internal mixer.
Another important point to note is that monitor mixer's
faders do not affect the levels of the inputs sent to your
DAW. The levels to the DAW inputs from analog inputs 1
through 8 are controlled solely by their respective
TRIM
controls. The digital inputs are passed to your DAW appli-
cation at unity gain; their level must be regulated at the dig-
ital source.
Summary of Contents for FW-1804
Page 1: ...FW 1804 FireWire Audio MIDI Interface D00831000A OWNER S MANUAL...
Page 18: ...18 TASCAM FW 1804 Notes...
Page 19: ......


