background image


TASCAM  CD-BT2

IMPORTANT SAFETY PRECAUTIONS

 1  Read these instructions.
 2  Keep these instructions.
 3  Heed all warnings.
 4  Follow all instructions.
 5  Do not use this apparatus near water.
 6  Clean only with dry cloth.
 7  Do not block any ventilation openings. 

I n s t a l l  i n  a c c o r d a n c e  w i t h  t h e 
manufacturer's instructions.

 8  Do  not  install  near  any  heat  sources 

such  as  radiators,  heat  registers, 
stoves,  or  other  apparatus  (including 
amplifiers) that produce heat.

 9  Do  not  defeat  the  safety  purpose  of 

the  polarized  or  grounding-type  plug. 
A  polarized  plug  has  two  blades  with 
one wider than the other. A grounding 
type  plug  has  two  blades  and  a  third 
grounding  prong.  The  wide  blade  or 
the  third  prong  are  provided  for  your 
safety. If the provided plug does not fit 
into  your  outlet,  consult  an  electrician 
for replacement of the obsolete outlet.

 10  Protect  the  power  cord  from  being 

walked  on  or  pinched  particularly  at 
plugs,  convenience  receptacles,  and 
the  point  where  they  exit  from  the 
apparatus.

 11  Only  use  attachments/accessories 

specified by the manufacturer.

 12  Use  only  with  the  cart,  stand, 

tripod, 

bracket,  or  table  specified  by  the 
m a n u f a c t u re r,  o r  s o l d  w i t h  t h e 
apparatus.  When  a  cart  is  used, 
use  caution  when  moving  the  cart/
apparatus  combination  to  avoid  injury 
from tip-over.

 13  Unplug this apparatus during lightning 

storms  or  when  unused  for  long 
periods of time.

 14  Refer  all  servicing  to  qualified  service 

personnel.  Servicing  is  required  when 
the  apparatus  has  been  damaged  in 
any  way,  such  as  power-supply  cord 
or  plug  is  damaged,  liquid  has  been 
spilled  or  objects  have  fallen  into  the 
apparatus,  the  apparatus  has  been 
exposed  to  rain  or  moisture,  does 
not  operate  normally,  or  has  been 
dropped.Do  not  expose  this  appara-
tus to drips or splashes.

D o  n o t  p l a c e  a n y  o b j e c t s  f i l l e d 
with  liquids,  such  as  vases,  on  the 
apparatus.
Do  not  install  this  apparatus  in  a 
confined space such as a book case or 
similar unit.
T h e   a p p a r a t u s   d r a w s   n o m i n a l 
non-operating  power  from  the  AC 
outlet  with  its  STANDBY/ON  in  the 
Standby position.
The apparatus should be located close 
enough  to  the  AC  outlet  so  that  you 
can  easily  grasp  the  power  cord  plug 
at any time.
An apparatus with Class I construction 
shall be connected to an AC outlet with 
a protective grounding connection.
Batteries  (battery  pack  or  batteries 
installed)  should  not  be  exposed  to 
excessive  heat  such  as  sunshine,  fire 
or the like.
E x c e s s i v e  s o u n d  p r e s s u r e  f r o m 
earphones and headphones can cause 
hearing loss.

Summary of Contents for CD-BT2

Page 1: ...CD BT2 Portable CD Bass Trainer D00997220A OWNER S MANUAL This device has a serial number on the rear panel Please record it and retain it for your records Serial number __________________...

Page 2: ......

Page 3: ...are designed to provide reasonable protection against harmful inter ference in a residential installation This equipment generates uses and can radiate radio frequency energy and if not installed and...

Page 4: ...old with the apparatus When a cart is used use caution when moving the cart apparatus combination to avoid injury from tip over 13 Unplug this apparatus during lightning storms or when unused for long...

Page 5: ...r a SAMSUNG transport Optical pickup Type KSM 900AAA Manufacturer SONY Corporation Laser output Less than 1 mW on the objective lens Wavelength 775 to 816 nm Type CMS M93BG6 Manufacturer Samsung Elect...

Page 6: ...CDs 24 Basic CD playback 24 Jumping back a few seconds FLASH BACK 24 Adjusting the volume 25 Changing the tempo 25 Changing the pitch with the tempo 26 Changing only the pitch 26 Using the bass enhan...

Page 7: ...perates with batteries 4 AA or an AC adapter sold separately Bass effects built in Play along on bass as you listen to a CD Tuner built in Metronome built in Headphone jack and line output jack Operat...

Page 8: ...ed space such as a bookcase and do not put anything on top of the unit Avoid installing this unit on top of any heat generating electrical device such as a power amplifier Make sure that the unit is m...

Page 9: ...age the delicate playing surface It may cause CDs to become unplayable Discs should be returned to their cases after use to avoid serious scratches that could cause the laser pickup to skip Keep discs...

Page 10: ...se old and new batteries together Even if batteries are the same size their voltage may differ Do not use batteries of different specifications together Do not attempt to recharge batteries that are n...

Page 11: ...the batteries Press and hold the POWER switch on the rear of the unit for about one second Release it when TASCAM appears on the display Start up completes after a few seconds and the TIME DISPLAY sc...

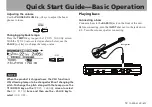
Page 12: ...amplification Playback Playing a CD Press the key to start Press the key again to pause playback Press the STOP key to stop playback Press the or key to skip to the beginning of the previous or next t...

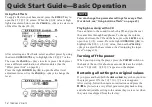
Page 13: ...change the tempo value NOTE When the product is shipped new the VSA function is ON allowing tempo to be changed without changing the pitch To change the pitch along with the tempo use the CURSOR key...

Page 14: ...n effects on page 31 Playing bass along with a CD You can listen to the sound from both a CD and your bass at the same time through headphones To change the volume balance between the CD and the bass...

Page 15: ...s Alkaline batteries about 5 hours NOTE Since this product has special functions including CD playback tempo alteration and bass effects battery life is shorter compared to other portable CD players B...

Page 16: ...completes in a few seconds and the TIME DISPLAY screen appears To turn the power OFF press and hold the POWER switch on the rear of the unit for more than one second Release the button when the scree...

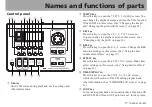
Page 17: ...nge the playback pitch on this screen See Changing only the pitch on page 26 4 BEE key Press this key to open the B E E screen Change the BEE function settings on this screen See Using the bass enhanc...

Page 18: ...n the screen with these keys e VALUE keys Change the value of the item selected on the screen r PHONES VOLUME keys Adjust the volume sent to your headphones using these keys The PHONES VOLUME screen a...

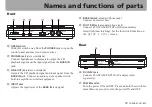
Page 19: ...l and input signal from the BASS IN jack Connect an audio system speakers with built in amplifiers or similar equipment d INPUT dial Adjusts the input level of the BASS IN jack signal f BASS IN jack s...

Page 20: ...se a conversion cable as necessary BASS IN jack bass guitar FOOT SW jack TASCAM RC 30P or other momentary footswitch non latching DC IN 5V PS P520 AC adapter sold separately See Operation with an AC a...

Page 21: ...TIME DISPLAY TEMPO CHANGE TEMPO KEY PITCH KEY B E E BEE EFFECTOR EFFECT LEVEL LEVEL TUNER TUNER SETUP MISC MISC PHONES VOLUME PHONES VOLUME TIME DISPLAY screen The TIME DISPLAY screen appears immediat...

Page 22: ...ge 29 6 CD time display Shows the CD time Set the displayed time mode on the SETUP MISC screen See Setting the time display on page 39 7 CD playback position Shows the current playback position of the...

Page 23: ...ETUP MISC screen in the same way as on the TIME DISPLAY screen Settings Every screen other than the TIME DISPLAY screen has settings See Making settings on page 23 for details Making settings Settings...

Page 24: ...r decrease the track number Searching forward and backward Press and hold the or key when the CD is playing or paused during playback to fast forward or fast reverse Jumping back a few seconds FLASH B...

Page 25: ...er a few seconds the display automatically returns to the previous screen Changing the tempo You can change the playback tempo slowing it by up to 50 1 Press the TEMPO key to open the TEMPO CHANGE scr...

Page 26: ...e screen appears normally Changing only the pitch You can change the pitch without changing the tempo 1 Press the KEY key to open the KEY PITCH screen 2 With the KEY item selected use the VALUE keys t...

Page 27: ...function is ON the icon at the top of the screen appears in inverse 3 Use the CURSOR key to select the MODE item and the VALUE keys to change the function 4 Press the CURSOR key again to to select the...

Page 28: ...at the point when you want loop playback to stop The current position is set as the OUT point and the symbol appears below the play back position display bar at that point After setting the OUT point...

Page 29: ...e SETUP MISC screen 2 Use the CURSOR keys to select PLAY MODE and the VALUE keys to select ALL or SINGLE NOTE If you select SINGLE appears to the left of the time display Repeat playback In repeat pla...

Page 30: ...audio system or speakers with built in amplifiers adjust the volume on the external device You cannot adjust the output level of this device s LINE OUT jack Playing along with a CD This device combin...

Page 31: ...the CURSOR keys to move between level knobs and effect modules As shown in the figure above in addition to BANK and PRESET the EFFECTOR screen also shows the LVL level knob and icons for up to four b...

Page 32: ...ect the module icons and open a pop up with parameter settings as shown in the figure below The parameters depend on the type of module For details about the parameters for each module type see the Ef...

Page 33: ...is ON its TEMPO and BEAT settings appear Use the CURSOR keys to select the items and the VALUE keys to change their settings NOTE Turning the metronome ON will stop CD playback TEMPO Set the tempo bet...

Page 34: ...Y PRECAUTIONS Other functions Stopping the metronome Do one of the following Press the STOP key Turn the METRONOME item OFF on the SETUP MISC screen NOTE Pressing any of the CD player operation keys w...

Page 35: ...e settings for each of the strings being tuned The tuning meter and input signal pitch appear on the screen see the preceding figure appears when there is no input 1 Connect a bass to the BASS IN jack...

Page 36: ...the center of the meter is highlighted The tuning procedures are the same as described above for the AUTO mode OSC oscillator mode The built in oscillator can output a sine wave of a pitch in the thr...

Page 37: ...ection press the MISC key to open the SETUP MISC screen and make settings as necessary Setting the function Use the CURSOR keys to select FOOT FUNC and the VALUE keys to choose one of the following fu...

Page 38: ...the PHONES and LINE OUT jacks Select one of the following MONO MONITOR settings OFF ordinary stereo monitoring default setting L R both channel signals are mixed and output in mono L left channel sign...

Page 39: ...en Changing the display contrast You can change the display contrast as needed to suit the surrounding lighting and other conditions Set the CONTRAST between 1 and 10 with higher numbers providing gre...

Page 40: ...nput levels 6 dBV LINE OUT jack Connector 3 5 mm 1 8 stereo minijack Standard output level 10 dBV Maximum output level 6 dBV PHONES jack Connector 3 5 mm 1 8 stereo minijack Maximum output 15 mW 15 mW...

Page 41: ...lean Cmp 15 Cmp Delay 16 Cmp Rev 17 Cmp Fla 18 Cmp Pha 19 Cmp Cho 20 Cmp Wah 21 Cmp Oct 22 Cmp Tec 23 Cmp Exc Preset number Preset name 24 Cmp Fla Dly 25 Cmp Pha Dly 26 Cmp Cho Dly 27 Cmp Wah Dly 28 C...

Page 42: ...the amount of peak gain reduction 0 30 GAIN Adjusts the output volume 0 20 Flanger FLA Gives the sound a moving modulation that can be compared to the sound of a jet engine SPEED Adjusts the speed of...

Page 43: ...greater width TIME Adjusts the reverberation time 0 25 MIX Adjusts the amount of the effect 0 20 Delay DLY Adds echoes to the sound Adjust the TIME and turn up the MIX for a rockabilly sound TIME Adj...

Page 44: ...m 5939 Wallace Street Mississauga Ontario L4Z 1Z8 Canada TEAC MEXICO S A De C V Phone 52 555 581 5500 www tascam com Campesinos No 184 Colonia Granjes Esmeralda Delegacion Iztapalapa CP 09810 Mexico D...

Reviews: