background image

Targus Wireless Stow-N-Go™ Rechargeable Notebook Mouse

4 The  communication  link  between  the  mouse  and

receiver is preset at the factory so the mouse should
now be ready to use.

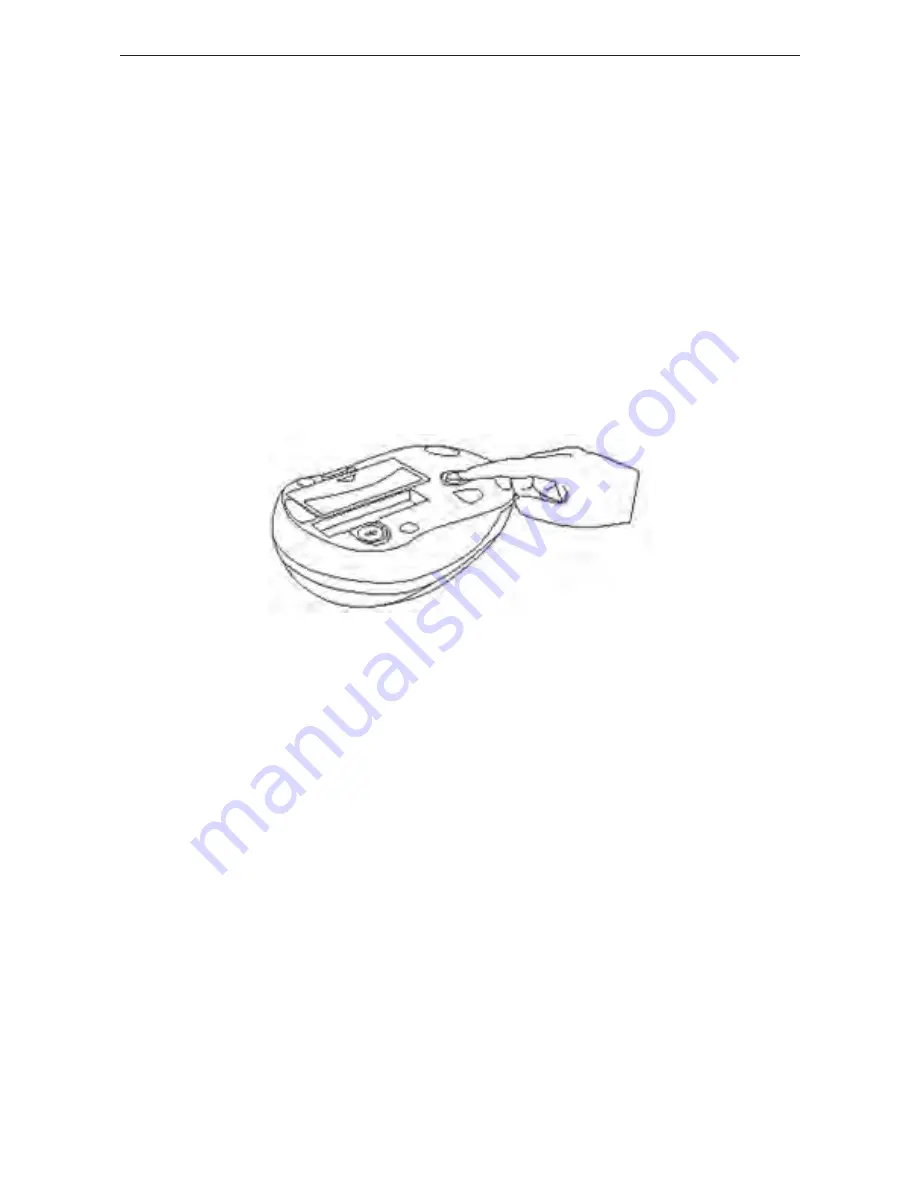
Switching Channels

In  some  instances,  radio  frequency  interference  may
require you to switch to an alternate channel. To do this:

• Press  and  release  the  reset  button,  located  on  the

bottom of the mouse.

Within  5-10  seconds  the  mouse  will  automatically
switch  to  another  channel  and  again  respond  to
movement.

8

Summary of Contents for Stow-N-G

Page 1: ...USER GUIDE Wireless Stow N Go Rechargeable Notebook mouse ...

Page 2: ...Table of Contents System Requirements 3 Installing the Batteries 4 Connecting the Mouse Receiver 6 Switching Channels 6 Storing the Receiver 8 Power Save Mode 9 Troubleshooting 11 Technical Support 12 2 ...

Page 3: ...ures eight communication channels with automatic channel hopping capability This feature reduces the likelihood of interference from other RF devices Using multi channels make it ideal for use in areas where more than one RF device is used such as a conference room or office area NOTE THIS MOUSE IS A HIGH RESOLUTION DEVICE FOR MAXIMUM ACCURACY AND EFFICIENCY IT IS RECOMMENDED THAT YOU SET YOUR DIS...

Page 4: ...ntel Pentium processor or equivalent USB interface Operating System Windows 2000 ME XP NOTE THE THIRD BUTTON AND THE SCROLLING WHEEL ONLY WORK WITH THE OPERATING SYSTEMS LISTED ABOVE IF YOU USE THE STOW N GO MOUSE WITH A DIFFERENT OPERATING SYSTEM IT WILL LOSE ITS ENHANCED FEATURES AND FUNCTION AS A STANDARD TWO BUTTON MOUSE Installing the Batteries 1 Remove the battery cover from the back of the ...

Page 5: ...ng the Mouse This mouse comes with rechargeable batteries For best results you should charge the mouse via the supplied USB charge cable at least 8 hours before using it To do this 1 Connect the cable s USB connector into an available USB port on your computer 2 Connect the other end to the mouse NOTE TO CONTINUOUSLY CHARGE THE MOUSE VIA THE USB CHARGE CABLE YOUR COMPUTER MUST BE ON AND AWAKE FOR ...

Page 6: ...Hibernate a Click Start b Click Control Panel c Click Performance and Maintenance Skip in Classic View d Click Power Options e Make sure System Standby and System Hibernates under Plugged in are set to Never 3 If you use your notebook computer s LCD monitor please do not close the lid Please ignore this step if you use an external monitor with your notebook lid closed 4 If your mouse does not resp...

Page 7: ...SHING IT IS HIGHLY RECOMMENDED THAT YOU CHARGE THE MOUSE AS SOON AS POSSIBLE TO PROPERLY MAINTAIN THE BATTERIES Connecting the Mouse Receiver To connect the mouse receiver 1 Press the eject button on the bottom of the mouse 2 Take the receiver out of the compartment 3 Plug the USB receiver into an available USB port on your computer and follow any on screen instructions to complete the default dri...

Page 8: ...the mouse should now be ready to use Switching Channels In some instances radio frequency interference may require you to switch to an alternate channel To do this Press and release the reset button located on the bottom of the mouse Within 5 10 seconds the mouse will automatically switch to another channel and again respond to movement 8 ...

Page 9: ...HUT OFF Power Save Mode To conserve the battery the mouse reduces its power consumption gradually when not in use by entering into sleep mode Move the mouse to resume normal operation Operating Hints For optimal performance and RF reception Turn off your computer s power management feature before charging the mouse so that your computer doesn t enter sleep mode which temporarily halts the charging...

Page 10: ...or mirrored surface as these surfaces will cause the mouse to fail temporarily To maximize battery life use the mouse on a white or light colored surface Dark surfaces cause the mouse s light emitter diode LED light to glow brighter which causes the battery to discharge more rapidly Comfortable Usage Research suggests that physical discomfort and injury to nerves tendons and muscles may be related...

Page 11: ...hat the polarity of the batteries is correct The positive and negative ends of each battery must match the positive and negative connections in the battery housing Make sure that the mouse is fully charged and your computer is on and awake For best results turn off your computer s power management feature while charging the mouse Check that the receiver s USB connector is firmly attached to the US...

Page 12: ...tebook Mouse To reset the connection press the reset button at the bottom of the mouse See Switching Channels To reduce interference move the mouse s receiver and the base unit of the affected device as far away from each other as possible 12 ...

Page 13: ...workmanship for one year If your Targus accessory is found to be defective within that time we will promptly repair or replace it This warranty does not cover accidental damage wear and tear or consequential or incidental loss Under no conditions is Targus liable for loss of or damage to a devices nor loss of or damage to programs records or data nor any consequential or incidental damages even if...

Page 14: ...na Increase the separation between the equipment and receiver Connect the equipment into an outlet on a circuit different from that to which the receiver is connected Consult the dealer or an experienced radio TV technician for help Microsoft Windows and Windows Vista are either registered trademarks or trademarks of Microsoft Corporation in the United States and or other countries All trademarks ...

Page 15: ...Visit our Website at www targus com Features and specifications subject to change without notice 2006 Targus Group International Inc and Targus Inc AMW07US 410 0068 001B ...

Reviews: