10
11
For an example, suppose your
band is performing on stage, and
you hear something unusual (well,
more unusual than normal). Without
interrupting their performance, you
can Solo each channel in turn, and
listen in the headphones until you
identify the problem channel or
band member. The Solo signal is not
affected by that channel’s MUTE (14),
or FADER (17). The channel signals to
the Aux, main mix and subgroups are
not affected.
STEREO CHANNELS
The following details show the
differences from the Mono channels:
There are no microphone inputs,
inserts, or low cut filters, and the Mid
EQ frequency is fixed at 2.5 kHz.
AUX 1 and AUX 2 buses are mono,
the stereo signals are summed before
reaching the AUX SEND (11,12) knobs.
SOLO (18) sends a sum of both
channels to the control room and
headphones.
GAIN (4), EQ (7-10), and MUTE (14),
and the channel FADERs (17) operate
equally on both left and right signals.
PAN (13) works rather like the
balance control on a home stereo,
adjusting the left and right balance
onto the main mix or subgroups.
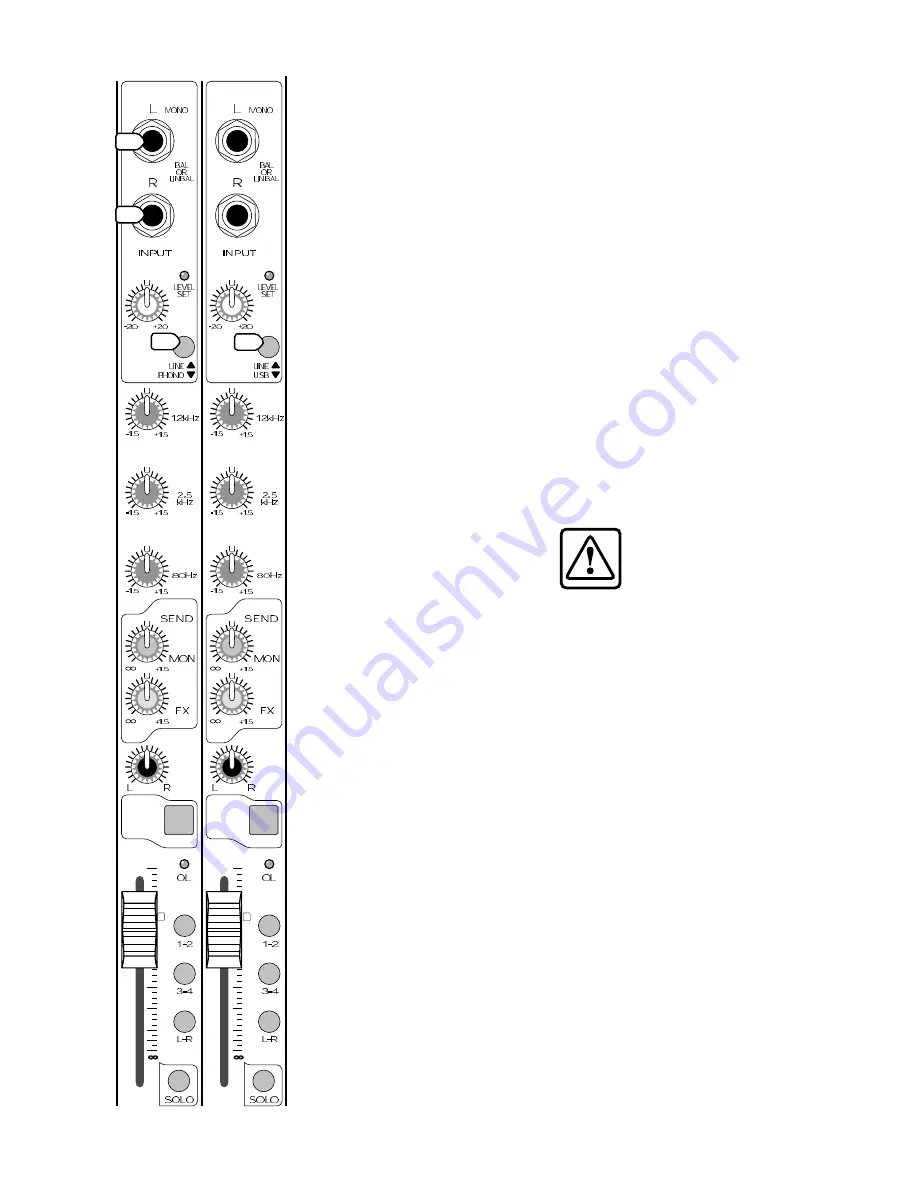
19. LINE INPUTS
These inputs accept 1/4" TRS
balanced and TS unbalanced plugs
from any line-level instrument, effects
device, or tape player. They can be
driven by virtually any line-level signal.
Guitars and other instrument-level
sources should not be connected
directly to these inputs. Use the INST
(2) inputs of channel 1 and 2, or use
a preamp to give a line-level output,
and then connect that to these
inputs.
Mono sources should be
connected to the left input only. The
left signal will then be split equally to
the left and right. You can use the
PAN (13) control to change the left/
right balance of the main mix and
subgroups.
Stereo sources should be
connected to both left and right
inputs, where they will pass through
the channel strip separated. The
standard convention is to plug in the
left signals into the odd-numbered
channels, and the right signals into
even-numbered channels.
20. LINE/PHONO switch
(channels 13 and 14 only)
In the up position, channel 13 and
14 accept line-level signals.
In the down position, these
two inputs accept phono-level
signals direct from turntables. An
internal phono preamplifier applies
the standard (RIAA) phono re-
equalization, and amplifies the raw
cartridge signals to line-level.
Suppose you have a turntable
and a favorite record from when you
were young. Connect the phono-
level outputs of the turntable to the
Ch 13 and 14 1/4" inputs. (You might
need a pair of RCA to 1/4" adapters,
depending on your turntable.) Also
connect the turntable’s ground wire
to the Mixer’s rear panel ground
screw. Play the record and adjust
the GAIN (4) as normal, so the LEVEL
SET LED (5) just lights. Select SOLO
(18) to hear it in the control room or
headphones, or press L-R to send it to
your main mix.
Caution:
DO NOT press
the switch down if you are
putting in a line-level signal
(or if your turntable already
has line-level outputs).
This could overload the mixer and
damage your hearing.
21. LINE/USB switch
(channels 15 and 16 only)
In the up position, channel 15 and
16 accept line-level signals.
In the down position, the stereo
channel is not fed by it’s 1/4" inputs,
but by the rear panel USB port
connected to a computer.
In the mixer’s USB section, the
digital audio output from software
such as Tracktion, is converted to
line-level, two-channel analog, which
feeds channels 15-16 just before the
GAIN (4) knob.
For example, suppose you have
recorded and mixed a lovely tune
using Tracktion software. You can
select Play in Tracktion, and press this
LINE/USB switch
in
to get the signals
into the mixer. Adjust the channel
GAIN (4) as normal, so the LEVEL SET
LED (5) just lights. Press L-R (16) to
send it to the main mix.
AUX
LINE
(
)
1
2
15
13
16
MUTE
GAIN
14
CD/ TAPE
15
16
MUTE
13
14
11
12
MUTE
11
12
9
(
)
(
)
(
)
GAIN
10
MUTE
9
10
PAN
PAN
PAN
LINE
LINE
LINE
GAIN
GAIN
PAN
EQ
MID
EQ
EQ
EQ
L
FX
R
1
2
AUX
1
2
AUX
1
2
AUX
1
2
AUX
HIGH
LOW
MID
HIGH
LOW
MID
HIGH
LOW
MID
HIGH
LOW
(
)
��
��
��
��
��
��
��
�
�
��
��
��
��
��
��
��
��
�
�
��
��
��
��
��
��
��
��
�
�
��
��
��
��
��
��
��
��
�
�
��
�
�
�
�
19
19
20
21
Summary of Contents for BLEND16
Page 1: ......
Page 7: ...7 SUB OUTS MAIN INSERT CONTROL RM OUT USB IN OUT MAIN OUT Hookup Diagrams Stereo PA system...
Page 28: ......


