Introduction
Tansun‘s range of mobile quartz heaters provide the perfect solution for spot or emergency heating requirements, effectively blending
into environments old and new while providing a cost effective, pollution free heater.
Please read the enclosed instructions carefully before use. The safety of this heater is guaranteed only by the correct usage in
accordance with these instructions, therefore it is recommended that they are retained for future reference.
Specification
Caution
•
Before using this appliance check that the voltage indicated on the type plate corresponds to the mains supply
voltage.
•
WARNING: This appliance must be connected to a supply that is earthed!
•
Only a 13A fuse must be fitted to the plug.
•
The unit must be operated in the vertical position and must not be moved when switched on.
•
UNDER NO CIRCUMSTANCES should any person attempt to touch any of the lamps whilst the unit is switched
on or when it has recently been used.
•
Ensure that the mains cable is always behind the unit and never in the beam of heat produced at the front.
•
UNDER NO CIRCUMSTANCES should any item be placed on or above any part of the heater, whether the
heater is being used or not.
•
Precautions should be taken to ensure that the heater is not placed, either directly or indirectly in line with any
form of spray paint, oil, water, or any other liquid substance, either whilst in use or not.
•
Do not handle the halogen lamp with bare hands. If it is inadvertently touched, remove finger marks with a soft
cloth and methylated spirit or rubbing alcohol. Otherwise, marks will burn into the quartz glass causing
premature heater failure.
•
Tansun do not recommend the use of an extension cable with this product.
•
This appliance is not intended for use by persons (including children) with reduced physical, sensory or mental
capabilities, or lack of experience and knowledge, unless they have been given supervision or instruction
concerning use of the appliance by a person responsible for their safety. Children should be supervised to
ensure that they do not play with the appliance
.
•
This heater is for indoor use only - do not install outdoors or use the heater in a damp area, for example a
bathroom or near to a swimming pool.
•
Do not touch the heater when it is turned on because the surface is hot.
•
Do not insert any object through any slot or opening on the heater.
Risk of Fire
Keep combustible materials such as furniture, papers, clothes and curtains at least 1.8m (6 feet) from the front
of the heater and away from the sides and rear.
1.8m
(6 ft)
Description Part Number
Lamps
Electrical
Rating (kW)
Supply
Amperes
(nominal)
Dimensions
H x W x D (mm)
Weight
(kg)
Spotter
HS030
Gold Quartz
SK15
2 x 1.5
230V ~ 50Hz *
13
1140 x 430 x 330
1080 x 705 x 550 with Stand
16.5
Beaver
HB030
Gold Quartz
SK15
2 x 1.5
230V ~ 50Hz *
13
650 x 430 x 200
669 x 430 x 509 with Stand
7.8
*The mains supply to this appliance should be a maximum impedance of 0.373 ohms.
2
3
Installation Instructions
BEAVER
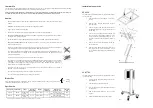
The support stand for the Beaver model is supplied in two halves
for ease of packing.
1. Place the base half of the stand ‘A’ on the work
surface.
2. Remove screws, nuts and washers from the base
half of the stand.
3. Slide the top half of the stand ‘B’ into position by
engaging the tabs into the slots on the base half as
shown in Fig. 1.
4. Line up the holes between the base half and top
halves and replace the screws and washers on the
outside ‘C’ and the serrated washers and nuts ‘D’ on
the inside of the base and fully tighten as shown in
Fig. 2.
5. Remove the four screws and washers ‘E’ from the
back of the heater.
6. Place the heater against the top half of the stand
and replace the four screws and washers ‘C’ and
ensure that they pass through the stand and fully
tighten.
SPOTTER
The support stand for the Spotter model is supplied in two halves
for ease of packing.
1. Interlock the two base plates with the base anchor
plate uppermost.
2. Affix the casters to each of the four ends.
3. Join the support to the anchor plate and bolt through
the base pieces.
4. Affix the head anchor bracket to the top of the
support.
5. Attach the heater head to the top of the support.
Fig. 1
Fig. 2
Fig. 3
‘A’
‘B’
‘E’
‘E’
‘C’
‘D’
Fig. 4


