background image

element User Manual v1.17 rev2  


10 

13. 

Screen saver 

To extend the life of the display and to save power when the panel is not in use, your 

panel will switch off the display if the panel has not been used a period of time. This is 

set in the factory to be 15 minutes. 


To wake the panel back up just press a button or move a knob / trackerball. 


14. 

Test mode 

By default the panel will come up showing the splash screen when you plug it into your 

computer and your software is not running. 


To enter the Test Mode, do the following: 

1.  Turn the panel off by unplugging the USB cable. 

2.  Make sure your software is not running. 

3.  Turn the panel back on by plugging in the USB cable. 

4.  Once you see the splash screen press the ‘

A

’ button. 


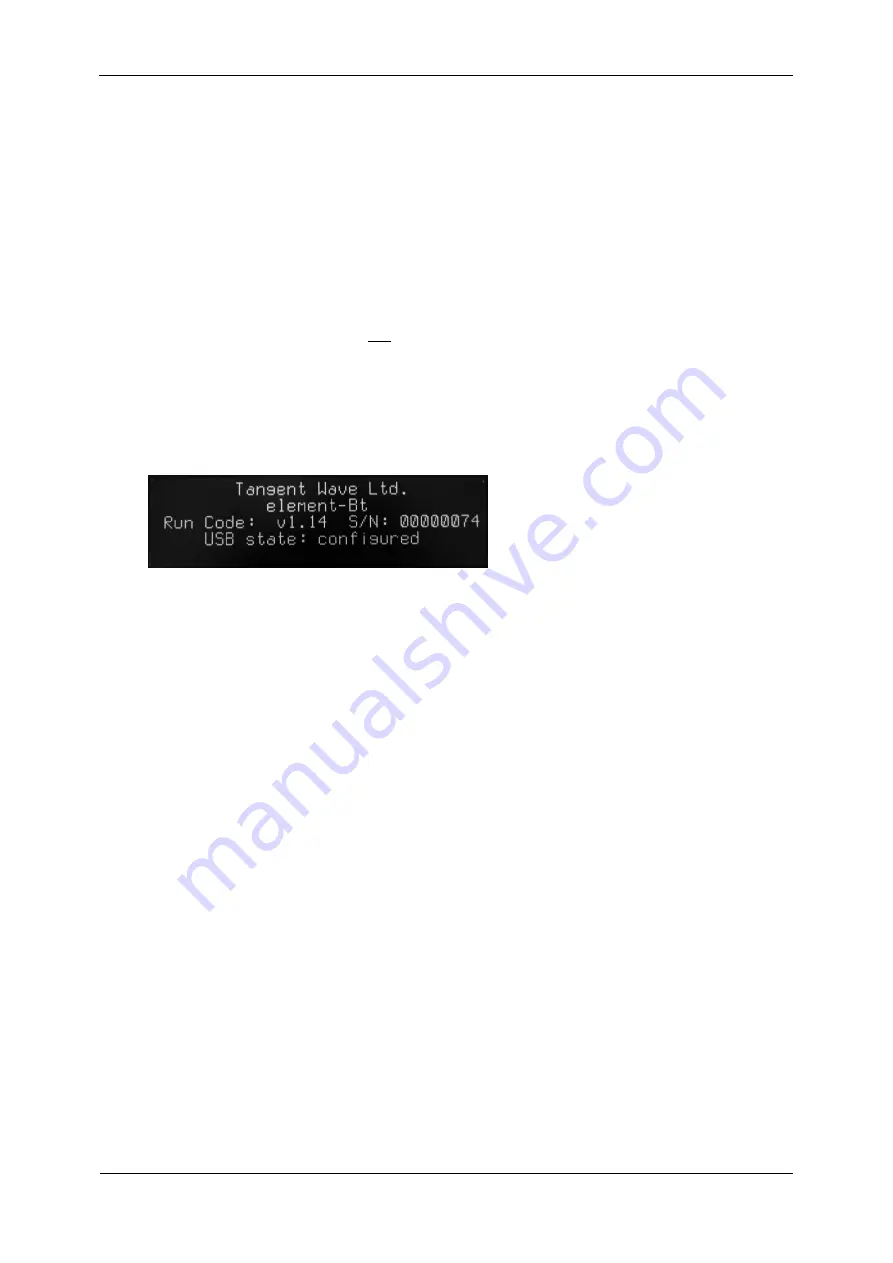
The display should look similar to this. 

The next sections explain what this is 

telling you about your panel. 


14.1 Run Code 

This is the panel firmware version number. See the section on updating the firmware for 

more information on this. 


14.2 USB state 

This is the current status of the USB connection. This will change and update rapidly 

when the panel is first plugged in but it should finish by saying 

configured

.  If it 

doesn’t say this after a few seconds then remove the USB connection and plug it back 

in again. 


If you move any of the controls or press any of the buttons the appropriate bottom line 

of the display will change to show you the status of the control or button which has been 

changed. The following describes what you should see for each control or button: 


14.3 S/N 

This is the unique serial number of the panel. Some software applications will require 

you to enter this when you configure it to use the Element panels. 


14.4 Testing knobs 

If you move a knob the bottom line of the display will show something similar to this: 


Encoder moved: 11 4 


The first number is the ID number for that control, in this case 11. The second number is 

the amount it’s moved by, in this case 4. The number gets bigger the faster you turn the 

Summary of Contents for element Tk

Page 1: ...User Manual v1 17 rev2 Important Check www tangentwave co uk for updates Tangent Wave Ltd Crowbush Farm Luton Road Toddington LU5 6HU UK www tangentwave co uk...

Page 2: ...e il riciclaggio 6 6 About this manual 7 7 What s in the box 7 8 Requirements 7 9 About the Element series of control panels 8 9 1 Drivers 8 9 2 Software 8 9 3 Power and communication 8 10 Positionin...

Page 3: ...e o The apparatus does not operate normally o The apparatus has been dropped 1 1 CE Declaration of Conformity Tangent Wave Ltd of 4 Crowbush Farm Luton Road Toddington United Kingdom declare that our...

Page 4: ...htigkeit ausgesetzt o Das Ger t funktioniert nicht normal o Der Apparat wurde fallen gelassen 2 1 CE Konformit tserkl rung Tangent Wave Ltd 4 Crowbush Farm Luton Road Toddington United Kingdom erkl rt...

Page 5: ...ou l humidit o L appareil ne fonctionne pas normalement o L appareil a t abandonn 3 1 D claration de conformit CE Tangent Wave Ltd de 4 Crowbush Farm Luton Road Toddington United Kingdom d clare que n...

Page 6: ...o no funciona normalmente o El aparato ha sido abandonado 4 1 Declaraci n ce de conformidad Tangent Wave Ltd de 4 Crowbush Farm Luton Road Toddington Reino Unido declara que nuestros productos Element...

Page 7: ...a o umidit o L apparecchio non funziona normalmente o L apparato stato abbandonato 5 1 Dichiarazione di conformit CE Tangent Wave Ltd di 4 Crowbush Farm Luton Road Toddington United Kingdom dichiara c...

Page 8: ...rove our services and products 7 What s in the box Element leaflet Element panel USB cable 2 x Link pins 8 Requirements Any operating system that has a built in USB HID driver Current versions of macO...

Page 9: ...use to work with your computer 9 2 Software Some applications will work with the panels without any additional software being installed Some applications will require the Tangent Hub support pack whic...

Page 10: ...ders or repeaters You can use a USB hub to connect multiple panels to your computer The important thing to note is that the hub must be powered and must be able to provide 500mA to each USB port simul...

Page 11: ...number See the section on updating the firmware for more information on this 14 2 USB state This is the current status of the USB connection This will change and update rapidly when the panel is first...

Page 12: ...f it does not change then the ball is faulty For the ring should be positive when the ring is turned clockwise and negative if turned anti clockwise If the number is always 1 or 1 or doesn t change th...

Page 13: ...communicating with the panel Generally problems with communication are related to setting up your software to talk to the panel Refer to your software vendors instructions for doing this Make sure the...

Page 14: ...y is always blank section 15 8 The display is always blank If your screen is completely blank and you have tried unplugging and plugging the panel back in again then check the following It might be th...

Page 15: ...e three white balls the ball sits on and the lenses which houses the optical sensor The ring on the trackerball is held in place by magnets in the ring When replacing the ring make sure it locates cor...

Reviews: