


10
Tanco Autowrap 404 EH
Operators manual
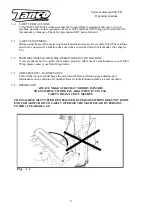
4.0 SETTING UP / MOUNTING OF THE MACHINE.
4.1
Mounting the Drawbar.
The Drawbar should be positioned such that the machine is parallel with the ground when it is
connected to the tractor.
4.2
Mount the loading arm and adjust the width on the lift arm in accordance with the bales diameter.
Adjust the loading arms end stopper so that the bale will be placed in the middle of the table
when loading.
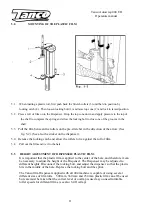
4.3
Mount the Film Dispenser.
Adjust the height on the Dispenser so that the middle of the plastic meets with the bale’s center.
4.4
Mount the safety arm to the Chassis
4.5
Lubricate the machine.
4.6
Check that all the bolts and nuts are tightened, specially the wheel bolts.
4.7
Remove the safety bolts used under transportation from the loading arm, insert the safety bolts
into the parking holes.
4.8
Connect the machine to the tractors rear trailer hitch.
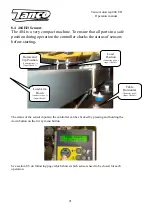
4.9 HYDRAULIC
CONNECTION.
The hydraulic hoses between machine and tractor are equipped with
1/2’
ISO male quick-
couplers. Discharge the oil pressure before you connect the oil hoses. Use the tractors’ hydraulic
lever. Connect the hoses so that the turntable rotates counterclockwise.
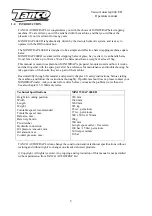
To make sure that the bale wrapper works properly, the tractors’ oil pressure has to be at least
100 bar. If you are unsure of what oil pressure the tractor gives, or what oil pressure the bale
wrapper receives, please contact your machinery dealer.
NB! When connected to a tractor with closed center (e.g. JOHN DEERE) a special, closed centers,
plug must be fitted to the valve to prevent the oil over heating (consult your dealer and parts book
and see chapter 13.0).
4.10 CHECK
LIST.
Before using the machine it is recommended to follow this check list:
1.
Make it a habit to discharge the oil-pressure before connection or disconnection of the
hydraulic hoses. (Use the tractors hydraulic control lever).
2.
Hose with BLUE CAP
=
RETURN OIL.
3.
Hose with RED CAP
=
PRESSURE.
4.
Tie up loose hoses so that no squeeze damages occur.
5.
Start the tractor and try out the functions. (It should rotate counterclockwise).
6.
Check all connections, hoses and couplings. If there is any oil-leakage, it should be
rectified immediately.
Your MINI WRAP
bale wrapper has been tested in practical operation in approx. 2 hours
at the factory.


