background image

Setting the first
printing line (TOF)

You can use the TOF function for setting the position of the first printing line for each paper
source and each menu individually.

Before using the TOF function (if fanfold paper is used), you should first set the tear position (see
above).

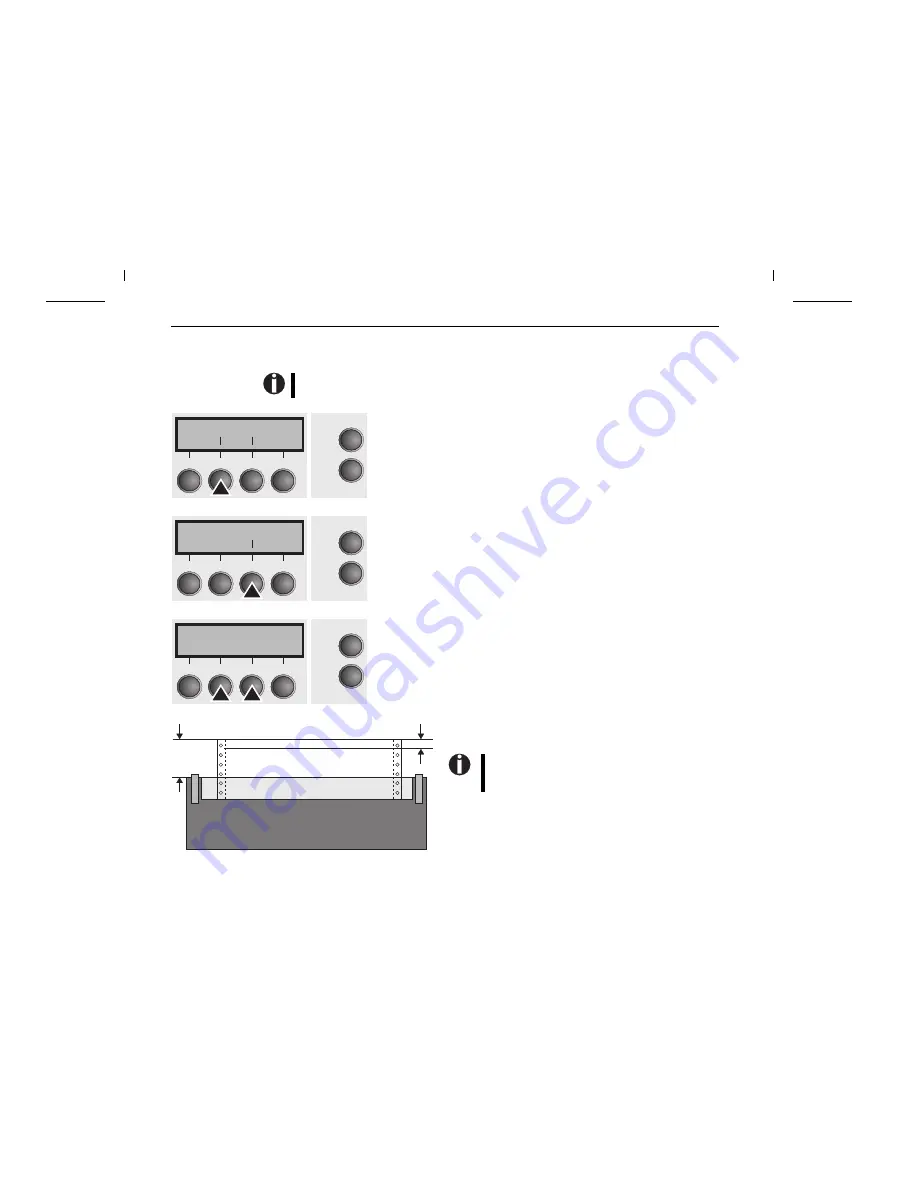
Press the Setup key. The printer changes to setup mode. 
Press the Adjust (2) key.

Press the TOF (3) key.
The paper is fed to the position where the bottom edge of the first printing line
is aligned with the tear edge. The factory setting for the first printing position
(TOF) is 12/72".

Press the 

<

 (2) or 

> (3) key to move the first printing line to the desired position.

You can set values in the range from 0 to 220/72" for fanfold paper and for
single sheets.

Confirm the setting by pressing the Set (1) key.
Press the Setup key. The printer is reset to the initial status.

Adjust  Paperway
Menu        Char

Online

Setup

2

1

3

4

TOF

Head        Tear

Online

Setup

2

1

3

4

FormAdj= 12/72"*
Set  <   >  Exit

Online

Setup

2

1

3

4

Default TOF

Readjusted TOF

12/72"

0–220/72"

The setting made will be retained after switching off
the printer. For more details, refer to the reference
manual on the online CD-ROM.

Settings

Quick Start-up

20

Summary of Contents for T2150

Page 1: ...pu ll to op en T2250 T2150 pu ll to op en Operator s manual Matrix printer...

Page 2: ...cessibill all operatore ADVERTENCIA Las cubiertas y piezas s lo deber n ser quitadas o abiertas por personal especializado Se except an de esta regla s lo las cubiertas y piezas cuya retirada y apertu...

Page 3: ...ter 8 Switching on the printer 8 Control panel 9 Online mode 9 Offline mode 9 Setup mode 10 Changing the ribbon cassette 11 Paper handling 13 Paper path quick selection 13 Loading paper 14 Fanfold pap...

Page 4: ...oughly before starting up your printer in order to prevent injuries and avoid damage to the device Keep this Operator s Manual in a place which is easily accessible at all times Place the printer on a...

Page 5: ...detailed description of the printer and its powerful features Drivers for Windows 95 98 ME Windows NT 4 Windows 2000 Additional documentations Programming instructions and descriptions of the availab...

Page 6: ...ottom cover Manual single sheet feeder closed Power inlet and fuse Interface connector Top cover Latches Tear edge Printhead Rear cover Ribbon cassette pu ll to op en Printer in fanfold paper mode Tra...

Page 7: ...cardboard box towards you and remove the remaining packaging material Check the printer for any visible transport damage and com pleteness ApartfromthisOperator sManual the CD ROM at the back of this...

Page 8: ...y inflammable gas or explosive substances Do not expose the printer to direct sunlight If you cannot avoid placing the printer near a win dow protect it from the sunlight with a curtain When connectin...

Page 9: ...this may result in severe damage You can set the printer to the correct mains voltage yourself To do this cautiously place the printer on its back side Use a suitable object e g a screwdriver but neve...

Page 10: ...n the printer and the computer Connect the power cable to the power inlet of the printer Connect the power cable plug to a mains socket Switching on the printer The power switch for switching on the p...

Page 11: ...the printer to offline mode Offline mode Onlyinthismodeitispossibletoperformstep line orformfeedsfromthecontrolpanel see page 17 Paper transport however data cannot be received Paper transport Park k...

Page 12: ...printing line and print head gap Paperway key 3 Paper path Char key 4 Font and number of characters per inch Access to the other menu settings Menu may be disabled by the manufacturer For information...

Page 13: ...o the top cover of the printer and remove it Cautiously slide the print head carriage to the left stop viewed from the printer front Raise the printer bar cover and remove the used cassette 90 The pri...

Page 14: ...il it clicks into place In this way the cartridge is automat ically positioned correctly Use the knob on the right side of the cassette to take up slack of the ribbon again Thereby the ribbon will sli...

Page 15: ...ss any key If a single sheet is loaded in the printer it is ejected Use one of the marked keys to select the desired paper path for example Single 2 The display alternates between the basic menu and t...

Page 16: ...t cover taking it by the areas marked with arrows on the left and right Open the right and left tractor flaps You may also want to remove the bottom cover in order to facilitate loading the fanfold pa...

Page 17: ...active paper source Tractor1 appears in the display The paper is automatically loaded when the printer is in online mode and receivesdatafromthecomputer Press the Load 4 key to load paper before star...

Page 18: ...o the width of the paper used Insert the single sheet into the input tray as far as possible Press the Online key to set the printer to ready status The sheet is automatically loaded when the printer...

Page 19: ...it is ejected Key 2 Short keypress Paper is transported upwards step by step Long keypress Continuous transport upwards Key 3 Short keypress Paper is transported downwards step by step Long keypress C...

Page 20: ...tear edge see below The display alternates between and After having torn off the paper press the Exit 4 key The printer returns the paper to the first printing position If a print job is active the pr...

Page 21: ...the park position Press the Setup key The printer changes to setup mode Press the Adjust 2 key Press the Tear 4 key Press the 2 or 3 key to move the perforation to the desired position Confirm the set...

Page 22: ...edge The factory setting for the first printing position TOF is 12 72 Press the 2 or 3 key to move the first printing line to the desired position You can set values in the range from 0 to 220 72 for...

Page 23: ...ence manual on the online CD ROM Press the Setup key The printer changes to setup mode Press the Adjust 2 key Press the Head 1 key Use the 2 or 3 key to set the range within which the automatic gap ad...

Page 24: ...the desired font Confirm the selection by pressing the Set 1 key You can cancel the selection and leave the setting unchanged by pressing the Exit 4 key Press the Setup key The printer is reset to th...

Page 25: ...ting rate 430 pages h 7 2 pages min ECMA Character density 5 6 7 5 8 6 10 12 15 17 1 20 cpi Resolution max Horizontally 360 dpi Vertically 360 dpi Emulations Standard MTPL Tally Printer Language Epson...

Page 26: ...testing Paper weight No of copies Form thickness max 60 120 g m2 1 5 0 60 mm Single sheet input tray Continuous single forms Continuous set of forms requires individual testing Paper weight No of copi...

Page 27: ...s manual However we cannot accept responsibility for any errors or damages resulting from errors or inaccuracies of information herein TRADEMARK ACKNOWLEDGEMENTS CENTRONICS is a trademark of Centronic...

Page 28: ...00 Fax 1 425 25155 20 http www Tally com UNITED KINGDOM Tally Limited Rutherford Road Basingstoke Hampshire RG24 8PD England U K Phone 44 870 872 2888 Fax 44 870 872 2889 http www Tally co uk CANADA T...

Reviews: