Step 4
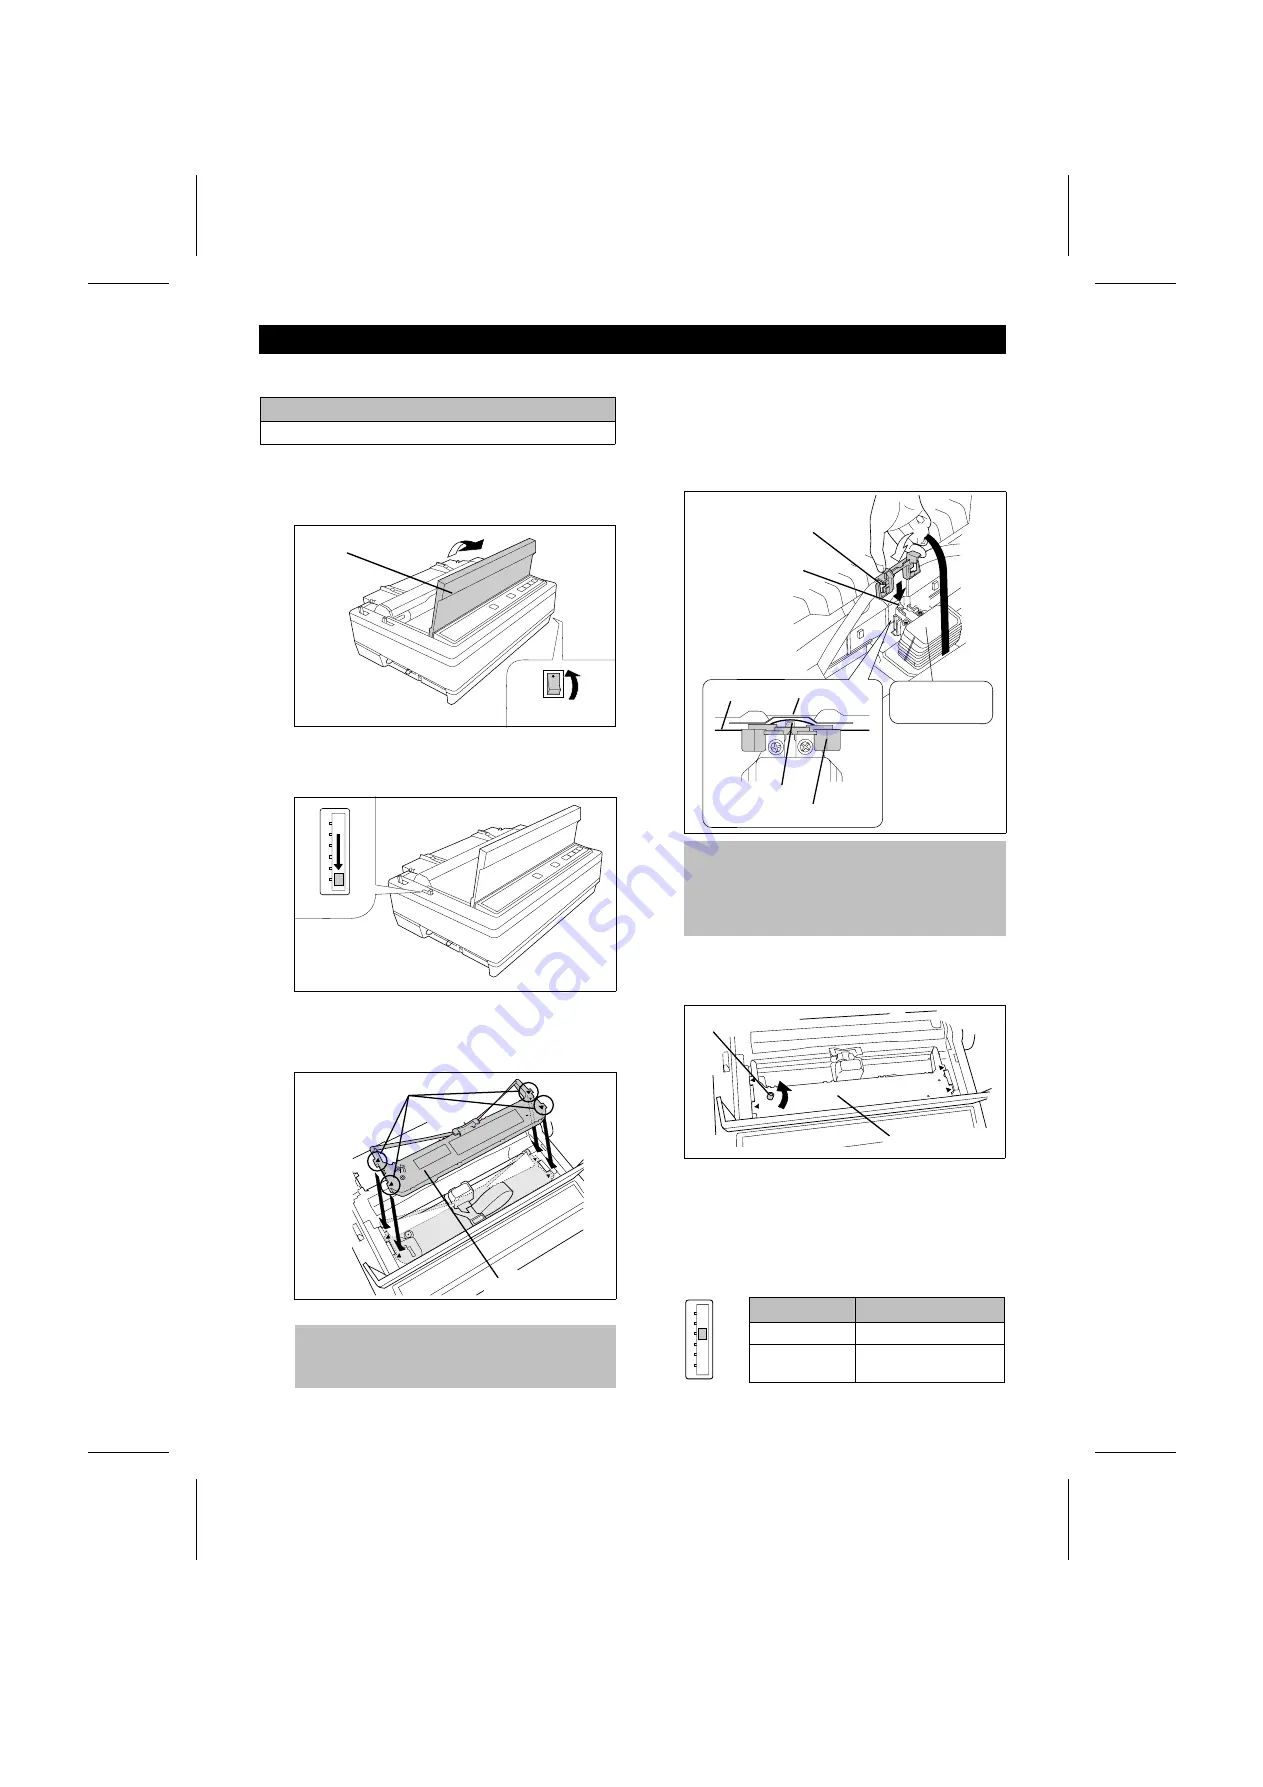
Installing Ribbon Cassette
■
Supply
Description
Ribbon Cassette (black)
1
➊
Turn power on.
➋
Open smoked plastic cover.
2
Move head gap lever to position “6”.
3
Install ribbon cassette and push down
4 arrows until they click into place.
4
➊
Lift blue ribbon guide from ribbon
cassette.
➋
Slide blue ribbon guide between
printhead nose and ribbon mask,
and push it down.
5
Make sure ribbon is not twisted and
rotate knob to remove any slack.
6
Close smoked plastic cover.
7
Adjust head gap lever for the
thickness of paper you are using.
Position
Used for
1 or 2
Thinner sheets
3, 4, 5 or 6
Thick sheets or
multi-part forms
Note:
•
If the ribbon does not insert easily between
the printhead nose and the ribbon mask,
rotate the knob on the ribbon cassette to
reduce the slack.
Step 3
Installing Ribbon Cassette
Note:
•
Do not take off the blue ribbon guide from
the ribbon.
Ribbon cassette
Arrows
➊
➋
Smoked plastic
cover
Power switch
1
2
3
4
5
6
HEAD GAP
Head gap lever
Knob
Ribbon cassette
1
2
3
4
5
6
HEAD GAP
CAUTION
HOT SURFACE,
AVOID CONTACT.
Printhead nose
Blue ribbon guide
Ribbon
Ribbon mask
Printhead nose
Blue ribbon guide
➋
➊
-3-


