background image

28  

Page

Installation

Installation Manual

HIGH-ALTITUDE INSTALLATIONS

Check the elevation where your water heater is installed  Set DIPswitches shown in the tables below 

depending on the altitude

NOTE: 

The dark squares indicate the direction the DIPswitches should be set to


     Only adjust the necessary switches

Bank of DIPswitches

Computer board

Indoor model

Altitude

 0 to 2,000 ft. 

(DEFAULT)

 2,000 to 

 3,000 ft.

3,000 to

5,000 ft.

5,000 to

7,500 ft.

7,500 to

10,100 ft.

DIPswitches

No 3 : OFF

No 4 : OFF

No 5 : OFF

No 3 : OFF

No 4 : ON

No 5 : OFF

No 3 : OFF

No 4 : OFF

No 5 : ON

No 3 : OFF

No 4 : ON

No 5 : ON

No 3 : ON

No 4 : ON

No 5 : ON

OFF

ON 1 2 3 4 5 6 7 8 9 10

OFF

ON 1 2 3 4 5 6 7 8 9 10

OFF

ON 1 2 3 4 5 6 7 8 9 10

OFF

ON 1 2 3 4 5 6 7 8 9 10

OFF

ON 1 2 3 4 5 6 7 8 9 10

Outdoor model

Altitude

 0 to 2,000 ft. 

(DEFAULT)

2,000 to

4,000 ft.

4,000 to

6,000 ft.

DIPswitches

No 3 : OFF

No 4 : OFF

No 5 : OFF

No 3 : OFF

No 4 : OFF

No 5 : ON

No 3 : ON

No 4 : OFF

No 5 : ON

OFF

ON 1 2 3 4 5 6 7 8 9 10

OFF

ON 1 2 3 4 5 6 7 8 9 10

OFF

ON

1 2 3 4 5 6 7 8 9 10

Installation altitude

 The maximum certified

or allowable installed

altitude is 10,100 ft for

indoor model and 6,000 ft

for outdoor model

Summary of Contents for T-H3M-OS

Page 1: ...ely call your gas supplier from a neighbor s phone Follow the gas supplier s instructions If you cannot reach your gas supplier call the fire department Installation and service must be performed by a...

Page 2: ...ons 28 APPLICATIONS 29 INITIAL OPERATION 31 OPTIONAL ITEMS 32 Owner s Guide OPERATING SAFETY 35 NORMAL OPERATION 37 Display of controller 37 General 37 Temperature table of controller 37 Temperature s...

Page 3: ...t you read through this safety manual carefully Please refer to the back of the manual for details about the warranty Keep this manual for future reference If you lose the manual contact the manufactu...

Page 4: ...al Gas Input Operating Range BTU h Min 15 000 Max 120 000 Propane Input Operating Range BTU h Min 15 000 Max 120 000 Gas Connection 1 2 NPT Water Connection 3 4 NPT Water Pressure psi MPa 15 150 0 1 1...

Page 5: ...stalled outdoors The principle behind tankless water heaters is simple This diagram illustrates tankless water heater design concepts only and does not accurately represent the water heater s physical...

Page 6: ...not match your requirements do not install and consult with the manufac turer 5 If any problem should occur turn off all hot water taps and turn off the gas Then call a trained technician or the Gas C...

Page 7: ...maintenance is recommended for these types of environments Sealed combustion is recommended too 9 The 140 Indoor T H3M DV model is to be installed indoors only The model is equipped with a thermistor...

Page 8: ...st water damage is required to be installed under the water heater in case of leaks It is recommended to direct vent the heater WARNING Damage caused by water quality is not covered by the warranty On...

Page 9: ...5 mm 4 in 102 mm 1 in 25 mm 3 in 76 mm 140 Outdoor T H3M OS 36 in 914 mm 12 in 305 mm 24 in 610 mm 1 in 25 mm 3 in 76 mm 24 inches recommended for maintenance Top Back Side Side Front Bottom Do not in...

Page 10: ...ed with plastic pipe materials such as ABS PVC solid core CPVC solid core or Polypropylene For details please refer to the Exhaust Vent ABS PVC CPVC or Polypropylene Vent section on p 11 Vent installa...

Page 11: ...0 9 m intervals with overhead hangers For each elbow added deduct 5 ft 1 5 m from max vent length For details on the vent connection refer to p 13 to 16 No of Elbow 2 venting 3 venting 4 venting 0 to...

Page 12: ...No 6 ON No 7 ON OFF ON 1 2 3 4 5 6 7 8 9 10 OFF ON 1 2 3 4 5 6 7 8 9 10 OFF ON 1 2 3 4 5 6 7 8 9 10 Set DIPswitches shown in the tables below depending on the vent length Only adjust switches with a...

Page 13: ...ectly on the intake vent collar of the water heater 2 Connect a 3 x 2 reducer directly on the exhaust vent collar of the water heater Make sure the couplings engage the o rings installed in the intake...

Page 14: ...Intake vent collar Female The water heater came with a metal screen that will fit into a 3 inch elbow For details of the optional items refer to the Installation manual for each optional item 1 Conne...

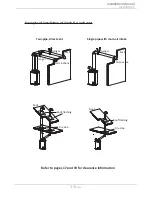
Page 15: ...ect vent Single pipe with room air intake Terminations Wall Hanger Hanger Roof Roof flashing Fire stop Termination Wall Hanger Roof flashing Fire stop Roof Refer to pages 17 and 19 for clearance infor...

Page 16: ...re rating of 160 F For best results a vent system should be as short and straight as possible The Indoor model is a Category IV appliance and must be vented accordingly with any 4 inch vent approved f...

Page 17: ...e extended above meter regulator assembly 3 feet I Clearance to service regulator vent outlet 3 feet J Clearance to non mechanical air supply inlet to building or the combustion air inlet to any other...

Page 18: ...ion at least 1 ft 305 mm away from each other no matter the orientation A direct vent termination must also be at least 2 ft 610 mm away from an inside corner If the adjacent wall is less than 2 ft 61...

Page 19: ...ust gas 3 ft 914 mm min B A 2 ft 610 mm min Intake air B B A Exhaust Gas A Exhaust terminations must be at least 1 ft 305 mm away from any obstructions B Intake terminations must be at least 1 ft 305...

Page 20: ...iping system during any pressure testing of that system at test pressures in excess of 1 2 psi 3 5 kPa The water heater must be isolated from the gas supply piping system by closing its individual man...

Page 21: ...ple Natural Gas Unit kBTU per hour Pipe Size Length Diameter 10 20 30 40 50 60 70 80 90 100 125 150 200 1 2 268 184 148 126 112 101 93 87 82 77 68 62 53 3 4 567 393 315 267 237 217 196 185 173 162 146...

Page 22: ...anual gas valve on the gas supply line 2 Remove the screw for the pressure port located on the gas inlet of the water heater shown in the diagram on the right 3 Connect the manometer to the pressure p...

Page 23: ...the discharge tube to the pressure relief valve and run the end of the tube to within 6 inches 152 mm from the floor This discharge tube must allow free and complete drainage without any restrictions...

Page 24: ...tralizer is not required 1 Connect a 1 2 FPT X 3 8 or 1 2 HB Adaptor to the condensate drain port at the bottom of the water heater 2 Connect a condensate drain tube to the 1 2 FPT X 3 8 or 1 2 HB Ada...

Page 25: ...e is designed to last for 3 years before replacement However the actual life of the neutralizer may vary depending on the application and usage Please ensure that the cartridge is properly replaced be...

Page 26: ...he Remote Controller 1 Take off the Back plate from the remote controller with a flat head screwdriver Fig A and B 2 Attach the Back plate on the wall with the two provided screws Fig B This remote co...

Page 27: ...Take off the water heater s front cover 3 Locate the remote controller terminals pictured below located around the lower right hand side of the computer board 4 Take off the back plate from the remot...

Page 28: ...witches No 3 OFF No 4 OFF No 5 OFF No 3 OFF No 4 ON No 5 OFF No 3 OFF No 4 OFF No 5 ON No 3 OFF No 4 ON No 5 ON No 3 ON No 4 ON No 5 ON OFF ON 1 2 3 4 5 6 7 8 9 10 OFF ON 1 2 3 4 5 6 7 8 9 10 OFF ON 1...

Page 29: ...eviously used with non potable water where any chemicals were added to the water heating appliances When the system requires water for space heating at temperatures higher than required for other uses...

Page 30: ...des and must meet BTU rating of water heater model used Check valve will have 1 8 inch hole drilling in clapper optional Atmospheric vacuum breaker Shutoff valve Pressure gauge Apply correct thermal e...

Page 31: ...he first time Open the main gas supply valve to the water heater using only your hand to avoid any spark Never use tools If the knob will not turn by hand do not try to force it call a qualified servi...

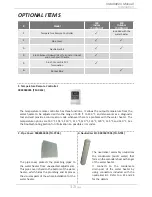
Page 32: ...he output temperature from the water heater to be adjusted within the range of 100 F to 140 F and also works as a diagnostic tool and will provide a concise error code whenever there is a problem with...

Page 33: ...and IV For different wall thicknesses there are two ranges of lengths available Refer to the NovaVent brochure for details Install these vent terminations in accordance with their installation instru...

Page 34: ...this safety manual carefully Please refer to the back of the manual for details about the warranty Keep this manual for future reference If you lose the manual contact the manufacturer or your local d...

Page 35: ...mpted repair may result in a fire or explosion D Do not use this appliance if any part has been under water Immediately contact a qualified installer or service agency to replace a flooded water heate...

Page 36: ...In approved containers 3 Tightly closed and out of reach of children 4 Water heater has a main burner which may come on at any time and will ignite flammable vapors Vapors 1 Cannot be seen 2 Are heav...

Page 37: ...RMAL OPERATION F 100 105 110 115 120 125 130 135 140 C 38 40 43 45 50 52 55 57 60 Factory setting Default TEMPERATURE TABLE OF THE CONTROLLER COLD Button HOT Button Pressthe HOT buttonorthe COLD butto...

Page 38: ...ection the DIPswitches should be set to 120 F 50 C DEFAULT 140 F 60 C No 9 OFF No 9 ON OFF ON 1 2 3 4 5 6 7 8 9 10 OFF ON 1 2 3 4 5 6 7 8 9 10 Normal Operation Owner s Guide Operation Screen on the co...

Page 39: ...troller will not operate temperature settings as only work for the information mode Indoor model only Operation Screen on the controller 1 Press the ON OFF button on the controller in order to turn th...

Page 40: ...tely drain the water out of the water heater Refer to p 41 2 Disconnect power to your heater This will keep your water heater from freezing and being damaged Only pipes within the water heater are pro...

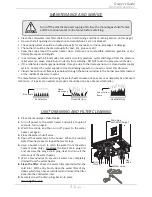
Page 41: ...ician If repairs are needed any repairs should be done by a licensed technician UNIT DRAINING AND FILTER CLEANING Turn off the electrical power supply and close the manual gas shutoff valve and the ma...

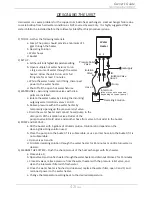
Page 42: ...d connect hoses pump to the drain ports of the isolation valves Outlet of the pump to valve B cold side and another hose from valve A hot side to the bucket 4 PUMP and DESCALE a Fill the bucket with 5...

Page 43: ...re controller is the power button turned on The time it takes to deliver hot water from the water heater to your fixtures depends on the length of piping between the two The longer the distance or the...

Page 44: ...sounds from the water heater Is the correct gas type of a water heater installed p 6 Are the DIPswitch settings for your altitude set correctly p 28 Check the flame quality p 41 Is the intake or exha...

Page 45: ...water heater itself or the installation of the unit the error code will be displayed on the temperature controller and remote controller Consult with the table on the following pages for the descript...

Page 46: ...tion breakage of wires Part 412 707 708 709 710 burn marks on the computer board Part 701 and or soot on the flame rod Part 108 Check if there is a buzzing spark ignition sound coming from the burner...

Page 47: ...controller Check the model type of the remote controller Inspect the connections between the water heater and remote controller Check the power supply of the water heater 751 N A Miscommunication betw...

Page 48: ...remote controller Indoor model Outdoor model 702 704 052 052 052 006 704 005 052 004 004 001 007 003 050 002 001 714 002 Temperature controller Indoor model COMPONENTS DIAGRAM Components Diagram Owner...
Page 49: ...age Computer board assembly Surge box assembly 709 710 103 708 402 707 701 711 716 402 407 408 060 713 706 for Indoormodel for Outdoormodel 701 710 703 120 053 705 712 712 Components Diagram Owner s G...

Page 50: ...116 053 117 103 105 064 054 104 115 053 053 106 107 108 708 110 061 109 111 709 112 053 114 113 707 102 053 120 709 150 057 055 062 053 711 117 055 119 151 118 051 Manifold assembly Burner assembly C...

Page 51: ...51 413 451 414 414 451 052 409 457 460 453 408 059 454 410 416 455 458 402 459 457 404 406 456 405 052 453 407 059 416 053 417 A B A B 401 154 E E 467 463 063 455 458 455 467 463 063 455 458 A 455 455...

Page 52: ...Screw M4x10 Screw M3x6 SUS3 319143 059 319143 048 320273 497 319143 330 EW00D EM167 EW00P EW00B 101 102 Burner assembly Manifold with gas valve assembly LP Manifold with gas valve assembly NA 320273 3...

Page 53: ...73 365 EK469 415 416 Drain tube Inlet heater 320273 366 319143 468 EK470 EK105 417 Secondary heat exchanger for Indoor model Secondary heat exchanger for Outdoor model 320273 553 320273 554 EK471 EK47...
Page 54: ...d cover Cable clamp for Indoor model 319143 481 N A 319143 191 319143 500 EK112 EX004 EKK1M EX13C 715 716 Exhaust thermistor for Indoor model Exhaust Hi limit switch wire 319143 131 319143 501 EKH6E E...
Page 55: ...limited warranty This limited warranty gives you specific legal rights and you may also have other rights which vary from State to State The manufacturer will honor the warranty to the original retai...

Page 56: ...eter sizing incorrect gas type and or gas pressures that fall outside the product s specified range Water incorrect water pipe sizing water pressures that fall outside the product s specified range re...

Reviews: