
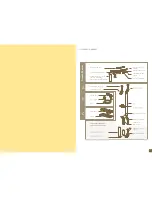
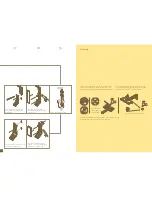


Fit foam seal around nipple. insert
waterway into outlet and screw nut
on to outlet loosely
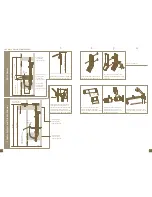
Swing aside. drill clearance into
lining then pre-drill support
Slip spacer under bracket
Seal hole and drive in screw (and
wall plug if appropriate)
Slip top rail bracket under
drencher bracket
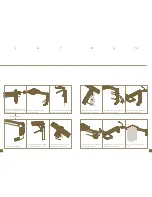
Seal holes and drive in screws (and
wall plugs if appropriate)
ensure edge of bracket is plumb
then mark bottom screw hole
Tighten using a lever until bracket
is pulled flat against wall
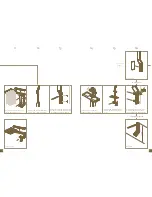
ensure edge is plumb, mark plumb
line to floor and mark screw holes
Tighten using a lever until bracket
is pulled flat against wall
Swing aside. drill clearance into
lining then pre-drill support
run water to ensure the unit is
sealed
5
8
6
9
7
10
Drencher only