


User Configuration Manual TGW4/8 Gateway Series for Aeonix
Tadiran Telecom (TTL) L.P. 90
3.3 FXO Trunk Line
– Basic Configuration (TGW8-2G)
1.
Open the Aeonix Web Admin.
2.
Add a new trunk
a.
In the navigation pane, select
Administration > Trunks > Add Trunk
, and then select
the trunk type as
SIP Trunk / Gateway
.
b.
Define the
Trunk ID
fields.
In the first field (before the @ sign), enter the trunk name as the line number.
In the second field (after the @ sign), enter the name of the domain to which the trunk is
connected.
c.
Click the
Configuration
tab.
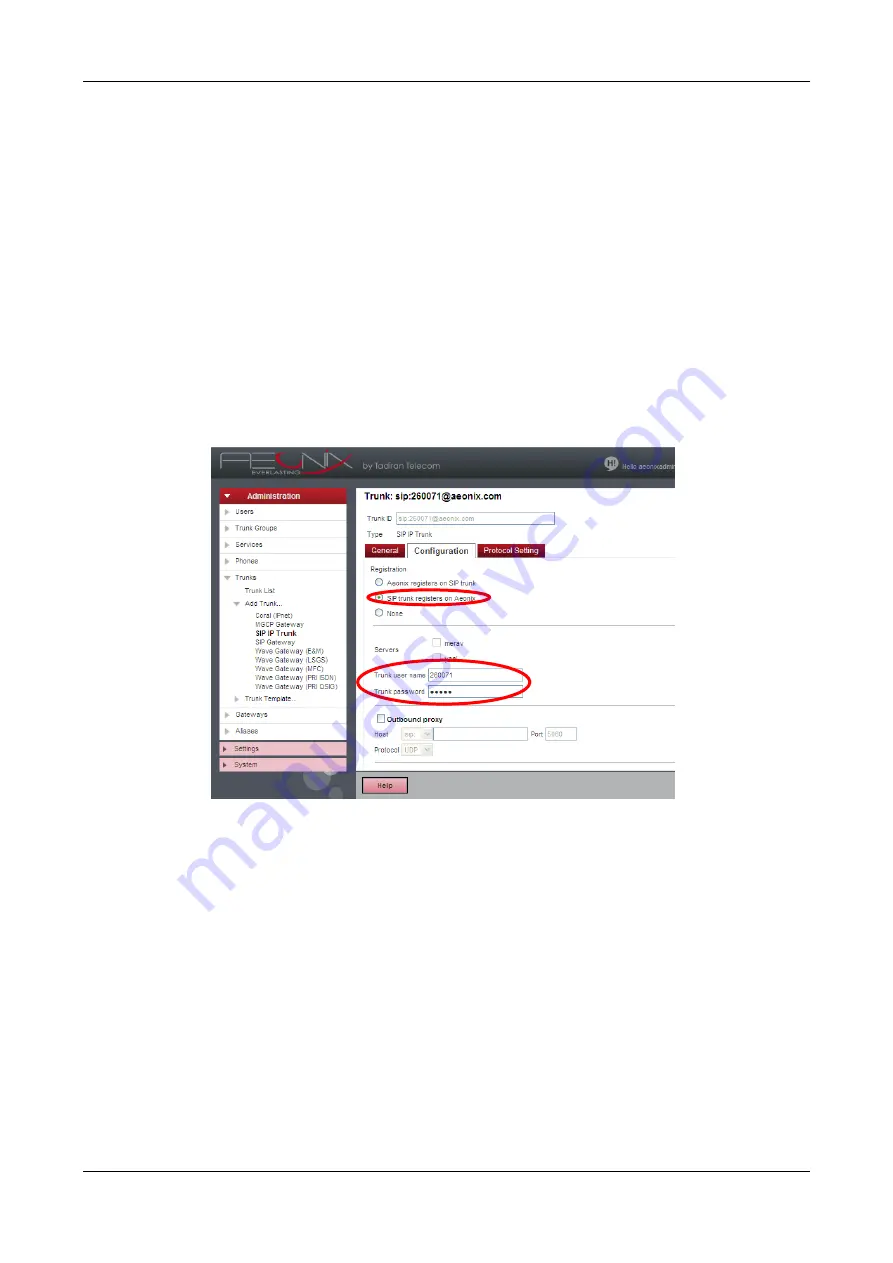
Figure 3-2
Aeonix Trunk Page
(d)
In the Registration section, select the
SIP trunk registers on Aeonix
check box.
(e)
In
Trunk user name
box, enter same name as was entered in
Section 2.3.5
(f)
In
Trunk password
box, enter same password as was entered in
Section 2.3.5
. See Table 2-8 on page 20.
3.
Repeat step 2 for all FXO trunks in the TGW gateway.
4.
Define a Trunk Group and add to it all FXO trunks in the system.
(a)
In the navigation pane, select
Administration >
Trunk Group.
(b)
To define a new trunk group, click
Add Trunk Group
(c)
To add FXO trunks to the group, click the
Members
tab.
(d)
Verify that the FXO trunks were added correctly; Verify that the FXO trunks are
working, as indicated by a green circle on the trunk group. Also verify in the gateway
that the FXO lines are registered, see
on page 71.


