background image

NOTICE!
External power supply
The device is powered by an external power supply. Before connecting the

external power supply, ensure that the input voltage (AC outlet) matches the

voltage rating of the device and that the AC outlet is protected by a residual cur‐

rent circuit breaker. Failure to do so could result in damage to the device and pos‐

sibly the user.
Unplug the external power supply before electrical storms occur and when the

device is unused for long periods of time to reduce the risk of electric shock or

fire.

NOTICE!
Risk of fire due to incorrect polarity
Incorrectly inserted batteries may destroy the device or the batteries.
Ensure that proper polarity is observed when inserting batteries.

Safety instructions


UHF wireless system

12

Summary of Contents for free solo Twin HT

Page 1: ...free solo Twin HT free solo Twin PT free solo Twin HTPT UHF wireless system user manual...

Page 2: ...Musikhaus Thomann Thomann GmbH Hans Thomann Stra e 1 96138 Burgebrach Germany Telephone 49 0 9546 9223 0 E mail info thomann de Internet www thomann de 18 05 2016 ID 380952 380953 380954 380955 380956...

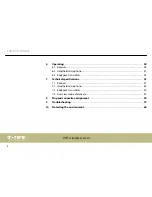
Page 3: ...s 10 3 Features 14 4 Installation and starting up 18 4 1 General Information 18 4 2 Receiver 19 4 3 Handheld microphone HT series 21 4 4 Bodypack transmitter PT series 21 5 Connections and controls 23...

Page 4: ...smitter 44 7 Technical specifications 47 7 1 Receiver 47 7 2 Handheld microphone 48 7 3 Bodypack transmitter 50 7 4 Overview scope of delivery 52 8 Plug and connection assignment 54 9 Troubleshooting...

Page 5: ...ructions Keep the manual for future reference Make sure that it is available to all those using the device If you sell the unit please make sure that the buyer also receives this manual Our products a...

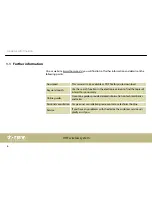
Page 6: ...arch Use the search function in the electronic version to find the topics of interest for you quickly Online guides Our online guides provide detailed information on technical basics and terms Persona...

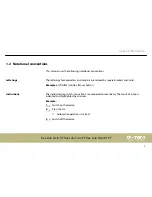
Page 7: ...Examples VOLUME control Mono button The individual steps of an instruction are numbered consecutively The result of a step is indented and highlighted by an arrow Example 1 Switch on the device 2 Pre...

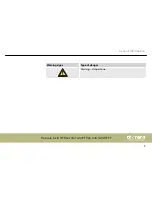
Page 8: ...will find an overview of the meaning of symbols and signal words that are used in this manual Signal word Meaning DANGER This combination of symbol and signal word indicates an immediate dangerous si...

Page 9: ...Warning signs Type of danger Warning danger zone General information free solo Twin HT free solo Twin PT free solo Twin HTPT 9...

Page 10: ...considered to be improper and may result in personal injury or property damage No liability will be assumed for damages resulting from improper use This device may be used only by persons with suffici...

Page 11: ...g knobs or the like from the unit They could swallow the pieces and choke Never let children unattended use electrical devices NOTICE Operating conditions This device has been designed for indoor use...

Page 12: ...reaker Failure to do so could result in damage to the device and pos sibly the user Unplug the external power supply before electrical storms occur and when the device is unused for long periods of ti...

Page 13: ...g batteries Leaking batteries can cause permanent damage to the device Take batteries out of the device if it is not going to be used for a longer period Safety instructions free solo Twin HT free sol...

Page 14: ...rsity receiver Two antennas for optimum reception quality Automatic frequency scanning Infrared interface for sending the frequency selection from the receiver to the trans mitter Built in antenna spl...

Page 15: ...or sending the frequency selection from the receiver to the trans mitter Built in antenna splitter a maximum of 4 units can be cascaded to two antennas Adjustable Squelch Outputs XLR 1 4 phone socket...

Page 16: ...phone socket 19 rack mountable 1 RU Power supply 12 V a suitable power supply is included n Transmitter one battery powered bodypack transmitter one battery powered handheld cardioid microphone The sy...

Page 17: ...s Available channels per group the t bone free solo 520 MHz 10 12 the t bone free solo 590 MHz 18 14 the t bone free solo 660 MHz 15 16 the t bone free solo 823 MHz 8 8 Features free solo Twin HT free...

Page 18: ...against vibration dust and moisture during transportation or storage use the original packaging or your own packaging material suitable for transport or storage respectively Create all connections whi...

Page 19: ...For more information please visit http www thomann de n Make sure that transmitter and receiver are both tuned to the same channel n Never set multiple transmitters to the same channel n Make sure tha...

Page 20: ...to reduce the risk of electric shock or fire First connect the power adapter to the receiver and then plug the power adapter into the power outlet Attach the included antennas to the rear panel of the...

Page 21: ...batteries is indi cated with symbols in the battery compartment Close the battery compartment screw the bottom housing section back on and switch the transmitter on 4 4 Bodypack transmitter PT series...

Page 22: ...er mini XLR panel connector n Turn on the transmitter and check the transmission by using the microphone or instru ment If necessary adjust the amplification of the transmitter and the levels on your...

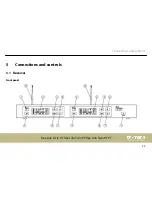
Page 23: ...5 Connections and controls 5 1 Receiver Front panel Connections and controls free solo Twin HT free solo Twin PT free solo Twin HTPT 23...

Page 24: ...settings are retained even when you switch the device off and disconnect it from the mains 2 Infra red receiver 3 ADL Starts the synchronization of the settings with the transmitter 4 Display 5 SET Op...

Page 25: ...8 AUTO Starts an automatic search to find a free channel 12 UHF antenna One antenna is available per channel Connections and controls free solo Twin HT free solo Twin PT free solo Twin HTPT 25...

Page 26: ...Rear panel Connections and controls UHF wireless system 26...

Page 27: ...gnal output for direct connection to a mixer a power amplifier or recording device 11 DC 12 18V Socket for connecting the supplied AC power supply If you are using a different power supply observe the...

Page 28: ...Display Connections and controls UHF wireless system 28...

Page 29: ...e receiver has been muted 17 A B Shows which of the two antennas is currently being used for signal transmission 18 SQ Shows the set squelch level for the radio signal Setting the squelch too high wil...

Page 30: ...at an automatic search is running to find a free channel 22 IR Shows that an infra red signal is being received 23 FREQUENCY Indicates the frequency that is assigned to the set combination of frequenc...

Page 31: ...5 2 Handheld microphone Connections and controls free solo Twin HT free solo Twin PT free solo Twin HTPT 31...

Page 32: ...mitter is muted the symbol does not appear on the receiver display 34 Lower housing part Unscrew to open 35 SET Opens the menu 36 SEL Selects a menu item 37 Indicating the frequency range in which the...

Page 33: ...5 3 Bodypack transmitter Connections and controls free solo Twin HT free solo Twin PT free solo Twin HTPT 33...

Page 34: ...LOW ON Blinks when the battery is too low 65 SET Opens the menu 66 Buttons Increases or decreases the currently displayed value 67 Battery holder for two round cell batteries AA LR06 1 5 V or comparab...

Page 35: ...to switch the device on or off Press the switch once briefly to mute the input When the transmitter is muted the symbol does not appear on the receiver display 71 Indicating the frequency range in wh...

Page 36: ...ndicates that the unit is locked to prevent unintentional operation 53 GAIN Shows the level of the radio signal sent 54 Battery level indicator Replace the batteries when only one blinking bar remains...

Page 37: ...and receiver are working on different frequencies if the receiver is not getting a usable signal or if you have muted the transmitter by briefly pressing the main switch 56 Shows the output power Con...

Page 38: ...f you have selected frequency group U you can use the arrow keys to set the fre quency directly in 25 kHz increments First set the value before the decimal point then press SET and set the value after...

Page 39: ...y IR stops flashing After three seconds the display shows the normal sate again 1 Press SET until the SQ area flashes in the display 2 Use the arrow buttons to set the desired value The current value...

Page 40: ...he normal sate again 3 If the system does not find a free channel within five seconds it automatically returns to the default state 1 Press SET until the symbol appears All keys except for the main sw...

Page 41: ...the display 2 Use SEL to select the frequency group Press SET to confirm the selection The figure in the CH field flashes 3 Use SEL to select a channel within the set frequency group If you have sele...

Page 42: ...onfirm the selection Press the main switch to close the menu without making any changes 1 Press SET until the symbol flashes on the display 2 Use SEL to change the transmitter power 5 mW 10 mW 20 mW P...

Page 43: ...ress SEL until the symbol appears All keys except for the main switch are locked To cancel the key lock press SEL until the symbol disappears The keys have their original function again Displaying fre...

Page 44: ...hes 2 Use the arrow keys to select the frequency group Press SET to confirm the selection The figure in the CH field flashes 3 Use the arrow keys to select a channel within the set frequency group If...

Page 45: ...the main switch to close the menu without making any changes 1 Press SET until the symbol flashes on the display 2 Use the arrow keys to change the transmitter power 5 mW 10 mW 20 mW Press SET to con...

Page 46: ...default state Press until the symbol appears All keys except for the main switch are locked To unlock the keypad press until the symbol is no longer displayed The keys have their original function aga...

Page 47: ...8 Signal to noise ratio 105 dB A Operating supply voltage DC 12 V 1000 mA Dimensions W H D without antennas 412 mm 44 mm 160 mm Weight 2 kg Carrier frequency frequency band number of channels bandwid...

Page 48: ...3 MHz item no 380955 823 MHz 832 MHz Bandwidth the t bone free solo Twin HT 520 MHz item no 380952 18 MHz the t bone free solo Twin HT 590 MHz item no 380953 24 MHz the t bone free solo Twin HT 660 MH...

Page 49: ...W the t bone free solo Twin HT 660 MHz item no 380954 20 mW the t bone free solo Twin HT 823 MHz item no 380955 20 mW Spurious response rejection ratio 55 dBc Peak deviation 55 kHz NF frequency respon...

Page 50: ...in PT 590 MHz item no 380957 584 MHz 608 MHz the t bone free solo Twin PT 660 MHz item no 380958 675 MHz 679 MHz the t bone free solo Twin PT 823 MHz item no 380959 823 MHz 832 MHz Bandwidth the t bon...

Page 51: ...ching band width 25 kHz Modulation type Frequency modulation FM Maximum transmission power the t bone free solo Twin PT 520 MHz item no 380956 20 mW the t bone free solo Twin PT 590 MHz item no 380957...

Page 52: ...out antennas 64 mm 98 mm 23 mm Weight 90 g 7 4 Overview scope of delivery Item no System Scope of delivery 380952 the t bone free solo Twin HT 520 MHz 1 receiver 2 handheld microphone 380953 the t bon...

Page 53: ...1 receiver 1 handheld microphone 1 bodypack trans mitter 380963 the t bone free solo Twin HTPT 823 MHz 1 receiver 1 handheld microphone 1 bodypack trans mitter 380956 the t bone free solo Twin PT 520...

Page 54: ...s one core plus shielding are typical representatives of the unbalanced transmission One conductor is ground and shielding while the signal is trans mitted through the core Unbalanced transmission is...

Page 55: ...completely neutralized The result is a pure signal without any noise inter ference 1 Signal 2 Ground shielding 1 Signal in phase 2 Signal out of phase 3 Ground 1 4 TS phone plug mono unbalanced 1 4 TR...

Page 56: ...1 Ground shielding 2 Signal in phase 3 Signal out of phase XLR plug balanced Plug and connection assignment UHF wireless system 56...

Page 57: ...ting In the following we list a few common problems that may occur during operation We give you some suggestions for easy troubleshooting Troubleshooting free solo Twin HT free solo Twin PT free solo...

Page 58: ...io device switched on and does the signal level on the output of the receiver match the input sensitivity of the audio device 5 Try to improve the transmission by moving the transmitter closer to the...

Page 59: ...procedures recommended above do not succeed please contact our Service Center You can find the contact information at www thomann de Troubleshooting free solo Twin HT free solo Twin PT free solo Twin...

Page 60: ...waste but make sure that they are fed to a recovery Please follow the notes and markings on the packaging Batteries must not be disposed of as domestic waste or thrown into fire Dispose of the bat te...

Page 61: ...e this device through an approved waste disposal firm or through your local waste facility When discarding the device comply with the rules and regulations that apply in your country If in doubt consu...

Page 62: ...Notes UHF wireless system 62...

Page 63: ......

Page 64: ...Musikhaus Thomann Hans Thomann Stra e 1 96138 Burgebrach Germany www thomann de...

Reviews: