background image

XTDE-ZX1 Install Guide 

4. XTDE-ZX1 

Configuration


Step 1.

 Connect XTDE-ZX1 to USB port, No.2 LED of XTDE-ZX1 will blink green 

LED. 

Step 2. 

Press button for 4 seconds

LED No.2 will turn to blue(or cyan-blue when 

Zigbee network was connected).   

Step 3.

 system will automatically pop-up the "Found New Hardware Wizard" window 

for install the driver. Allocate the driver folder, then complete the installation. 

Step 4.

 Check current COM port in windows device manager. 

Step 5.

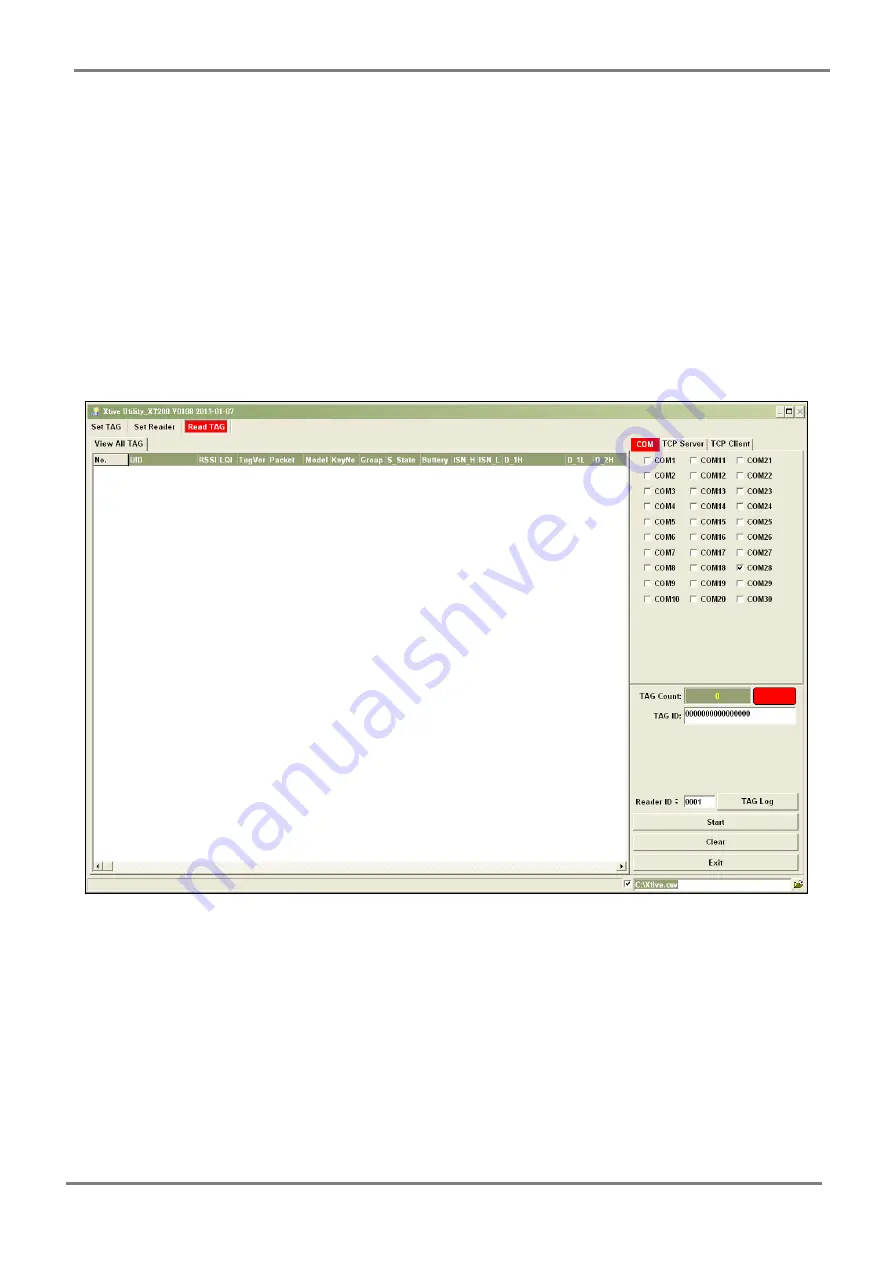
 execute Xtive_XT200_V7.exe 


- 4 -


Summary of Contents for Zigbee XTDE-ZX1

Page 1: ...ec 2 Taiwan Blvd Taichung city Taiwan 403 TEL 04 2207 8888 FAX 04 2207 9999 Email service syris com Website http www syris com Contents 1 XTDE ZX1 Feature and Specification 1 2 The Diagram of the System Connection 2 3 Zigbee Channel list 3 4 XTDE ZX1 Configuration 4 5 Receive tag s data from XT200 ZX1 9 ...

Page 2: ... Xtive Channel 316 Xtive RSSI 0 255 Xtive LQI 0 255 Programmable Set Parameters LED Multi LED visual indication Button Switch button Interface USB2 0 full speed Device CDC Zigbee Frequency 2 40 2 48 GHz Zigbee Protocol IEEE 802 15 4 Zigbee Pro Zigbee function Router support 8 level network Zigbee network Max 16 devices in 1 group Zigbee channel 16 Channel Operating Temperature 20 C to 65 C 5 to 95...

Page 3: ...XTDE ZX1 Install Guide 2 The Diagram of the System Connection 2 ...

Page 4: ...nel List Channel Number hex Frequency MHz CH26 0x1A 2480 CH25 0x19 2475 CH24 0x18 2470 CH23 0x17 2465 CH22 0x16 2460 CH21 0x15 2455 CH20 0x14 2450 CH19 0x13 2445 CH18 0x12 2440 CH17 0x11 2435 CH16 0x10 2430 CH15 0x0F 2425 CH14 0x0E 2420 CH13 0x0D 2415 CH12 0x0C 2410 CH11 0x0B 2405 3 ...

Page 5: ...tton for 4 seconds LED No 2 will turn to blue or cyan blue when Zigbee network was connected Step 3 system will automatically pop up the Found New Hardware Wizard window for install the driver Allocate the driver folder then complete the installation Step 4 Check current COM port in windows device manager Step 5 execute Xtive_XT200_V7 exe 4 ...

Page 6: ...XTDE ZX1 Install Guide Step 6 Click Set Reader Step 7 Select correct COM port and click Reader Information to communicate with XTDE ZX1 5 ...

Page 7: ...Z1 means you can configure Zigbee parameters in Zigbee Set page Click Get Zigbee Group ID to get current Zigbee Group ID and then modify the same Group ID to pair with XT200 ZX1 In put correct ID and Click Set Zigbee Group ID to setup Zigbee Group ID Zigbee mesh network will auto organize with the same group ID 6 ...

Page 8: ... Check Model is show XTDE X1 means you can configure Xtive RFID parameters in GUEST page Set Reader ID Input the number to ID field and then click Set Reader ID to change Reader s ID Get Reader ID Get the ID of current reader TAG SEND MODE Set reader s auto send mode when receive tag STOP SEND Stop to receive tag AUTO SEND Receive tag s data automatically RSSI Filter Adjust RSSI level 0 250 to fil...

Page 9: ...ll exit setting mode automatically after 3 minutes If your configuration is correct XTDE ZX1 and XT200 ZX1 will auto organize success You can check LED status of XTDE ZX1 When LED No 1 is blinking means this reader is reading RFID tag When LED No 2 is lighting green color means Zigbee network organize success 8 ...

Page 10: ...stall Guide 5 Receive tag s data from XT200 ZX1 Starting read TAG will receive Tag information from reader You can check ID field to understand this tag signal was received from which reader ID means Reader s ID 9 ...

Reviews: