


Chapter1:GetStartedwithRX1213sas
7
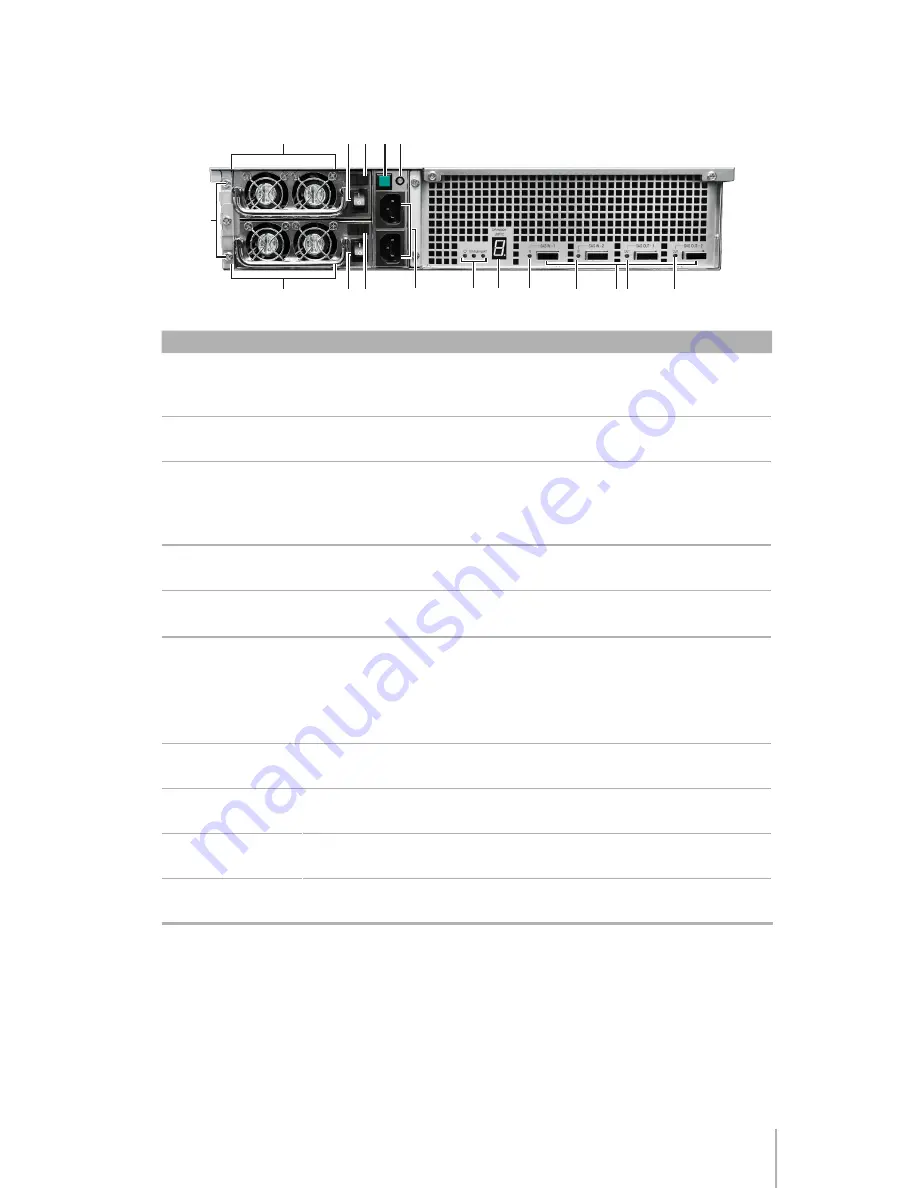
Back View
4
8
8 9
7
6
6
7
1
10
3
1
1
1
1
1
5
Article Name
Description
1
LED
Indicators
TheLEDindicatorsareusedtodisplaythestatusofthesystem.
Forcompletedetails,pleaserefertothenexttable:
LED
Behavior
.
2
Hard Drive
Trays
Theharddrivetraysaredesignedforloadingtheharddrives
withRX1213sas.
3
Expansion
Unit ID
OneRX1213sascanbeconnectedwithuptoeightRX1213sas.
TheexpansionunitIDisusedtodisplaythenumberIDof
connectedRX1213sas,allowingyoutodistinguishthestatusof
differentRX1213sasat
Main Menu
>
Storage Manager
.
4 EXPANSION
Port
TheexpansionportisusedtoconnectRX1213sastoSynology
RackStation.
5 Power Supply
Safety Panel
Removescrewsandpanelbeforeremovingpowersupply.
6
Fan
Thepowerfansarebuilttoexhaustwasteheatoutofthepower
supply.
Thesystemfans(insideRX1213sas)arebuilttoexhaustwaste
heatoutofRX1213sas.Ifthefanisnotworking,RX1213sas
will“beep”everyfewseconds.
7 Power Supply
On/Off Switch
Thepowersupplyon/offswitchisusedtoturnon/offthepower
supply.
8 Power Supply
Safety Latch
Thepowersupplysafetylatchisusedtosecurethepower
supplyinplace.
9
Beep Off
Button
Thebeepoffbuttonisusedtoturnoffthebeepingsoundthat
warnsofpowerfailure.
10 Power Port
Thepowerportiswhereyouconnectthepowercordto
RX1213sas.
Summary of Contents for RX1213sas
Page 1: ...RX1213sas User s Guide For Synology RackStation RX10613xs Synology_QIG_RX1213sas_20120820 ...
Page 2: ......
Page 4: ......
Page 10: ......
Page 27: ......


