Synology NUT-4202R Instruction Manual Download Page 61

3.7 Help 

 
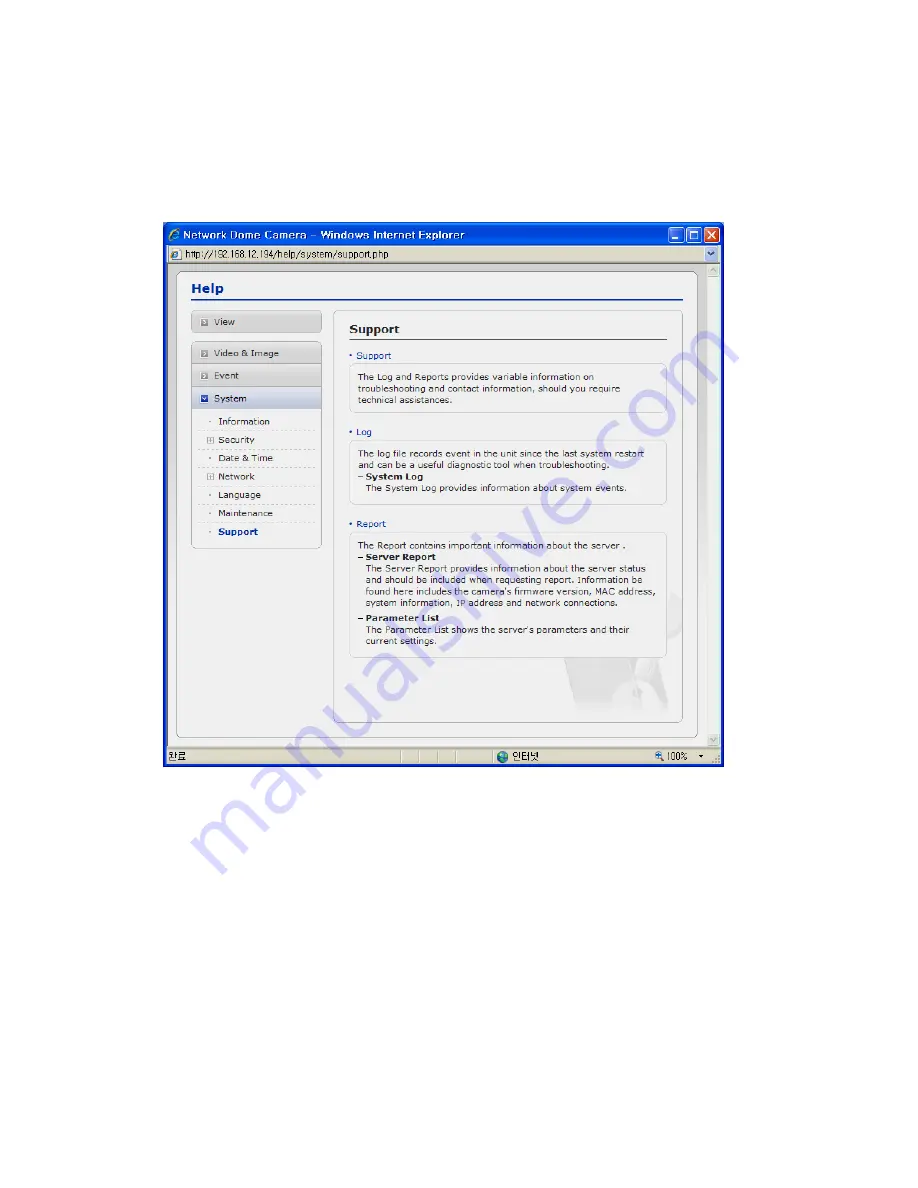
The Help information window will be provided as a popup window so that users can open and read it 
without a need for log-in. It will offer a description on setting and Help page by which users can 
manipulate the Network Camera without a reference to the manual. 


61

Summary of Contents for NUT-4202R

Page 1: ...INSTRUCTION MANUAL D1 Plastic DOME CAMERA Please read this manual thoroughly before use and keep it handy for future reference...

Page 2: ...d by the qualified personnel before operating it any further Unplug the unit from the wall outlet if it is not going to be used for several days or more To disconnect the cord pull it out by the plug...

Page 3: ...OT INSTALLED AND USED IN ACCORDANCE WITH THE INSTRUCTION MANUAL MAY CAUSE HARMFUL INTERFERENCE TO RADIO COMMUNICATIONS CAUTION CHANGES OR MODIFICATIONS NOT EXPRESSLY APPROVED BY THE PARTY RESPONSIBLE...

Page 4: ...et 10 Protect the power cord from being walked on or pinched particularly at plugs convenience receptacles and the point where they exit from the apparatus 11 Only use attachments accessories specifie...

Page 5: ...twork Camera Setup 20 3 5 1 Basic Configuration 21 3 4 4 3 Preventive Maintenance 64 4 4 Product Specification 65 1 Users 21 2 Network 22 3 Video Image 23 4 Date Time 25 3 5 2 Video Image 26 3 5 3 Eve...

Page 6: ...stallation Guide Template Sheet Accessory Kit ote Check your package to make sure that you received the complete system including all mponents shown above This manual applies to the Plastic Dome Netwo...

Page 7: ...F enables interoperability between different vendor products increased flexibility reduced cost and future proof systems Brilliant video quality The Network Camera offers the highly effi reduces bandw...

Page 8: ...onnection from supplied power adapter Depending on operation methods it is possible to conne with an installer 2 NO Name Description 1 Lens Allows wide area to be monitored 2 Extension Cable 26pin cam...

Page 9: ...net RJ 45 port compatible with 10 100Mbps PoE Modular Jack To mount the board camera on the camera mount bracket place the four board camera supports on the fo the rear of the camera mount bracket Not...

Page 10: ...Use the following drawings to install the camera module to the housing 10...

Page 11: ...ch this dome Camera is installed using the Template sheet To remove dome cover turn the dome cover counterclockwise until locators reach end of travel and pull off Push the liner in the direction of t...

Page 12: ...ra with it like above picture Turn the dome The assembly of the dome window cover and liner is in reverse order of disassembly Finally lock dome window cover with locking screw M2X4 from the accessory...

Page 13: ...e sure the grommet is property installed on the adaptor to prevent dust ingress Using the Quick install Adaptor option Use the optional Quick install Adaptor on wall or ceiling application 1 Install t...

Page 14: ...ss to the device with the mart Manager utility on the CD 1 Start SmartManager utility Start All programs SmartManager SmartManager the main window will be displayed after a short while any network dev...

Page 15: ...mation refer to the Smart Manger User s Manual 3 Select the camera on the list and click right button of the mouse You can see the pop up menu as below 4 Select Assign IP You cam see a Assign I Enter...

Page 16: ...streaming video in Microsoft Internet Explorer set your browser to allow ActiveX eld of your browser You can see a starting page Click Live View Playback or Setup to enter web page controls 3 1 Access...

Page 17: ...ord via a standard HTTP connection enter it directly in the first dialog shown below o set the password via an encrypted HTTPS connection see 3 5 4 System Security HTTPS ote HTTPS Hypertext Transfer P...

Page 18: ...ct the most suitable one The protocol drop down list allows you to select which combination of protocols and methods to use depends on your viewing requirements and on the properties of your network 3...

Page 19: ...of the camera menu toolbar in the live view page Control toolbar The live v The Stop button stops the video stream being played Pressing the key again toggles start and stop video stream The Pause but...

Page 20: ...ave unrestricted access to all the Setup tools and Operators who have to the settings for Basic Live View Video Image Audio Event and System Configuration You can configure the network camera by click...

Page 21: ...s described below T User Group Authority Guest st level of access which only allows access to the Provides the lowe Live View page Operator ertain other settings Operators have no access An operator c...

Page 22: ...otoc that lets network administrators centrally manage and automate the assignment of IP addresses on a network DHCP is enabled by default Although a DHCP server is mostly used to set an IP address dy...

Page 23: ...grammed stream profiles available for quick set up Choose the form of video encoding you wish to use from the drop down list H 264 MP Main Profile Primarily for low cost applications that requires add...

Page 24: ...r MPEG 4 video stream Leaving the Maximum bit rate as unlimited maintains consistently good image quality but increases bandwidth usage when there is more activity in the image Limiting th bit rate to...

Page 25: ...the overlay see below aylight savings time select the Automatically adjustment for daylight saving time changes JPEG quality Select the picture quality If users want to have a high quality of fast im...

Page 26: ...sets the time from the clock on your computer rver the video encoder will obtain the time from an NTP Set manually this option allows you to manually set the time and date 5 2 Video Image Basic efer...

Page 27: ...htness can be adjusted in the range 1 10 where a higher value produces a brighter image Color level Select an appropriate level by entering a value in the range 1 10 Lower valu mean less color saturat...

Page 28: ...items or delete button elect Enable to activate the privacy masking function The privacy masking function allows you to mask parts of the video im se The privacy masks are configured by Mask windows E...

Page 29: ...opies the HTML code generated on the creen and paste it in page code of the website you want to display live video s viewer login option must be checked Refer 3 5 1 Basic Configuration Users for more...

Page 30: ...3 5 3 Event Event In On Boot e Network Transmitter is started elect Enable to activate the motion event 1 This is used to trigger the event every time th S 30...

Page 31: ...t The network camera support 1 alarm input ports vent lasts for the specified dwell time from the point of detection of an alarm input Sel Type Choose the type of alarm you wish to use from the drop d...

Page 32: ...ely the event can be triggered via the product s API pplication Programming Interface This option makes use of the manual trigger button provided on the live view page which are used t start or stop t...

Page 33: ...use menu on the video screen Motion detection is used to generate an alarm whenever movement occurs or sto im Motion is detected in defined Motion windows which are placed in the video image to target...

Page 34: ...asts for the specified hold time from the point of detection of a motion lso modify or delete a motion index Select an index and then click the Modify or Delete utton elect Enable to activate the moti...

Page 35: ...the host names or IP addresses and port numbers for your mail server in the fields provided to enable the sending of notifications an image email messages from the camera to predefined addresses via...

Page 36: ...NS server must be to normally desirable if there is a firewall between the camera and the target FTP server SMTP E Mail Receiver Receiver SMTP E Mail Test Receiver Enter an email address and click the...

Page 37: ...pre trigger buffer enter the desired total length in seconds minutes or hours and specify the required image frequency Post event This function is the counterpart to the pre trigger buffer described...

Page 38: ...name Password Provide your log in information HTTP Server Test When the setup is complete the connection can be tested by clicking the Test button Alarm Out When the network camera detects an event it...

Page 39: ...Enter pre event time value for storage device pre recording Post event Enter post event time value for storage device post recording Device Setting Select Device Type to be recorded in the drop down l...

Page 40: ...er IP address for NAS device Remote Directory Enter directory or folder location to be recorded in the NAS device Capacity Enter the capacity of storage to be used It must be less than the total stora...

Page 41: ...list Event Out E mail Select email addresses you want to send via email that an event has occurred FTP Select checkbox beside FTP to record and saves images to an FTP server when an event has occurred...

Page 42: ...ter the system information This page is very useful when you refer device information after installation Device Name Configuration Enter the device name Location Configuration Enter the location infor...

Page 43: ...s viewer login to the Live View page as described below User Setting Check the box to enable anonymous viewer login to the Network Camera without the user account When using the user account users hav...

Page 44: ...for the administrator Operator and Viewer to enable HTTPS connection set to HTTP by default HTTP HTTPS HTTP HTTPS Upload Certificate To use HTTPS for communication with the Network Camera An official...

Page 45: ...sses added to the list are set as allowed or denied addresses All other IP addresses not in this list will then be allowed or denied access accordingly that is if the addresses in the list are allowed...

Page 46: ...tomatically adjustment for daylight saving time changes From the Time Mode section select the preferred method to use for setting the time Synchronize with computer time sets the time from the clock o...

Page 47: ...4 Network Setting in regard to network can be executed Settings for IP DNS Host Name Port and ARP Ping can be established along with setting for DDNS uPnP QoS and SNMP 47...

Page 48: ...tically use the DNS server settings provided by the DHCP server Click the View button to see the current settings Use the following DNS server address to enter the desired DNS server by specifying the...

Page 49: ...ctv network co kr Enable DDNS Check to get DDNS service to be available DDNS Server Select the DDNS server Registered host Enter an address of the DDNS server Username Enter an ID to access to the DDN...

Page 50: ...eam3 This function is for sending Video and Audio to Multicast group Enable Multicast Check the box to enable multicast operation Multicast destination IP Enter an IP between 224 0 0 0 and 239 255 255...

Page 51: ...ng systems and clients that support this protocol Note UPnP must be installed on your workstation if running Windows XP To do this open the Control Panel from the Start Menu and select Add Remove Prog...

Page 52: ...ay use and thus control over bandwidth races between applications DSCP Settings For each type of network traffic supported by your network video product enter a DSCP Differentiated Services Code Point...

Page 53: ...e network to the outside that is the Internet Security on the private network LAN is increased since most broadband routers are pre configured to stop attempts to access the private network LAN from t...

Page 54: ...The Network Camera automatically search for NAT routers on your network manual setting Select this option to manually select a NAT router and enter the external port number for the router in the field...

Page 55: ...nd printers to connect to a network automatically Without zeroconf a network administrator must set up services such as Dynamic Host Configuration Protocol DHCP and Domain Name System DNS or configure...

Page 56: ...so known as zero configuration networking Bonjour enables devices to automatically discover each other on a network without having to enter IP addresses or configure DNS servers Bonjour is a trademark...

Page 57: ...bnet mask the system time Default The default button should be used with caution Pressing this will return all of the Network Camera s settings to the factory default values including the IP address U...

Page 58: ...Logs The network Camera support system log information Click the System Log button to get the log data Update Server Server Report Click the Server Report button to get the important information abou...

Page 59: ...playing the video clip in the Micro SD memory 2 Playback Buttons To view a recording data in the SD local storage select it from the list and click the Playback buttons Go to the first go to the begi...

Page 60: ...earch results from the SD local storage in the network camera connected are displayed monthly If there is a recorded data for a particular date a blue square on the date will be displayed 6 Play Time...

Page 61: ...will be provided as a popup window so that users can open and read it without a need for log in It will offer a description on setting and Help page by which users can manipulate the Network Camera w...

Page 62: ...the factory default settings using the Reset Button 1 Switch off the Network Camera by disconnecting the power adapter 2 Open the lens cover 3 Press and hold the Control Button SW1 on the board with...

Page 63: ...g of images If images are very complex try limiting the number of clients accessing the camera Images only shown in black white Check the Video Image setting Blurred images Refocus the camera Poor ima...

Page 64: ...tive maintenance allows detection and correction of minor that faults before they become serious and cause equipment failure Every three month perform the following maintenance 1 Inspect all connectio...

Page 65: ...authority HTTPS IP Filtering Privacy Zone Max Connection 10 API Programming Interface API Supported Open Platform Compatible ONVIF Alarm Triggers Motion Detection External Input Manual Trigger Alarm E...

Page 66: ...System Microsoft Windows 98 Microsoft Windows ME Microsoft Windows 2000 Microsoft Windows XP or Microsoft Windows Vista CPU Over Pentium IV 2 4Ghz 512MB RAM 10GB free disk or higher VGA AGP Video RAM...

Page 67: ...D1 Plastic DOME CAMERA Printed in Korea 67...

Reviews: