Synology DiskStation DS218play Hardware Installation Manual Download Page 9


9

  Chapter 3: Install DSM on DiskStation

After hardware setup is finished, please install DiskStation Manager (DSM) – Synology’s browser-based 
operating system – on your DiskStation.

Install DSM with Web Assistant

Your DiskStation comes with a built-in tool called 

Web Assistant

 that helps you download the latest version of 

DSM from the Internet and install it on your DiskStation. To use Web Assistant, please follow the steps below.

Power on the DiskStation.

Open a web browser on a computer connected to the same network as the DiskStation.

Enter either of the following into the address bar of your browser:

find.synology.com

diskstation:5000

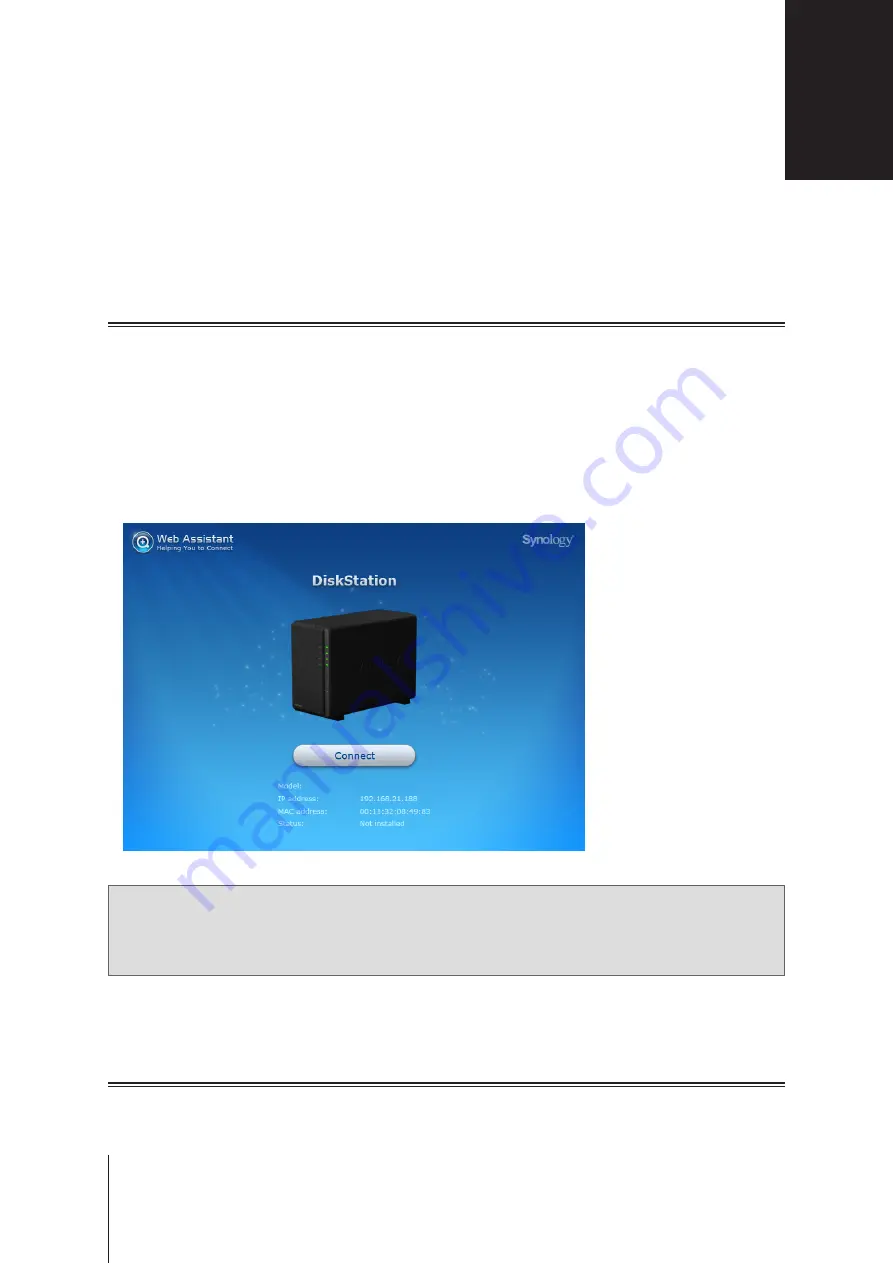
Web Assistant will be launched in your web browser. It will search for and find the DiskStation within the local 

network. The status of the DiskStation should be 

Not Installed

.

DS218play

Click 

Connect

 to start the setup process and follow the onscreen instructions.

Note:

1.  The DiskStation must be connected to the Internet to install DSM with Web Assistant.
2.  Suggested browsers: Chrome, Firefox.
3.  Both the DiskStation and the computer must be in the same local network.

If you accidentally leave the installation process before it is finished, log in to the DSM as 

admin

 (default 

administrative account name) with the password left blank.

Learn More

Congratulations! Your DiskStation is now ready for action. For more information or online resources about your 
DiskStation, please visit 

www.synology.com

.

Install DSM on DiskStation

3

Chapter

Summary of Contents for DiskStation DS218play

Page 1: ...Synology DiskStation DS218play Hardware Installation Guide ...

Page 2: ...afety Instructions 5 Chapter 2 Hardware Setup Tools and Parts for Drive Installation 6 Install Drives 6 Start Up Your DiskStation 8 Chapter 3 Install DSM on DiskStation Install DSM with Web Assistant 9 Learn More 9 Appendix A Specifications Appendix B LED Indicator Table Synology_HIG_DS218play_20170626 ...

Page 3: ... instructions carefully to avoid harming yourself or damaging your DiskStation Note All images below are for illustrative purposes only and may differ from the actual product Package Contents Main unit x 1 AC power cord x 1 AC power adapter x 1 RJ 45 LAN cable x 1 HDD bracket x 1 Screws for HDD bracket x 3 Screws for hard drives x 10 Screws for fixing the Synology case x 3 Before You Start 1 3 Cha...

Page 4: ...nd the Power LED starts blinking 5 Fan Back Panel Disposes of excess heat and cools the system If the fan malfunctions the DiskStation will emit a beeping sound 6 LAN Port Connect a network cable here 7 USB 3 0 Port Connect external hard drives USB printers or other USB devices to the DiskStation here The USB 3 0 ports are colored blue 8 RESET Button 1 Press and hold until you hear a beep sound to...

Page 5: ...er cord Wipe with damp paper towels Do not use chemical or aerosol cleaners To prevent the unit from falling over do not place on carts or any unstable surfaces The power cord must plug in to the correct supply voltage Make sure that the supplied AC voltage is correct and stable To remove all electrical current from the device ensure that all power cords are disconnected from the power source Risk...

Page 6: ...lease back up any important data before installation Install Drives 1 Push the upper case in the direction as shown below Lift the upper case and set it aside 2 Install drives For 3 5 drives with 3 screw holes on each side indicated below a Slide the drive into the hard drive bay and push it all the way until it s firmly connected to the SATA connector b Secure the drive with the screws provided F...

Page 7: ...he drive with the screws provided For 2 5 drives a Place the drive in the 2 5 Disk Holder Type C sold separately and then tighten the 2 5 screws to secure the drive b Slide the 2 5 Disk Holder into the hard drive bay and push it all the way until the drive is firmly connected to the SATA connector Secure the Disk Holder with the provided screws 3 Repeat the steps above to install the other drive i...

Page 8: ...d tighten the screws on the back panel Start Up Your DiskStation 1 Connect one end of the AC power adapter to the power port of the DiskStation Connect the other end to a power outlet 2 Use the LAN cable to connect the DiskStation to your switch router or hub 3 Press the power button to turn on the DiskStation Congratulations Your DiskStation is now online and detectable from a network computer ...

Page 9: ... 5000 4 Web Assistant will be launched in your web browser It will search for and find the DiskStation within the local network The status of the DiskStation should be Not Installed DS218play 5 Click Connect to start the setup process and follow the onscreen instructions Note 1 The DiskStation must be connected to the Internet to install DSM with Web Assistant 2 Suggested browsers Chrome Firefox 3...

Page 10: ...logy Hybrid RAID 1 Disk Fault Tolerance Agency Certifications FCC Class B CE Class B BSMI Class B HDD Hibernation Yes Scheduled Power On Off Yes Language Localization Environment Requirements Line voltage 100V to 240V AC Frequency 50 60Hz Operating Temperature 40 to 104 F 5 to 40 C Storage Temperature 5 to 140 F 20 to 60 C Relative Humidity 5 to 95 RH Note Model specifications are subject to chang...

Page 11: ...d1 Off No internal drive Power Blue Static Powered on Blinking Booting up Shutting down Off Powered off Note Model specifications are subject to change without notice Please refer to www synology com for the latest information LED Indicator Table 1 Please try to restart your DiskStation or re insert the drive s and then run the HDD SSD manufacturer s diagnostic tool to check the health status of t...

Reviews: