SYN-INT-E01
For further information or to consult this guide on line,
please visit our Web site.
www.synapseelectronique.com
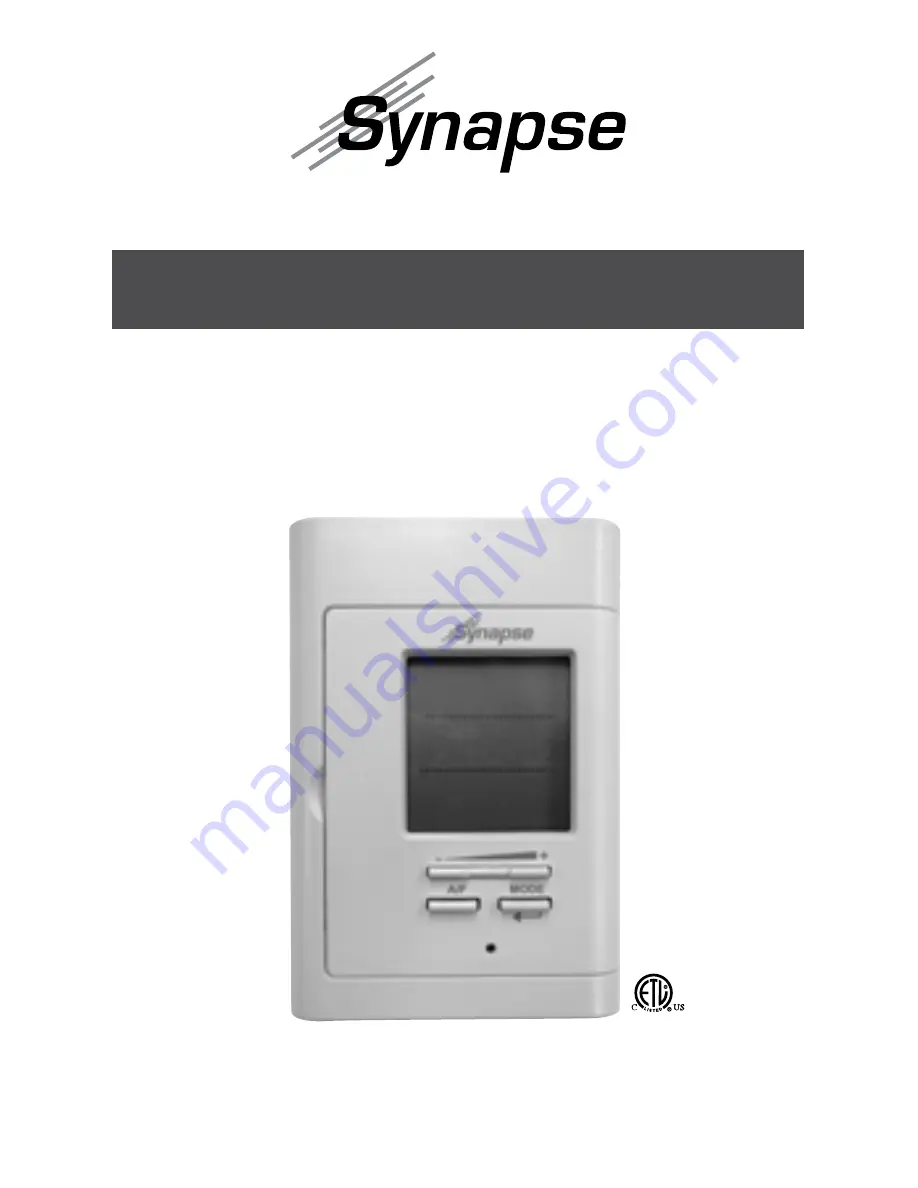
“SE72”
Heating floor programmable
electronic thermostat
User’s guide
Page 1: ...SYN INT E01 For further information or to consult this guide on line please visit our Web site www synapseelectronique com SE72 Heating floor programmable electronic thermostat User s guide...
Page 2: ...these instructions and keep them handy for future reference If these instructions are not fol lowed the warranty will be considered null and void and the manufacturer deems no further responsi bility...
Page 3: ...e will ensure a uniform temperature This Thermostat is not Compatible with the Following Installations electrical current higher than 16 A with a resistive load 3840 W 240 VAC 3475 W 208 VAC and 1920...
Page 4: ...equent air drafts e g head of stairs Thermostat Mounting and Connection 1 Cut off power supply on lead wires at the electrical panel in order to avoid any risk of electric shock 2 Ensure that the air...
Page 5: ...plied solder less connectors A pair of wires black must be connected to the power source 120 208 240 VAC and another pair yellow must be connected to the heating cable refer to the drawings displayed...
Page 6: ...01 6 6 Reinstall the front part of the thermostat on the mounting base and tighten the screw at the bottom of the unit 7 Turn on the power 8 Set the thermostat to the desired setting see the following...
Page 7: ...isplays and must be adjusted before switch ing to the Auto or Pre Prog mode The maximum floor temper ature is limited to 28 C Ambient and Floor Temperature The figures displayed below the word AMBIENT...
Page 8: ...o do so you must press down the A F button for at least 20 seconds After 20 seconds the new maximum temperature will be displayed in replacement of the Floor mode set point and will blink during 5 sec...
Page 9: ...r is restored after an extensive failure more than 2 hours the hour and the day of the week are recovered but you must update them Display in Degrees Celsius Fahrenheit The thermostat can display the...
Page 10: ...he week This mode is initially activated when the power is turned on for the first time You must adjust the hour as described in the sec tion Adjustment of the hour and the day of the week before swit...
Page 11: ...he period by pressing down the Mode button 3 The two figures representing the hour blink to indicate that you can adjust them from 00 to 23 using the or button You must confirm the adjustment by press...
Page 12: ...ny time the set point SET of the current pe riod The anticipated start icon will blink when the anticipated start of the next period begins For example if the requested temperature between 8h00 am and...
Page 13: ...lections are completed release the source day button The selected days have the same programming as the source day To copy the programming in block you must 1 Press down the source day button hold it...
Page 14: ...ode The Preprogrammed mode allows an automatic programming of the thermostat 252 preprogrammings have been defined for Ambient mode and 252 for Floor mode A0 to Z1 and 0 to 9 see appendix 1 to consult...
Page 15: ...n the Pre Prog button during 5 seconds The letter indicator blinks and you can adjust it by pressing down the or button Once the letter is chosen you must validate your choice by pressing down the Mod...
Page 16: ...button when period 2 is displayed you exit the View mode At any time you can exit the View mode using one of these 3 methods 1 Press down the button of the day you are viewing 2 Press down another day...
Page 17: ...a clic sound It is the noise of the relay which opens or closes as applicable Backlighting The screen lights up when you press down a button If you do not press down any button for more than 15 second...
Page 18: ...the screen 2 Press down the Test button 3 The following two cases can occur a Successful test The red indicator of the thermostat lights up In this case press down once again the Test button to reini...
Page 19: ...minutes indicating that you can deactivate the Lock option 3 Simultaneously press down the and buttons for more than 10 seconds The Lock icon will then be hidden indicating that the lock option is dea...
Page 20: ...r However when power is restored after an exten sive failure more than 2 hours it recovers the last mode Man Auto Pre Prog as well as the various adjustments that were ef fective when the failure occu...
Page 21: ...is always on Check if the thermostat is properly connected Refer to the installation section Heating does not run even if the thermostat indicates it is on Check if the thermostat is properly connect...
Page 22: ...h a resistive load 16 A 3840 W 240 VAC 3475 W 208 VAC 1920 W 120 VAC Range of temperature 1 C to 35 C 34 F to 95 F Temperature display resolution 1 C 1 F Range of the temperature set points 1 C to 35...
Page 23: ...1 22 18 22 18 N pre prog Week Week End 6am 10pm 8am 12am 2 20 16 20 16 3 22 18 22 18 Week schedule beginning at 7h00AM N pre prog Week Week End 7am 11pm 7am 11pm 4 24 20 24 20 5 26 22 26 22 N pre prog...
Page 24: ...23 B3 28 24 28 24 N pre prog Week Week End 6am 12am 8am 2am B4 22 18 22 18 B5 23 19 23 19 B6 24 20 24 20 B7 25 21 25 21 B8 26 22 26 22 B9 27 23 27 23 C0 28 24 28 24 AMBIENT N pre prog Week Week End 6...
Page 25: ...7 23 D4 28 24 28 24 N pre prog Week Week End 7am 1am 9am 3am D5 22 18 22 18 D6 23 19 23 19 D7 24 20 24 20 D8 25 21 25 21 D9 26 22 26 22 E0 27 23 27 23 E1 28 24 28 24 AMBIENT N pre prog Week Week End 7...
Page 26: ...23 F5 28 24 28 24 N pre prog Week Week End 8am 2am 10am 4am F6 22 18 22 18 F7 23 19 23 19 F8 24 20 24 20 F9 25 21 25 21 G0 26 22 26 22 G1 27 23 27 23 G2 28 24 28 24 AMBIENT N pre prog Week Week End 8...
Page 27: ...23 H6 28 24 28 24 N pre prog Week Week End 6am 11pm 8am 1am H7 22 18 22 18 H8 23 19 23 19 H9 24 20 24 20 I0 25 21 25 21 I1 26 22 26 22 I2 27 23 27 23 I3 28 24 28 24 AMBIENT N pre prog Week Week End 6...
Page 28: ...23 J7 28 24 28 24 N pre prog Week Week End 7am 12am 9am 2am J8 22 18 22 18 J9 23 19 23 19 K0 24 20 24 20 K1 25 21 25 21 K2 26 22 26 22 K3 27 23 27 23 K4 28 24 28 24 AMBIENT N pre prog Week Week End 7...
Page 29: ...23 L8 28 24 28 24 N pre prog Week Week End 8am 1am 10am 3am L9 22 18 22 18 M0 23 19 23 19 M1 24 20 24 20 M2 25 21 25 21 M3 26 22 26 22 M4 27 23 27 23 M5 28 24 28 24 AMBIENT N pre prog Week Week End 8...
Page 30: ...23 N9 28 24 28 24 N pre prog Week Week End 6am 10pm 8am 12am O0 22 18 22 18 O1 23 19 23 19 O2 24 20 24 20 O3 25 21 25 21 O4 26 22 26 22 O5 27 23 27 23 O6 28 24 28 24 AMBIENT N pre prog Week Week End 6...
Page 31: ...23 Q0 28 24 28 24 N pre prog Week Week End 7am 11pm 9am 1am Q1 22 18 22 18 Q2 23 19 23 19 Q3 24 20 24 20 Q4 25 21 25 21 Q5 26 22 26 22 Q6 27 23 27 23 Q7 28 24 28 24 AMBIENT N pre prog Week Week End 7...
Page 32: ...23 S1 28 24 28 24 N pre prog Week Week End 8am 12am 10am 2am S2 22 18 22 18 S3 23 19 23 19 S4 24 20 24 20 S5 25 21 25 21 S6 26 22 26 22 S7 27 23 27 23 S8 28 24 28 24 AMBIENT N pre prog Week Week End 8...
Page 33: ...7 23 U2 28 24 28 24 N pre prog Week Week End 6am 9pm 8am 1am U3 22 18 22 18 U4 23 19 23 19 U5 24 20 24 20 U6 25 21 25 21 U7 26 22 26 22 U8 27 23 27 23 U9 28 24 28 24 AMBIENT N pre prog Week Week End 6...
Page 34: ...23 W3 28 24 28 24 N pre prog Week Week End 7am 10pm 9am 1am W4 22 18 22 18 W5 23 19 23 19 W6 24 20 24 20 W7 25 21 25 21 W8 26 22 26 22 W9 27 23 27 23 X0 28 24 28 24 AMBIENT N pre prog Week Week End 7...
Page 35: ...23 Y4 28 24 28 24 N pre prog Week Week End 8am 11pm 10am 1am Y5 22 18 22 18 Y6 23 19 23 19 Y7 24 20 24 20 Y8 25 21 25 21 Y9 26 22 26 22 Z0 27 23 27 23 Z1 28 24 28 24 AMBIENT N pre prog Week Week End 8...
Page 36: ...d the unit must be installed and used according to instructions If the installer or the user modifies the unit they will be held respon sible for any damage resulting from this modification The warran...