background image

Getting Started

1. 

CHARGING YOUR DEVICE


Plug the power adapter into an electrical outlet and connect your device to 

                 the adapter. It is recommended that you fully charge the battery before use, 

                 for at least six hours.

2. 

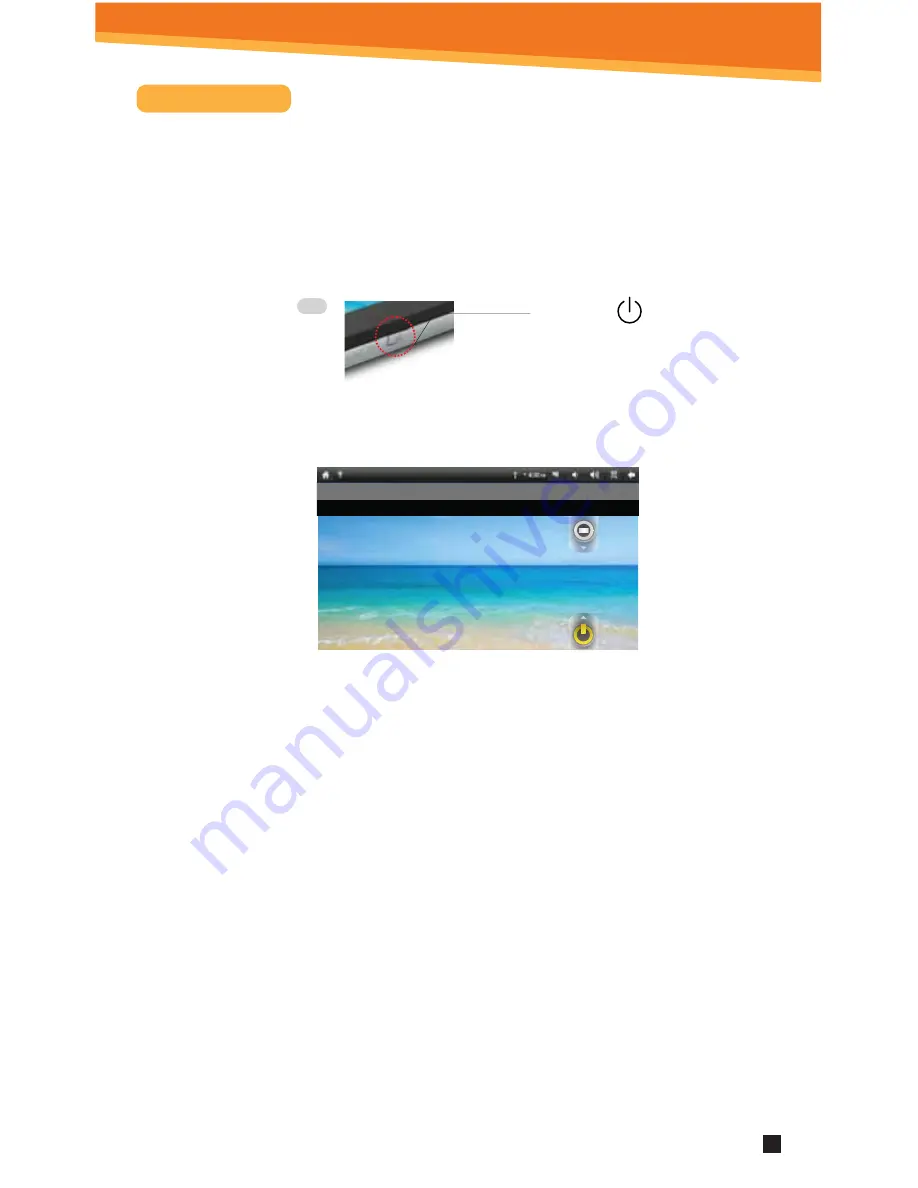
TURNING YOUR DEVICE ON


                 Press the power button on the top of the device to turn it on. You can use the 

                 device while the battery is charging. To turn the power off, hold the power 

                 button of your device for about five seconds. Then slide Power Off when it 

                 appears on the screen, followed by OK


                   Sleep Mode:    Your device will go into sleep mode after a period of inactivity

                                             or if ON/OFF button pressed. (Go to Settings, under display to 

                                             modify the sleep time.) To get out of sleep mode, press the 

                                                    power button to start using it again.

3. 

CONFIGURING THE TOUCH SCREEN


1. 

Press the MENU button on the top of the product.

                 2. 

Tap Settings on the bottom menu.

                 3. 

Scroll down and tap Touch Screen Calibrate.

                 4. 

Use the your fingernail or Stylus to tap the middle of the displayed 

                                  crosshairs to calibrate the touch screen.

                Note: After a system reset, it may be necessary to re-calibrate your screen.

4.             INSERTING AN SD CARD


                Using an SD Card allows you to import other files, download applications and 

                play stored media.  Insert a Micro SD Card (supports up to 32GB) into the top SD 

                Card Slot. You will hear a click when the card is inserted properly.


3

6:30 

PM

Friday, May 13

Top

Power Key

ON/OFF Button

SYTAB7MX

Summary of Contents for SYTAB7MX

Page 1: ...Powered by MODEL NUMBER SYTAB7MX Wireless Mobile Internet Tablet 7 Mini Tablet User Guide...

Page 2: ...Mini USB 2 0 HDMI output to your TV Enjoy videos photos and more in the comfort of your home MINI Volume Power Key ON OFF Home Back Button Micro SD Slots Up to 32 GB Micro SD Power Jack For Charger U...

Page 3: ...acity for importing files downloading applications taking pictures reading books and playing stored media To protect your SD card s file and directory structure integrity it should be unmounted before...

Page 4: ...button pressed Go to Settings under display to modify the sleep time To get out of sleep mode press the power button to start using it again 3 CONFIGURING THE TOUCH SCREEN 1 Press the MENU button on t...

Page 5: ...ll down the top notification toolbar to see the Notification screen Click the Turn on USB storage button to sync the local memory built in storage and any other removable storage device connected to t...

Page 6: ...ry Level 4 Time Display 5 Screen Shot tap to take a picture of your screen 6 Settings Menu 7 Use the return icon will bring the screen page backwards 8 Search Bar 9 Application Quick Launch Bar Freque...

Page 7: ...vice versa during use To manually switch between Landscape and Portrait mode tap on the Screen Orientation icon on the top menu bar If the Orientation icon is not present press the menu button Tap the...

Page 8: ...your home you may have to contact your local ISP to purchase service Setting Date And Time INTERNET 1 Tap Settings from the Home Screen to access the device settings 2 By default your device should b...

Page 9: ...wn home or office Wi Fi Access Point AP or a trusted free unsecured Wi Fi hotspot Secure Wi Fi network must have a password Unsecure Wi Fi network anyone can access 3 Tap the network that you would li...

Page 10: ...count settings tap Manual Setup after entering your email address and password Tap Settings Menu then tap Account Settings to change your email Settings Your device displays the Home Screen when there...

Page 11: ...activate the video on the HDTV screen Pressing the menu button again brings the picture back to the tablet screen The Search Panel allows you to quickly search the web The Widget Panel allows you to c...

Page 12: ...hange the setting ADDING APPLICATIONS You can easily add applications to your device using the SAM 4 0 app store to search for and install Android applications Please note that not all applications wi...

Page 13: ...voice notes or sound using the tablet s on board microphone 13 Music Player Play and manage audio files 14 Sam 4 0 Application store Choose applications to use on your tablet 15 Droid Reader Open PDF...

Page 14: ...dress or search term 3 Tap Done when finished Sending and Receiving Email After email setup is complete you can access your current email account Inbox 1 Tap Email on the Home Screen Application Panel...

Page 15: ...omponents repaired or replaced by Digital Gadgets service site will be under warranty for the remaining period of the warranty This Limited Warranty covers only products manufactured by Digital Gadget...

Page 16: ...n radiate radio frequency energy and if not installed and used in accordance with the instructions may cause harmful interference to radio communications However there is no guarantee that interferenc...

Reviews: