background image

1.Read instructions-All the safety and operating instructions

should be read before the appliance is operated.

2.Retain Instructions-The safety and operating instructions

should be retained for future reference.

3.Heed Warnings-All warnings on the appliance and in the

operating instructions should be adhered to.

4.Follow Instructions-All operating and use instructions

should be followed.

5.Cleaning-Unplug TV/VCR from the wall outlet before

cleaning. Do not use liquid cleaners or aerosol cleaners. Use
a damp cloth for cleaning.
EXCEPTION: A product that is meant for uninterrupted
service and, that for some specific reason, such as the possi-
bility of the loss of an authorization code for a CATV con-
verter, is not intended to be unplugged by the user for clean-
ing or any other purpose, may exclude the reference to
unplugging the appliance in the cleaning description other-
wise required in item 5.

6.Attachments-Do not use attachments not recommended by

the TV/VCR manufacturer as they may cause hazards.

7.Water and Moisture-Do not use this TV/VCR near water-

for example, near a bath tub, wash bowl, kitchen sink, or
laundry tub, in a wet basement, or near a swimming pool,
and the like.

8.Accessories-Do not place this TV/VCR on an unstable cart,

stand, tripod, bracket, or table. The TV/VCR may fall, caus-
ing serious injury to someone, and serious damage to the
appliance. Use only with a cart, stand, tripod, bracket, or
table recommended by the manufacturer, or sold with the
TV/VCR. Any mounting of the
appliance should follow the manu-
facturer’s instructions and should
use a mounting accessory recom-
mended by the manufacturer. An
appliance and cart combination
should be moved with care.
Quick stops, excessive force, and
uneven surfaces may cause the
appliance and cart combination to
overturn.

AMEUBLES- Cet appareil ne doit être

placé que sur un meuble (avec ou sans
roulettes) recommandé par le fabricant.
Si vous l’installez sur un meuble à
roulettes, déplacez les deux ensembles
avec précaution. Un arrêt brusque, l’u-
tilisation d’une force excessive et des surfaces irrégulières
risquent de déstabiliser l’ensemble et de le renverser.

9. Ventilation-Slots and openings in the cabinet and the back

or bottom are provided for ventilation and to ensure reliable
operation of the TV/VCR and to protect it from overheat-
ing, and these openings must not be blocked or covered.
The openings should never be blocked by placing the
TV/VCR on a bed, sofa, rug, or other similar surface. This
TV/VCR should never be placed near or over a radiator or
heat register. This TV/VCR should not be placed in a built-
in installation such as a bookcase or rack unless proper
ventilation is provided or the manufacturer’s instructions
have been adhered to.

10.Power Sources-This TV/VCR should be operated only

from the type of power source indicated on the marking
label. If you are not sure of the type of power supply to
your home, consult your appliance dealer or local power
company. For TV/VCRs intended to operate from battery
power, or other sources, refer to the operating instructions.

11.Grounding or Polarization-This TV/VCR is equipped

with a polarized alternating-current line plug(a plug having
one blade wider than the other). This plug will fit into the
power outlet only one way. This is a safety feature. If you
are unable to insert the plug fully into the outlet, try revers-
ing the plug. If the plug should still fail to fit, contact your
electrician to replace your obsolete outlet. Do not defeat the
safety purpose of the polarized plug.

12.Power-Cord Protection-Power-supply cords should be

routed so that they are not likely to be walked on or
pinched by items placed upon or against them, paying par-
ticular attention to cords at plugs, convenience receptacles,
and the point where they exit from the appliance.

- 2 -

EN

9I03

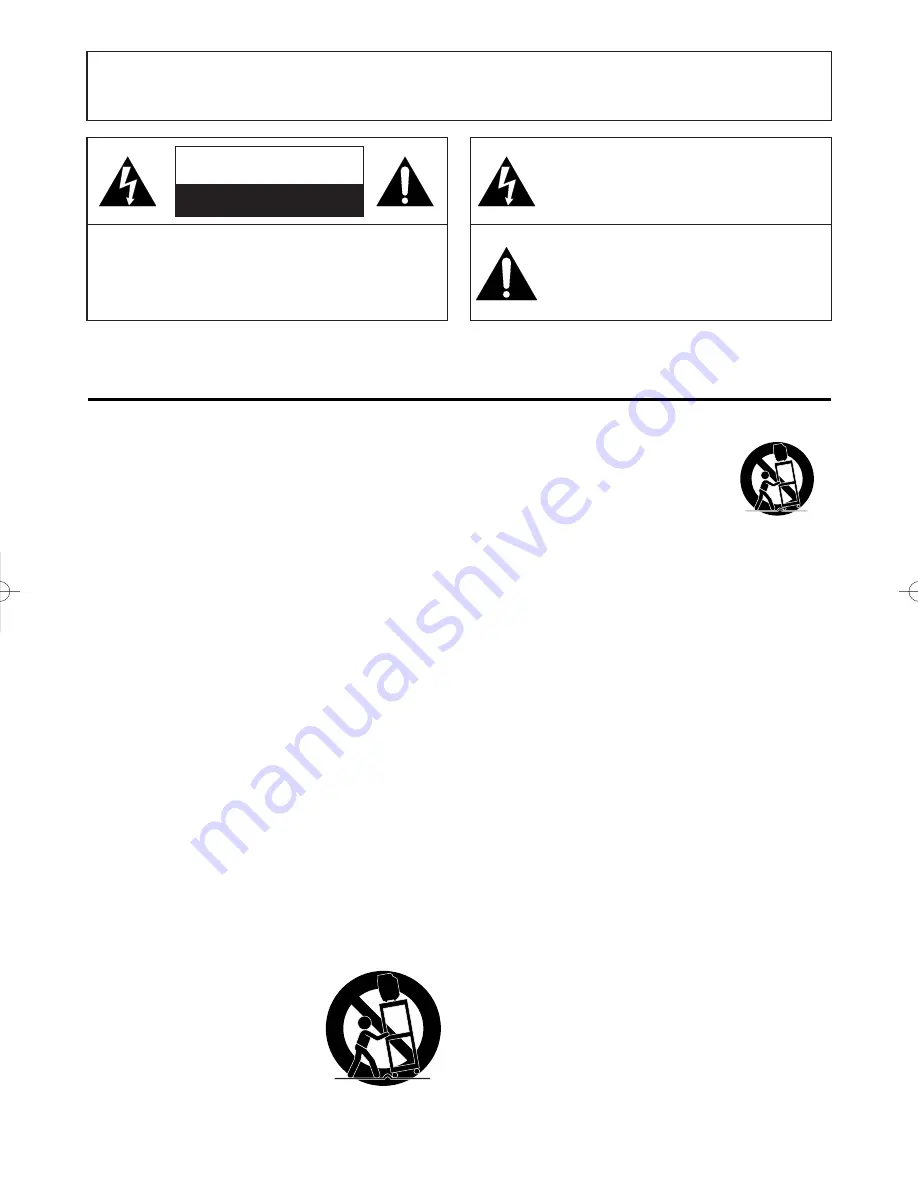
WARNING:

TO REDUCE THE RISK OF FIRE OR ELECTRIC SHOCK, DO NOT EXPOSE THIS APPLIANCE

TO RAIN OR MOISTURE.

CAUTION: TO REDUCE THE RISK OF ELECTRIC
SHOCK, DO NOT REMOVE COVER (OR BACK).
NO USER SERVICEABLE PARTS INSIDE. REFER
SERVICING TO QUALIFIED SERVICE PERSON-
NEL.

CAUTION

RISK OF ELECTRIC SHOCK

DO NOT OPEN

THIS SYMBOL INDICATES THAT DAN-
GEROUS VOLTAGE CONSTITUTING A
RISK OF ELECTRIC SHOCK IS PRESENT
WITHIN THIS UNIT.

THIS SYMBOL INDICATES THAT THERE
ARE IMPORTANT OPERATING AND
MAINTENANCE INSTRUCTIONS IN THE
LITERATURE ACCOMPANYING THE
APPLIANCE.

The caution marking is located on the rear of the cabinet.

IMPORTANT SAFEGUARDS

PORTABLE CART WARNING

S3126A

SYMBOLE D'AVERTISSEMENT POUR 

LES COMPOSANTES

APPAREIL ET MEUBLE A ROULETTES

S3126A

T5505_7505UF(EN).QX33  04.4.12  10:01 AM  Page 2

Summary of Contents for SRC2213W

Page 1: ...ERGY STAR guidelines for energy efficiency ENERGY STAR is a U S registered mark If you need additional assistance for set up or operating after reading owner s manual please call TOLL FREE 1 800 968 3429 Please read before using this equipment INSTRUCCIONES EN ESPAÑOL INCLUIDAS This Owner s Manual is made of recycled paper 13 MODEL ILLUSTRATED ...

Page 2: ...cabinet and the back or bottom are provided for ventilation and to ensure reliable operation of the TV VCR and to protect it from overheat ing and these openings must not be blocked or covered The openings should never be blocked by placing the TV VCR on a bed sofa rug or other similar surface This TV VCR should never be placed near or over a radiator or heat register This TV VCR should not be pla...

Page 3: ...age Requiring Service Unplug this TV VCR from the wall outlet and refer servicing to qualified service per sonnel under the following conditions a When the power supply cord or plug is damaged or frayed b If liquid has been spilled or objects have fallen into the TV VCR c If the TV VCR has been exposed to rain or water d If the TV VCR does not operate normally by following the operating instructio...

Page 4: ...ong magnetic fields Avoid moving TV VCR to locations where temper ature differences are extreme Do not handle the power cord with wet hands Do not pull on the power cord when disconnecting it from an AC wall outlet Grasp it by the plug If by accident water is spilled on your unit unplug the power cord immediately and take the unit to an Authorized Service Center for servicing Do not put your finge...

Page 5: ...ATION 14 WATCHING A TV PROGRAM 14 GAME MODE 14 DEGAUSSING 14 PICTURE CONTROL 14 CLOSED CAPTION SYSTEM 15 V CHIP SET UP 15 FM MODE 13 inch model only 17 C PLAYBACK 17 NORMAL PLAYBACK 18 AUTO REPEAT PLAYBACK 18 SEARCH 18 SLOW MOTION 19 RENTAL PLAYBACK 19 VERTICAL HOLD CONTROL 20 STILL PICTURE 20 TRACKING ADJUSTMENT 20 C RECORDING 20 NORMAL RECORDING 20 OTR One Touch Recording 21 TIMER RECORDING 21 T...

Page 6: ...ear picture Digital Auto Tracking DTR Automatically adjusts the tracking for each tape you play Rental play mode Improves playback picture quality from worn tapes such as rental tapes Auto repeat Allows you to repeat the playing of a tape indefinitely without pressing the PLAY button Time search Lets you set the TV VCR to advance the tape by entering the desired playback time you want to skip OTR ...

Page 7: ... the lowest memcrized channel TRACKING function Press to minimize video noise lines or dots on screen during playback or Slow mode See page 20 6 Remote Sensor Window Receives the infrared signals from the remote control 7 STOP EJECT button TV VCR Press to stop the tape motion Press in the Stop mode to remove tape from TV VCR STOP button remote control Press to stop the tape motion L button Press t...

Page 8: ...e pages 23 and 24 26 13 model TV FM button Sets the FM mode 19 model EJECT button Press to remove tape from TV VCR 27 ANT terminal Connect to an antenna or cable system 28 Power cord Connect to a standard AC outlet 120V 60Hz 8 REW button Press to rewind the tape or to view the picture rapidly in reverse during playback mode Rewind Search s button Press to select a mode from a particular menu for e...

Page 9: ...tdoor antenna NOTE The connection of an Rod antenna may not always give acceptable TV reception Note to CATV system installer This reminder is provided to call the CATV system installer s attention to Article 820 40 of the NEC that provides guidelines for proper grounding and in particular specifies that the cable ground shall be connect ed to the grounding system of the building as close to the p...

Page 10: ...E This function effects only the language on the screen menu and not the audio source 2 Select LANGUAGE Press the MENU button on the remote control Press the PLAY K or STOP L but ton to point to LANGUAGE 3 Select ENGLISH ESPAÑOL or FRANÇAIS Select ENGLISH ESPAÑOL Spanish or FRANÇAIS French using the F FWD B or REW s button 4 Exit the Language mode Press the MENU button on the remote control to ret...

Page 11: ...NG CLOCK CHANNEL SET UP USER S SET UP V CHIP SET UP LANGUAGE ENGLISH CAPTION OFF ZERO RETURN TIME SEARCH INDEX SEARCH 8 Start the clock Press the MENU button on the remote control Although seconds are not dis played they begin counting from 00 when you press the MENU but ton on the remote control Use this feature to synchronize the clock with the correct time NOTE When unplugging the AC cord or if...

Page 12: ...FF AUTO CLOCK CH SEARCH 08 10 13 _ _ SETTING CLOCK AUTO CLOCK ON AUTO CLOCK CH SEARCH B AUTO CLOCK CH 45 MANUAL CLOCK SET D S T OFF M E N U TIMER PROGRAMMING PICTURE CONTROL B SETTING CLOCK CHANNEL SET UP USER S SET UP V CHIP SET UP LANGUAGE ENGLISH CAPTION OFF ZERO RETURN TIME SEARCH INDEX SEARCH M E N U TIMER PROGRAMMING PICTURE CONTROL B SETTING CLOCK CHANNEL SET UP USER S SET UP V CHIP SET UP ...

Page 13: ...s the F FWD B button 3 Enter the desired channel number Press the PLAY K or STOP L but ton until your desired channel num ber appears You can also use the number buttons or the CHANNEL K L button to enter it Example CH8 When selecting cable channels which are higher than 99 press the 100 button first then press the last two digits Example to select channel 125 first press the 100 button then press...

Page 14: ... further adjustments for a natural looking image NOTES Procedures must be followed within 5 seconds or the Picture Control mode will be cancelled When setting the Picture Control the Game mode will be cancelled Make sure TV VCR power must be turned on 1 Select PICTURE CONTROL Press the MENU button on the remote control Press the PLAY K or STOP L but ton to point to PICTURE CON TROL Then press the ...

Page 15: ...e On Screen Display will disappear after 5 sec onds This is also true when the MUTE button is pressed and when the PAUSE STILL button is pressed while recording If there is a power failure of any kind the unit will retain its memory for this feature M E N U TIMER PROGRAMMING PICTURE CONTROL SETTING CLOCK CHANNEL SET UP USER S SET UP V CHIP SET UP LANGUAGE ENGLISH B CAPTION CAPTION1 ZERO RETURN TIM...

Page 16: ... RAT ING Select a TV rating to be unblocked by press ing the PLAY K or STOP L button Then press the F FWD B button to unblock the rating 3 Press the MENU button on the remote control to exit the screen MPAA RATING SET UP 1 Select V CHIP SET UP Press the MENU button on the remote control Press the PLAY K or STOP L but ton to select V CHIP SET UP Then press the F FWD B button 2 Enter Access code Use...

Page 17: ...e the FM Antenna mode to INT internal or EXT external by following the step below 1 Press the MENU button Press the PLAY K or STOP L button to point to CHANNEL SET UP Then press the F FWD B button 2 Press the PLAY K or STOP L button to point to FM ANTENNA Select INT or EXT using the F FWD B or REW s button CHANGE ACCESS CODE To change access code follow the steps 1 Select V CHIP SET UP Press the M...

Page 18: ...indefinitely without touching the PLAY button ALL REPEAT Repeat playback from the beginning to the end of the tape BLANK REPEAT Repeat playback from the begin ning to a blank part of more than 10 seconds 1 Select USER S SET UP Press the MENU button on the remote control Press the PLAY K or STOP L but ton to point to USER S SET UP Then press the F FWD B button 2 Select ALL or BLANK Press the PLAY K...

Page 19: ...n on the remote control to return to the TV mode 4 Start playback Press the PLAY button to start playback RENTAL PLAY B appears Once you select the Rental mode it stays in effect even after you turn off the TV VCR TO CANCEL THE RENTAL MODE Repeat steps 1 and 2 select OFF using the F FWD B or REW s button on the remote control Press the MENU button on the remote control to return to TV mode If ther...

Page 20: ... for 5 seconds then disappear 2 Stop the recording by pressing the STOP button when recording is completed If you decide to record on the tape again cover the hole with plastic tape Tracking adjustment will be set automatically Digital Tracking function when you start play back However when playing pre recorded tapes or tapes recorded on units other than your own noise lines black and white streak...

Page 21: ... weekly within a 1 year period In the example below the timer is being set to record DATE July 4th 2004 SETTING TIME from 7 30PM to 8 50PM CHANNEL CH61 TAPE SPEED SP Make sure If your TV VCR is connected to a cable or satellite box you must set the TV VCR to channel 3 or 4 to match the output channel of the box Clock is set to the correct time and date before set ting the timer TV VCR power is tur...

Page 22: ...V TIMER REC STANDBY starts flashing on the TV screen 2 minutes before the programmed start time To shift the time schedule of an automatic timer recording 1 Press the POWER button 2 Repeat step 1 on page 21 3 Press the RECORD button and select the desired program using the PLAY K or STOP L button 4 Press the RECORD button again Each additional push will shift forward the begin end time for recordi...

Page 23: ...S SET UP Press the MENU button on the remote control Press the PLAY K or STOP L but ton to point to USER S SET UP Then press the F FWD B button M E N U TIMER PROGRAMMING PICTURE CONTROL SETTING CLOCK CHANNEL SET UP B USER S SET UP V CHIP SET UP LANGUAGE ENGLISH CAPTION OFF ZERO RETURN TIME SEARCH INDEX SEARCH 2 Set AUTO RETURN to ON Press the PLAY K or STOP L but ton to point to AUTO RETURN Press ...

Page 24: ...R appears To view the time left for sleep timer press the WAKE UP SLEEP button twice then press the MENU button on the remote control to exit the sleep timer setting SLEEP TIMER 2 00 WAKE UP ON OFF ON TIMER TV TAPE TV BTIME 12 00AM You can make copies of video tapes made by friends or relatives for your enjoyment Connect your TV VCR and a Source Playing VCR using the following diagram WARNING Unau...

Page 25: ...1 800 488 1222 to locate an Authorized Service Center ON SCREEN DISPLAY To check the Counter Clock and Channel number on the TV screen press the DISPLAY button on the remote control Each time you press the DISPLAY button on the remote control the TV screen will change as follows WHEN THE CLOSED CAPTION MODE IS OFF Counter mode After 5 seconds only the counter remains To clear it press the DISPLAY ...

Page 26: ...screen Magnetism from nearby appliances or unshielded stereo speakers or geomagnetism might affect the color of the TV picture Refer to DEGAUSSING on page 14 CLOSED CAPTION PROBLEM POSSIBLE REMEDY My TV VCR is showing captions You are watching a live broadcast and spelling errors made by the that are misspelled closed captioning production company may pass through uncorrected A prerecorded program...

Page 27: ... CHANNEL DESIGNATIONS If you subscribe to cable TV the channels are displayed as 1 125 Cable companies often designate channels with letters or letter number combinations Please check with your local cable company The following is a chart of common cable channel designations TV Display TV Display TV Display TV Display TV Display TV Display TV Display TV Display CATV channel TV Display W 80 W 81 W ...

Page 28: ...nado Botón s Púlselo para seleccionar un modo desde un menú particular Por ejemplo IDIOMA o ADJUST DE USER CONTROLES DE OPERACIÓN Y SUS FUNCIONES POWER WAKE UP SLEEP 1 2 3 4 5 6 7 8 9 100 0 TV FM CHANNEL RETURN REW PLAY STOP F FWD GAME RECORD PAUSE STILL SPEED SLOW CHANNEL T PROG CLEAR COUNTER RESET DISPLAY MUTE MENU VOLUME 3 15 5 26 16 8 11 18 19 20 7 24 4 10 9 22 21 23 17 25 NOTA No recomendamos...

Page 29: ...al 99 pulse primero este botón y luego pulse los dos últi mos dígitos Para seleccionar el canal 125 pulse primero el botón 100 y luego el 2 y el 5 16 Botón de menú MENU Púlselo para visu alizar el menúprincipal en la pantalla del televisor 17 Botón del visualizador DISPLAY Visualiza el contador o el número del canal actual y la hora actual en la pantalla del televisor 18 Botón de velocidad de cint...

Page 30: ...NU en el mando a distancia Pulse el botón PLAY K o STOP L para señalar LANGUAGE 3 Seleccione ENGLISH ESPAÑOL o FRANÇAIS Seleccione ENGLISH ESPAÑOL o FRANÇAIS con el botón F FWD B y pulse el botón REW s en el mando a distancia 4 Salga del modo de idioma Pulse el botón MENU en el mando a distancia para volver al modo del televisor NOTA Si por alguna razón el menú está en español o francés pulse el b...

Page 31: ...e el botón MENU en el mando a distancia Pulse el botón PLAY K o el botón STOP L para señalar AJUSTE DE CANAL A continuación pulse el botón F FWD B 2 Empiece el prefijado automático Pulse el botón PLAY K o STOP L para señalar AUTOPROGRAMA CION DE CA A continuación pulse el botón F FWD B El sintonizador busca y memoriza todos los canales activos en su localidad 3 Después de buscar El sintonizador se...

Page 32: ...and water heaters 1 800 4 MY HOME R 1 800 469 4663 Call anytime day or night U S A and Canada www sears com www sears ca R R LIMITED 90 DAY WARRANTY FOR 13 INCH MODEL If this product experiences any failure due to a defect in material or workmanship within 90 days from the date of purchase return it to your nearest Sears store and it will be replaced free of charge This warranty applies only if th...

Reviews: