


Español
– 25 –
ES
3
Pulse
[
B
]
para AJUSTE AUTO.
1
• Si no se ha ajustado el reloj, aparece la
pantalla AJUSTE DE RELOJ cuando pulse
[MENU]
. En este caso, vaya al paso 2.
2
Seleccione el mes actual.
3
Seleccione el dia actual.
4
Seleccione el año actual.
5
Seleccione la hora actual.
6
Seleccione los minutos actuales.
7
Seleccione “AM” o “PM”.
8
Para salir de la pantalla AJUSTE DE RELOJ
1
Encienda el televisor y sintonice al canal 3.
• Si el canal 3 se está utilizando para una transmisión, vea la
sección “RF Output Channel”.
2
o
POWER
Español
Conexiones
1
Ajuste del reloj
5
Conmutación VCR/DVD
3
Instalación de las pilas del control remo-
to
2
Activación de la unidad por primera vez
4
CHANNEL
OPEN/CLOSE
VCR
DVD
SKIP
H
STOP
PLAY
G
SKIP
REV
FWD
OUTPUT
OUTPUT
DVD
VCR
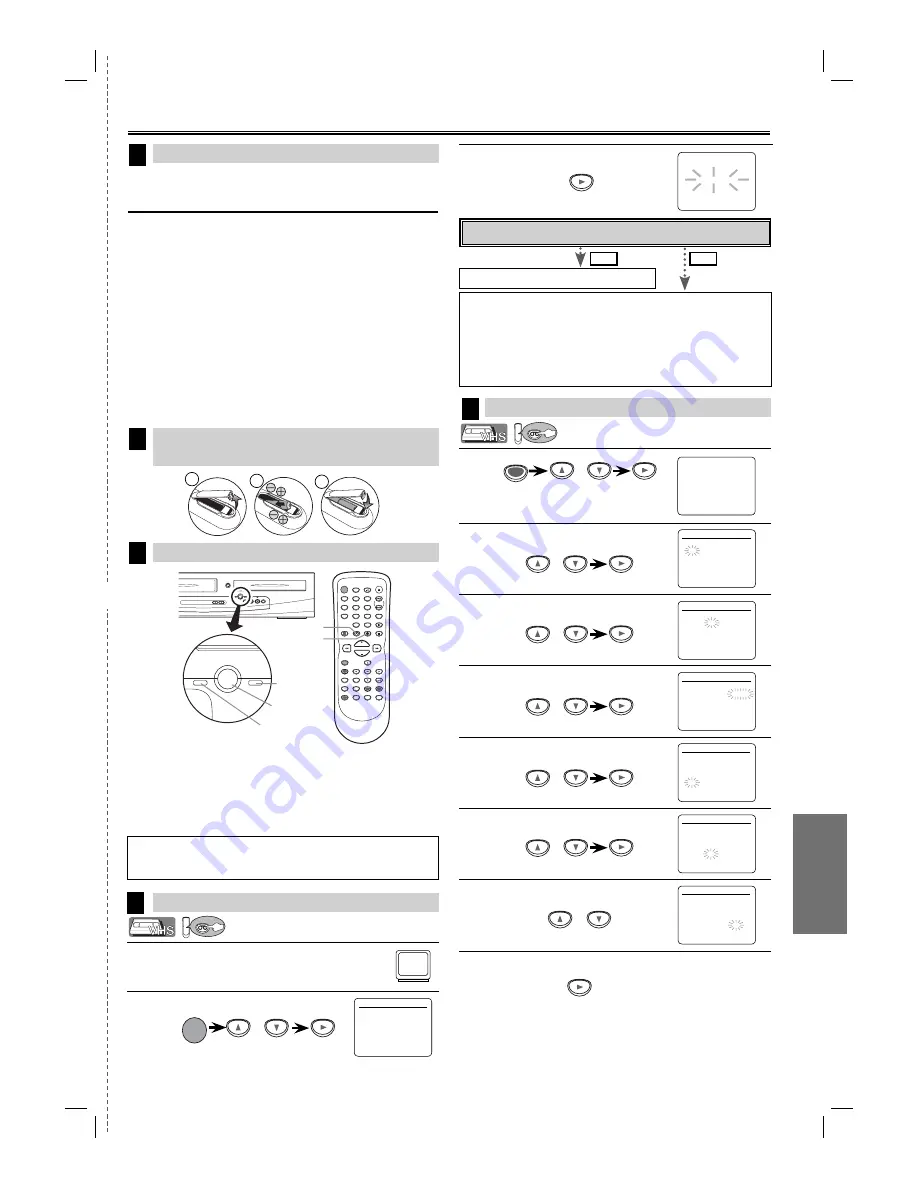
Botón OUTPUT
Luz
DVD OUTPUT
Luz
VCR OUTPUT
Botón DVD
Botón VCR
POWER
DISPLAY
VCR
DVD
PAUSE
SLOW
VCR/TV
SKIP/CH.
PLAY
STOP
REC/OTR
MENU
SETUP
TOP MENU
MODE
ZOOM
SUBTITLE
T-SET
ANGLE
ENTER
RETURN
SEARCH
MODE
REPEAT
A-B
OPEN/CLOSE
/EJECT
SPEED
AUDIO
CLEAR/
C. RESET
1
2
3
4
5
6
7
8
9
0
+10
MODO VCR
Pulse
[VCR]
en el control remoto. (Compruebe que está encen-
dida la luz VCR OUTPUT.)
MODO DVD
Pulse
[DVD]
en el control remoto. (Compruebe que está encen-
dida la luz DVD OUTPUT.)
No
Espere unos minutos.
Después del escaneo
• El sintonizador se detiene en el canal memorizado más bajo.
• Puede seleccionar sólo los canales memorizados en esta unidad con
[SKIP/CH.
G/
/
K
,
H
/
/L
]
(o
[CHANNEL
K
/
/ L
]
).
• Si aparece nuevamente “AJUSTE AUTO” en la pantalla de TV, verifique las
conexiones de cable. Presione nuevamente
[
B
].
Si
Pulse
[MENU]
para salir.
Conecta el cable de la caja de canales de cable o la caja de satélite en la
toma ANT-IN de la unidad?
- M E N U -
PROGRAMAR
AUTOREPETIR [OFF]
AJUSTE
CANAL
B
AJUSTE DE RELOJ
SELEC.
IDIOMA
SALIDA DEL AUDIO
TV ESTEREO [ON]
SAP
AJUSTE DE RELOJ
MES DIA
AÑO
1 0 / – –
– – – –
HORA MINUTO AM/PM
– – : – –
– –
AJUSTE DE RELOJ
MES DIA
AÑO
1 0 / 0 2
– – – –
HORA MINUTO AM/PM
– – : – –
– –
AJUSTE DE RELOJ
MES DIA
AÑO
1 0 / 0 2
2 0 0 6
HORA MINUTO AM/PM
– – : – –
– –
AJUSTE DE RELOJ
MES DIA
AÑO
1 0 / 0 2 LUN 2 0 0 6
HORA MINUTO AM/PM
0 5 : – –
– –
AJUSTE DE RELOJ
MES DIA
AÑO
1 0 / 0 2 LUN 2 0 0 6
HORA MINUTO AM/PM
0 5 : 4 0
– –
AJUSTE DE RELOJ
MES DIA
AÑO
1 0 / 0 2 LUN 2 0 0 6
HORA MINUTO AM/PM
0 5 : 4 0
P M AM
B
PM
Consulte la “Basic TV Connection” en la página delantera
antes de utilizar esta unidad.
Canal de salida RF
Si el canal 3 se está utilizando para una transmisión,
1) Programe su televisor al canal 4.
2) Inserte una cinta pregrabada en esta unidad.
3) Pulse
[OUTPUT]
en la unidad para que se encienda la
luz VCR OUTPUT.
• Si aparece ruido en la pantalla de TV, presione
[VCR/TV]
en el mando a distancia.
4) Pulse una vez
[PLAY
B
]
.
5) Después de unos segundos, pulse
[PLAY
B
]
en la uni-
dad durante 3 segundos.
• El canal de salida RF cambiará del canal 3 al canal 4 y
podrá ver una imagen reproducida.
• Cuando no aparezca una imagen en la pantalla del televi-
sor, repita el paso 4.
6) Pulse
[STOP
C
]
para parar la reproducción.
Consejo
• Si pulsa sólo
[OUTPUT]
en el panel frontal NO cambía el modo del control
remoto. DEBE seleccionar también el modo correcto en el control remoto.
LANGUAGE SELECT
B
ENGLISH
[ON]
FRANCAIS
ESPAÑOL
CA 01
AJUSTE AUTO
MENU
o
o
o
o
o
o
o
NO
SI
VCR
VCR
VCR
VCR
✄
2
3
1
E8A00UD_E8C00UD.indd 25
E8A00UD_E8C00UD.indd 25
2006/08/18 13:11:36
2006/08/18 13:11:36


