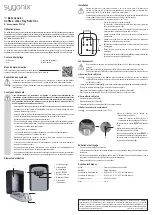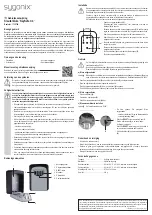
Installation
Mount the safe to a vertical surface e.g. wall, door, inside of a cabinet. Check that the provided
screws are appropriate for the type of surface you intend to mount to. If in doubt consult a
professional.
Before drilling, always check for concealed wires or pipes beneath the surface that could be
damaged or cause harm.
The center hole is for a peep hole mount (not included).
57 mm
40 mm
• Open compartment cover
(6)
.
• See section “Unlock Safe” for instructions on how to open the safe
door
(4)
.
• Inside there will be 4 mounting points
(1)
. Hold the box against the
wall and mark position for the holes with a pencil.
• Use a spirit level to make sure the holes are level.
• Use a 6 mm diameter bit to drill holes for the supplied screws.
• Insert the plastic dowels; use a hammer to insert these if necessary.
• Place the box against holes on the wall, then secure using the
provided screws.
• Close the safe door
(4)
then scramble the number dials
(5)
.
• Close the compartment cover
(6)
.
Operation
To maximize security, the combination should be changed from factory default combination
“0000” as soon as possible.
Keep the compartment cover
(6)
closed for increased water resistance.
Rotate the number dials
(5)
weekly to keep them working well.
a) Unlock Safe
When entering the combination to unlock the safe, cover the number dials
(5)
with your hand or
body to prevent others from seeing the combination. The factory default combination is”0000”.
• Slide the compartment cover
(6)
open to reveal the number dials
(5)
.
• Rotate the number dials
(5)
to the set combination.
• Press down on the release switch
(2)
to open the safe door
(4)
.
• Pull the safe door
(4)
all the way open then add or remove keys to or from the safe.
b) Lock Safe
• Close the safe door
(4)
.
• Scramble the number dials
(5)
.
• Slide the compartment cover
(6)
closed.
c) Set New Combination
The factory default combination is”0000”.
A
B
• Open the safe. See section “Unlock Safe”.
- Leave the number dials
(5)
at the unlock safe
combination.
• Slide the
RESET
button from position A to B.
• Set the number dials
(5)
to a new 4-digit
combination.
• Slide the
RESET
button back to position A to fix
the new combination.
• Close the safe door
(4)
and compartment cover
(6)
.
Care and Cleaning
• This product is maintenance-free.
• It is recommended to rotate the dials weekly to keep them working well.
• Do not use any aggressive cleaning agents, rubbing alcohol or other chemical solutions as they can cause
damage to the housing and malfunctioning.
•
Clean the product with a dry, fibre-free cloth.
Technical Data
Access .................................................. 4-dial combination lock
Material ................................................. Aluminium alloy
Operating conditions ............................. -20 to +60 °C, 40 – 85 % relative humidity
Storage conditions ................................ -20 to +60 °C, 40 – 85 % relative humidity
Dimensions (W x H x D) ....................... 87.5 x 41 x 120 mm
Weight .................................................. 441 g
Operating Instructions
Key Safe ‘KeySafe C4’
Item No. 1732742
Intended Use
This safe box is designed to provide a relatively safe place to lock away keys. It has a 4-digit combination
lock that is protected from the elements by a sliding compartment cover. The compact aluminium housing
is corrosion and impact resistant. It can be secured to a horizontal surface using the included mounting
hardware.
For safety and approval purposes, you must not rebuild and/or modify this product. If you use the product
for purposes other than those described above, the product may be damaged. In addition, improper use can
result in other hazards. Read the instructions carefully and store them in a safe place. Make this product
available to third parties only together with its operating instructions.
This product complies with the statutory national and European requirements. All company names and
product names are trademarks of their respective owners. All rights reserved.
Delivery Content
• Key safe
• Screws x 4
• Plastic dowels x4
• Operating instructions
Up-to-date Operating Instructions
Download the latest operating instructions at www.conrad.com/downloads or scan the
QR code shown. Follow the instructions on the website.
Explanation of Symbols
The symbol with the exclamation mark in the triangle is used to indicate important information in
these operating instructions. Always read this information carefully.
The arrow symbol indicates special information and advice on operation.
Safety Instructions
Read the operating instructions carefully and especially observe the safety information.
If you do not follow the safety instructions and information on proper handling in this
manual, we assume no liability for any resulting personal injury or damage to property.
Such cases will invalidate the warranty/guarantee.
• The device is not a toy. Keep it out of the reach of children and pets.
• Do not leave packaging material lying around carelessly. This may become dangerous playing
material for children.
• Protect the device from extreme temperatures, direct sunlight, strong jolts, high humidity,
moisture, flammable gases, steam and solvents.
• Do not place the product under any mechanical stress.
• If it is no longer possible to operate the product safely, take it out of operation and protect it
from any accidental use. Safe operation can no longer be guaranteed if the product:
- is visibly damaged,
- is no longer working properly,
- has been stored for extended periods in poor ambient conditions or
- has been subjected to any serious transport-related stresses.
• Please handle the product carefully. Jolts, impacts or a fall even from a low height can damage
the product.
• Consult an expert when in doubt about the operation, safety or connection of the device.
•
Maintenance, modifications and repairs must only be completed by a technician or an
authorised repair centre.
• If you have questions which remain unanswered by these operating instructions, contact our
technical support service or other technical personnel.
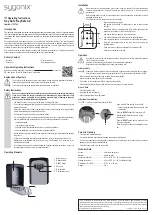
Operating Elements
1
2
3
5
6
4
1 Mounting point
2 Release switch
3 RESET button
4 Safe door
5 Number dials
6 Compartment cover
This is a publication by Conrad Electronic SE, Klaus-Conrad-Str. 1, D-92240 Hirschau (www.conrad.com). All rights
including translation reserved. Reproduction by any method, e.g. photocopy, microfilming, or the capture in electronic data
processing systems require the prior written approval by the editor. Reprinting, also in part, is prohibited. This publication
represents the technical status at the time of printing.
Copyright 2018 by Conrad Electronic SE.
*1732742_v1_1018_02_dh_m(1)_en


