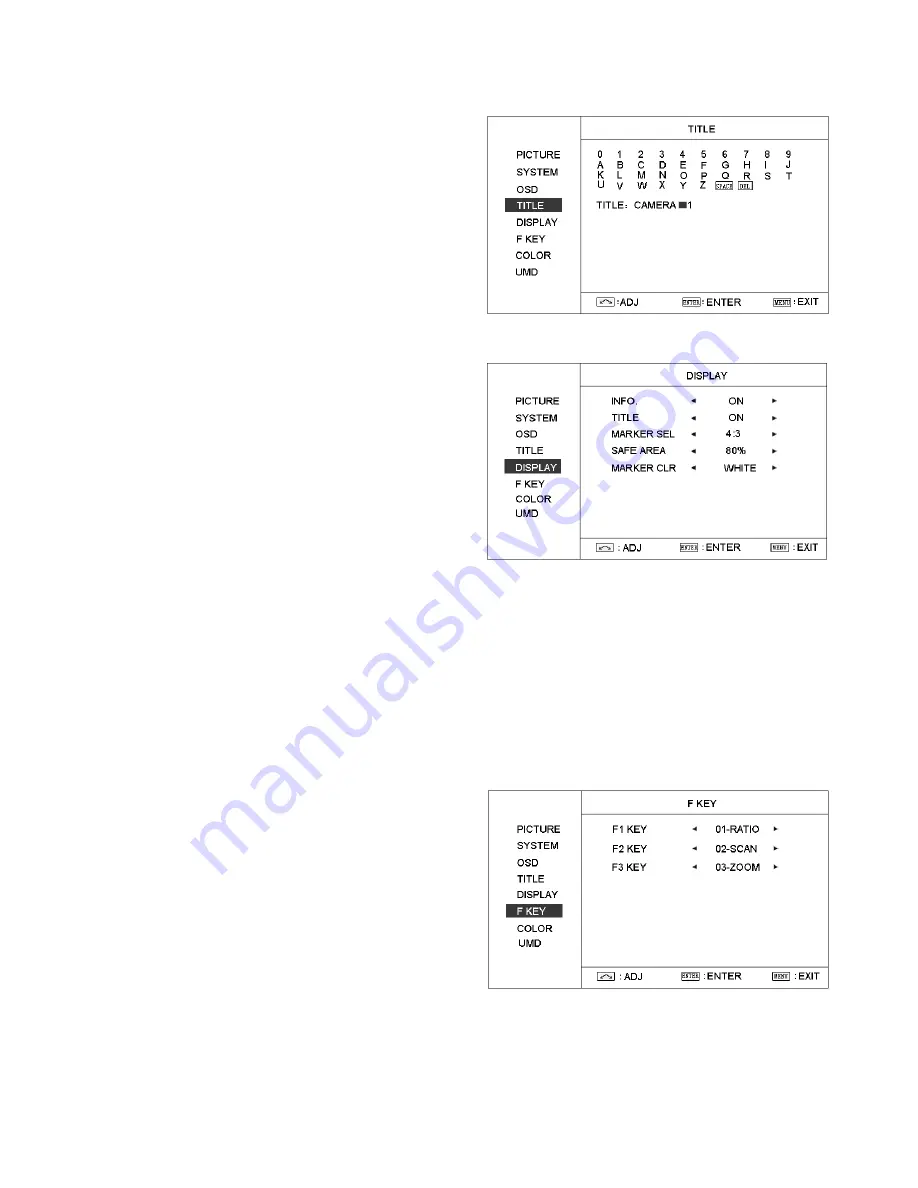
SWIT s-1222F User Manual Download Page 8


3.4 TITLE submenu 
 

Revolve  "ENTER"  button  to  select  the  letters,  and 

press  "ENTER"  to  input.  Select  SPACE  to  input 

space and DEL to delete the left letter. Max 10 letters 

are supported.


After  setting,  press  "MENU",  the  system  will  save 

data  to  current  user  and  quit  menu.  The  menu  will 

automatically save and quit if it remains idle.   


3.5 DISPLAY submenu 
 

The DISPLAY submenu includes: 


INFO: “ON/OFF” 

When select on, the infos 

including Input format, aspect ratio, 

underscan/overscan, zoom status will be 

display on left top screen. 

 TITLE

: User edited title on/off 

 MARKER SEL: 

Select the scale marker from 4:3, 

13:9, 14:9, 15:9, 1.85:1, 2.35:1 and OFF 


SAFE AREA: 

Select the safe area scale from 80%, 85%, 90%, 95% and OFF. 


MARKER CLR:

 Select the color of markers from WHITE, RED, GREEN, BLUE, BLACK and GRAY. 


3.6 F KEY submenu 
 

The F KEY Settings Submenu is to define Function Key F1, F2 and F3. The available functions are: 

01- RATIO:

 Aspect ratio 16:9 / 4:3 switch 

02- SCAN:

 Underscan / Overscan switch 

03- ZOOM:

 Picture Zoom-in 

04- B/W:

 Color / Black & white switch 

05- BLUE ONLY:

 Blue only mode switch on/off 

06- ZEBRA:

 Zebra over exposure switch on/off 

07- VECTOR:

 Vector scope switch on/off 

08- PATTERN:

 Internal colorbar switch on/off   

09- RGB HIST:

 R, G, B Histogram switch on/off 

10- TIMECODE:

 SDI timecode display switch on/off 

11- F.COLOR:

 False color mode switch on/off 

12- AUDIO BAR: 

Audio meter display switch on/off 

13- FOCUS: 

Peaking focus assist switch on/off, 

14- FLIP:

 Image flip 

15- COLOR TEMP: 

Adjust color temperature 

16-UMD: 

Adjust UMD 

Summary of Contents for s-1222F

Page 1: ...Model S 1222F 21 5 Broadcast Studio LCD Monitor User Manual Ver V1 0 0V00 Please read this User Manual throughout before using...

Page 2: ...not cover the following 1 Physical damage to the surface of the products including scratches cracks or other damage to the LCD screen or other externally exposed parts 2 The LCD dot defects are not ov...

Page 3: ...d or recommended by the manufacturer in order to avoid damage For a third party power adapter please make sure the voltage range supplied power and polarity of power lead are fit Please disconnect the...

Page 4: ...used extensively for synchronization and for logging and identifying material in recorded media Peaking focus assist red blue switch The Peaking focus assist function is to mark the sharpest edges of...

Page 5: ...play safe area scale marker title UMD function status and the current input signal information MENU Press to enter Menu ENTER Select and Apply Under menu system revolve ENTER to adjust settings and pr...

Page 6: ...hrough output HDMI A connector REMOTE DB9 socket external controlling signal input See details in 4 REMOTE interface definition DC IN 11V 17V BACK UP Connect with 4 pin XLR power adaptor Pin 1 Negativ...

Page 7: ...djustment SHARPNESS 0 100 value adjustment BACKLIGHT 0 100 value adjustment 3 2 SYSTEM submenu The SYSTEM submenu includes RATIO Aspect ratio 16 9 4 3 selection SCAN UNDERSCAN OVERSCAN ZOOM OFF ZOOM1...

Page 8: ...ect the safe area scale from 80 85 90 95 and OFF MARKER CLR Select the color of markers from WHITE RED GREEN BLUE BLACK and GRAY 3 6 F KEY submenu The F KEY Settings Submenu is to define Function Key...

Page 9: ...ue adjustment B GAIN 0 255 value adjustment R BIAS 0 255 value adjustment G BIAS 0 255 value adjustment B BIAS 0 255 value adjustment Remark RGB GAIN and RGB BIAS settings are only available when Colo...

Page 10: ...connecting the terminal R with GND and goes out when disconnecting The GREEN light is on when connecting the terminal G with GND and goes out when disconnecting The YELLOW light is on when connecting...

Page 11: ...DMI 1 HDMI loop output 3 5mm 1 SDI HDMI embedded audio output Video Format CVBS NTSC PAL SDI SMPTE 274M 1080i 60 59 94 50 1080p 30 29 97 25 24 23 98 SMPTE RP211 1080psf 30 29 97 25 24 23 98 SMPTE 296M...

Page 12: ...tective glass A PG22 1 for optional purchase VESA desktop stand A VS22 1 for optional purchase RACK install bracket A RK22 2 for optional purchase 6 1 Protective Glass The A PG22 protective glass has...

Page 13: ...1 Fix the brackets onto the left and right sides of S 1222F monitor see Fig 1 and Fig 2 2 Install the monitor with brackets onto the 19 inch rack see Fig 3 and Fig 4 3 The installed monitor is as Fig...

Page 14: ...7 Installation Dimension The main body in mm With desktop stand feet in mm...

Page 15: ...With VESA desktop stand in mm With Rack install bracket in mm...

Page 16: ......

Reviews: