3. Menu Operation
⑴
Press “MENU” and it will display menu system
⑵
Revolve “OK” to select an item. The selected item will be highlighted display.
⑶
Press “OK” to enter the selected item.
⑷
Under menu system, press “MENU” to back to previous menu.
*The menu will automatically save and quit if it remains idle.
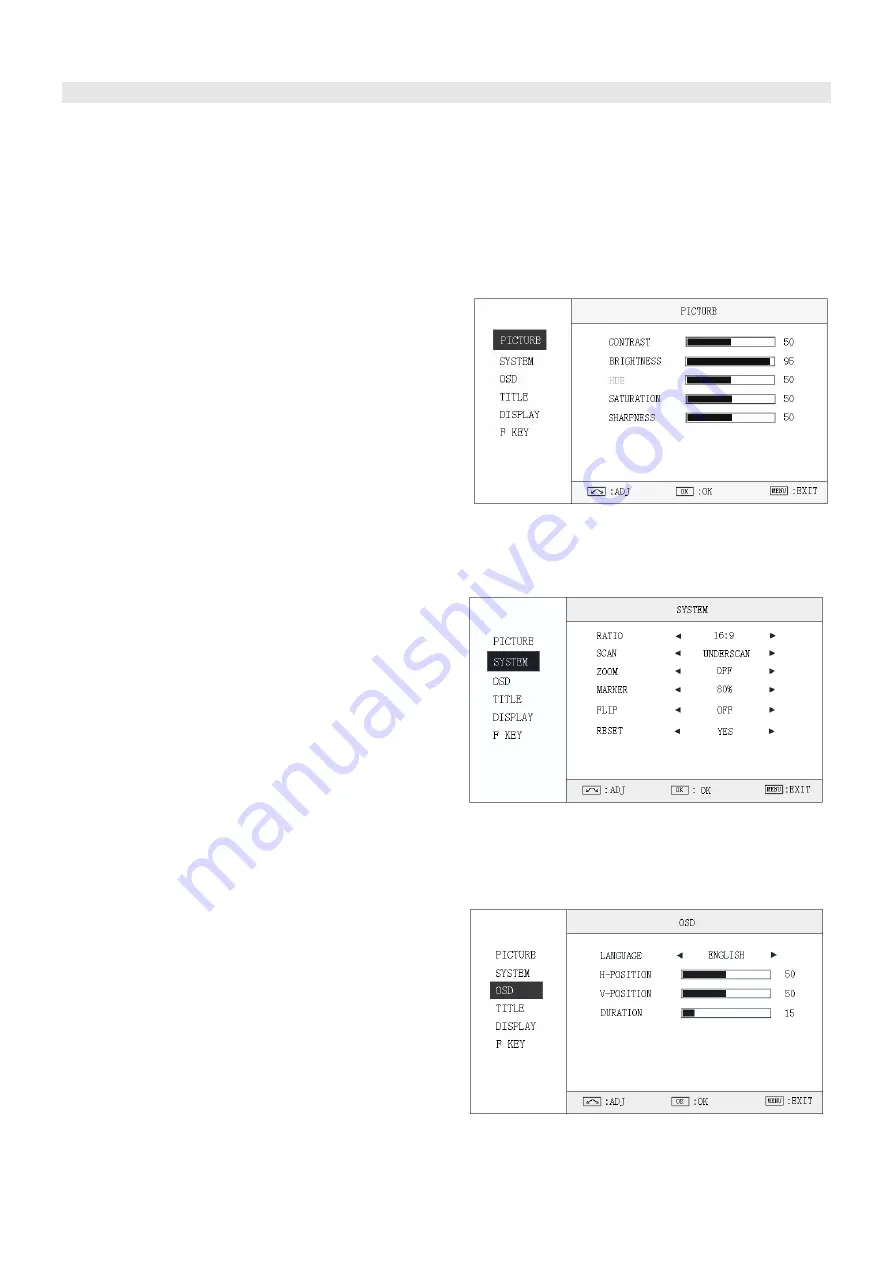
3.1 PICTURE submenu
The PICTURE submenu includes:
⑴
CONTRAST:
0-100 value adjustment
⑵
BRIGHTNESS:
0-100 value adjustment
⑶
HUE:
0-100 value adjustment
(Only available under CVBS NTSC input)
⑷
SATURATION:
0-100 value adjustment
⑸
SHARPNESS:
0-100 value adjustment
3.2 SYSTEM submenu
The SYSTEM submenu includes:
⑴
RATIO:
Aspect ratio “16:9” / “4:3” selection
⑵
SCAN:
“UNDERSCAN” / “OVERSCAN” selection
⑶
ZOOM:
“OFF”, “ZOOM1” and “ZOOM2” selection
ZOOM1: Canon DSLR scale zoom-in
ZOOM2: Pixel to Pixel zoom-in
⑷
MARKER:
Select and set the safe area scale from
80%, 85%, 90% and 95%.
⑸
FLIP:
Select “ON” to flip the picture by 180°.
⑹
RESET:
Select “YES” to recover all to factory setting.
3.3 OSD submenu
The OSD submenu includes:
⑴
LANGUAGE:
Menu language selection
⑵
H-POSITION:
Menu horizontal position (0-100)
adjustment, real-time preview and default value: 50.
⑶
V-POSITION:
Menu vertical position (0-100)
adjustment, real-time preview and default value: 50.
⑷
DURATION:
Menu timeout setting (5-60)
Set a time (in seconds) in which the menu will
automatically quit if remains idle. Default: 15.


