background image

—  1  —

If you have any questions or concerns please contact us:

1-434-623-4766

[email protected]

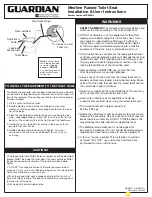
PRIOR TO INSTALLATION:

· 

Inspect product to ensure no damages have occurred while in shipping.


· 

Observe all plumbing and building codes in accordance with your state and local requirements.


· 

The step-by-step guidelines in the installation instructions are a general reference. Should there be 
any discrepancies, Swiss Madison cannot be held liable. It is recommended to install all Swiss 
Madison products by hiring a licensed professional.


· 

Read installation and maintenance instructions thoroughly before installing. Be sure to use proper 
tools and always wear proper personal safety accessories for your protection. 


· 

Make sure all wood studs and supports are properly installed.


· 

Confirm that your model will fit in intended location and plumbing fixtures are located where legally 
required before beginning installation.


· 

Verify all the necessary plumbing is installed by a certified plumber.

· 

This flush plate must be used with the back plate provided as a whole set.

SUGGESTED TOOLS & MATERIALS:

INCLUDED PARTS:

Safety 

Glasses

Tape 

Measure

Flush

Plate

Installation 

Bolts

Back

Plate

Level

ACTUATOR FLUSH PLATE


   INSTALLATION INSTRUCTIONS

Utility 

Knife

Summary of Contents for SM-WC424

Page 1: ...all Toilet Tank Carrier System for Wall Hung Toilet SM WC424 SwissMadison WellMadeForever www swissmadison com 1 434 623 4766 info swissmadison com INSTALLATION INSTRUCTIONS Wall Hung Carrier System w e l l m a d e f o r e v e r ...

Page 2: ...uctions are a general reference Should there be any discrepancies Swiss Madison cannot be held liable It is recommended to install all Swiss Madison products by hiring a licensed professional Read installation and maintenance instructions thoroughly before installing Be sure to use proper tools and always wear proper personal safety accessories for your protection Be sure to properly bleed all air...

Page 3: ...four mounting holes in the carrier frame two on each side It is recommended for framing installations to use 2 screws and 1 fender washers needing four of each total Be sure to screw carrier to wood framing flush across the front 1 2 44 0 OR A B 13 OR OR 4 3 OR 19 WALL HUNG CARRIER SYSTEM INSTALLATION INSTRUCTIONS 1 2 3 4 5 8 22 23 24 9 10 11 12 13 14 15 18 17 16 25 26 27 28 29 30 31 42 41 40 39 3...

Page 4: ...ipe left or right If offsetting is required you must move the top bracket holding the discharge pipe to the back holes in the frame This allows you to miss the carrier frame when connecting the necessary plumbing For a vertical discharge leave bracket as shown above Use this mounting position for an offset installation WALL HUNG CARRIER SYSTEM INSTALLATION INSTRUCTIONS ...

Page 5: ... to keep threads clean for later adjustment Ensure template is plumb Install dry wall over carrier system in intended location Find cutout template that was included with your carrier Cut out the small marked holes 1 to align cutout with the threaded bolts Align template up on your wall so the threaded bolts fit through the precut holes Cut around the marked lines 2 to reveal pipe actuator locatio...

Page 6: ...sh plate and attach plumbing NOTE Swiss Madison is not responsible for any damage done to wall or carrier system Install mud guards into proper holes to ensure no debris enters pipes after sheetrock has been cut WALL HUNG CARRIER SYSTEM INSTALLATION INSTRUCTIONS ...

Page 7: ...your water connection Install the locknut as shown Once the water connection is made to the water shutoff valve undo the other side of the hose Next turn valve on to flush out any debris before reinstalling to the actuator WALL HUNG CARRIER SYSTEM INSTALLATION INSTRUCTIONS ...

Page 8: ...23 24 25 26 27 28 7 Ensure roughing box is secure to keep debris from entering the tank WALL HUNG CARRIER SYSTEM INSTALLATION INSTRUCTIONS ...

Page 9: ...tall with mounting hardware and ensure toilet bowl is level With grease sponge thoroughly to lubricate all ends Measure distance between both lines on pipes Take measured distance deduct from bald end of pipe and cut pipes as shown in step 6 This will allow some tolerance to recut if necessary With a ruler against finished wall on top of pipe mark as shown Remove pipes from wall and install into b...

Page 10: ...www swissmadison com 1 434 623 4766 info swissmadison com SwissMadison WellMadeForever INSTALLATION INSTRUCTIONS Wall Hung Toilet w e l l m a d e f o r e v e r ...

Page 11: ...pancies Swiss Madison cannot be held liable It is recommended to install all Swiss Madison products by hiring a licensed professional Read installation and maintenance instructions thoroughly before installing Be sure to use proper tools and always wear proper personal safety accessories for your protection Two people are recommended to handle and install this product as it is fragile REQUIRED PAR...

Page 12: ...on on each pipe as pictured below 1 Install Tank Carrier System Before toilet bowl installation a wood frame and commercial or residential tank system is required Install according to manufacturer s instructions 4 Cut Pipes Measure the distance between both marked lines on pipe Take measured distance deduct from bald end of pipe and cut pipes as shown below After cutting take a file and remove all...

Page 13: ... Bowl Place part B onto the screw WALL HUNG TOILET INSTALLATION INSTRUCTIONS A B x2 C x2 D x2 7 Attach Bowl Put part C into the hole in the back of the bowl Insert part C into part B 8 Secure and Seal Using tool A tighten part D to secure the bowl Insert cover caps into installation hole Fill any gaps with cement or sealant B B B C C C D D A A ...

Page 14: ... the hinge Attach blind hole screw fixing to the bottom of screw 3 Attach Hinges Insert hinges with blind hole screw fixings attached into holes on toilet bowl Lightly tighten hinges with a screwdriver too allow for later adjustment Pull 4 Adjust and Cover Hinges Be sure the hinge is all the way forward for proper seat fitting Place the covers onto the hinges or Incorrect Correct ...

Page 15: ... the hinges Attach seat to the secure hinges Adjust seat to align to the bowl TOILET SEAT USAGE To remove push middle button until you hear a click then pull straight up To re install align hinge posts with reference marks on seat then push down until your hear a click Click Click One Button Two Button Click Click ...

Page 16: ...www swissmadison com 1 434 623 4766 info swissmadison com INSTALLATION INSTRUCTIONS Wall Mount Actuator Flush Plate SwissMadison WellMadeForever w e l l m a d e f o r e v e r ...

Page 17: ... professional Read installation and maintenance instructions thoroughly before installing Be sure to use proper tools and always wear proper personal safety accessories for your protection Make sure all wood studs and supports are properly installed Confirm that your model will fit in intended location and plumbing fixtures are located where legally required before beginning installation Verify al...

Page 18: ...2 4 1 3 turn on ACTUATOR FLUSH PLATE INSTALLATION INSTRUCTIONS 2 ...

Page 19: ...5 7 8 6 9 10 click click click ACTUATOR FLUSH PLATE INSTALLATION INSTRUCTIONS 2 1 3 Full Flush Half Flush 3 ...

Page 20: ...te The product has been subjected to improper maintenance abuse misuse excessive use of chemicals accidents or other damages etc Swiss Madison makes no implication that its products comply with any local building or plumbing codes It is the consumer s responsibility and obligation to determine local code compliance prior to and during installation This warranty extends only to the original purchas...

Reviews: